


In this “How To” Lesson/Guide we fully cover the fundamentals of Sports Photography.
Sports Photography can be a very time consuming and challenging activity, but it can be extremely rewarding when you get that precise “in the moment” shot from a sports event.
The basic approach to capturing fast moving sports is to shoot in “Burst Mode”, where the camera fires off several shots per second like a machine gun.
This shooting needs to be done at a very fast shutter speed of ideally around 1/2000th of a second or higher to freeze the action.
Such a fast Shutter Speed is critically important to isolate items and have them crisply in focus without any motion blur occurring.
Shutter Speeds for Sports is discussed in detail later in this article, along with everything else we could think of related to Sports Photography.
Good Sports Photography requires you to manipulate camera settings manually and not use Auto Mode on your camera.
If you have never been out of Auto Mode we suggest going through our Digital SLR Camera Course that can be found at the following Link:
How To Do Camera Settings Guide
To start off our comprehensive Sports Photography Guide, we have ten basic tips or rules for doing Sports Photography.
Top 10 Tips for Sports Photography
Here are our Top Ten Tips for doing Sports Photography.
They are based on our experience taking sports photos, as well as from researching the Internet and seeing what other people recommend.
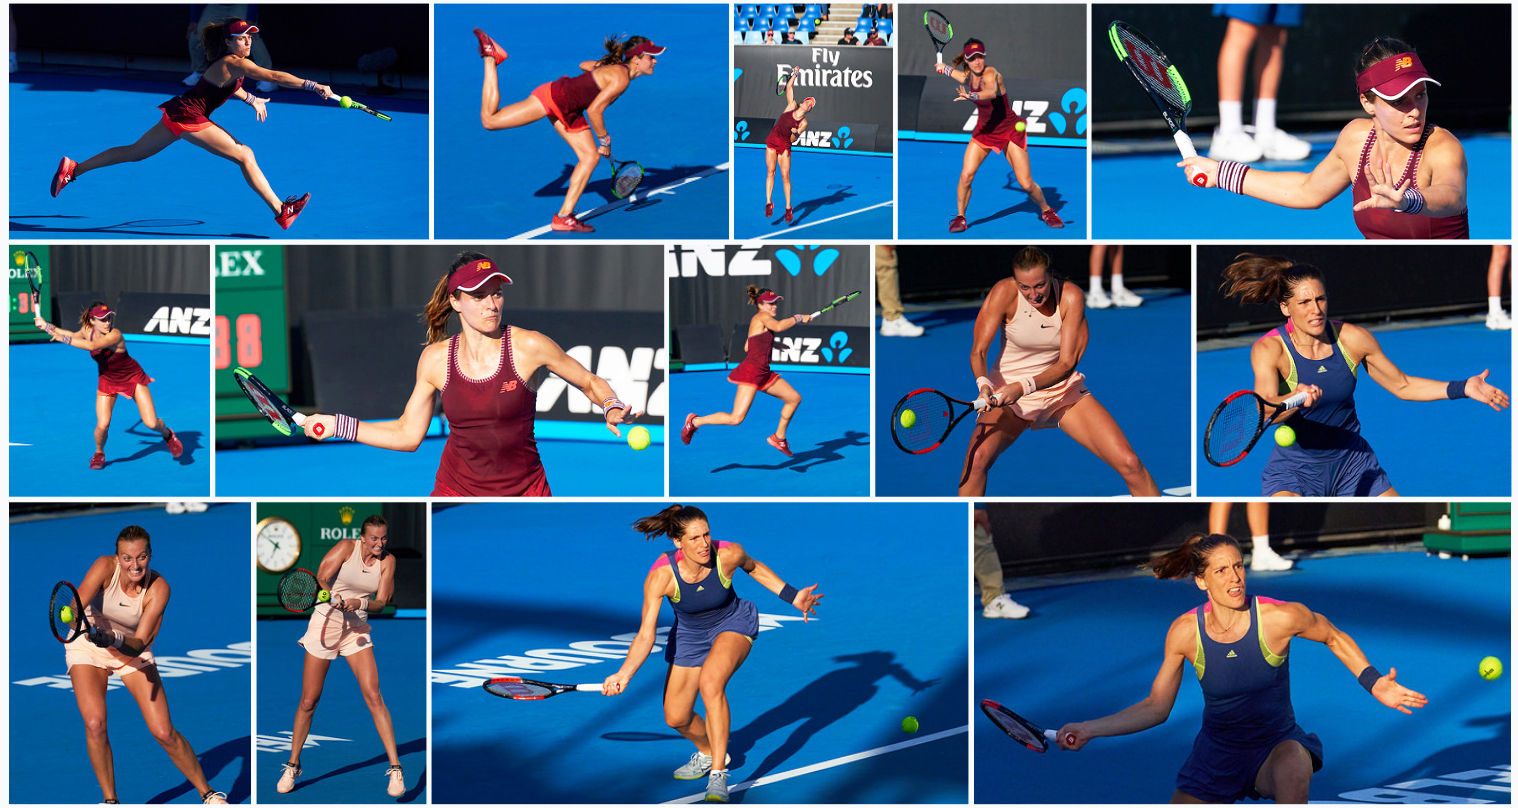
An essential tip we have not included is to make sure you are at least reasonably interested in the Sport you are photographing.
We have found that our best photos have come from covering sports that we have participated in and know “the game”, or else Sports that have sparked our interest.
For example, here at PBP we love photographing Tennis, Basketball, Surfing, Sailing, Mountain Biking and Football, but loathe covering Netball, Badminton, and Gymnastics. We have tried photographing the sports we do not like, but it has been difficult and the photos we ended up with were only average to unusable. Maybe other people are different, but we have found that we have to do what we love or else it just does not happen for us.
So with that out of the way, let’s list and then detail each of the “Top Ten Tips for Getting Great Sports Photos”.
1. Camera and Lens Equipment
2. Do Not Use Automatic Mode
3. Use Burst Mode
4. Use Continuous Autofocus Mode
5. Shoot in JPG
6. Ask Permission For Children
7. Take Lots of Photos
8. Position is Everything
9. Shoot From Down Low
10.Post Process Your Images
1. Camera and Lens Equipment
You need a reasonable quality DSLR type camera that allows you to set the Shutter Speed, ISO, and Aperture, or one that has a “Sports Mode” option where the camera can set these values.
Various suitable cameras are discussed later in this article, including various DSLRs as well as the very powerful Sony RX100 pocket camera.
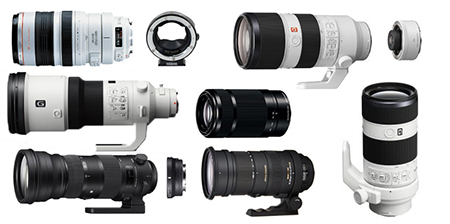
To get close to the action and get those newspaper or magazine type images, the lens of the camera needs to be able to zoom to at least 200mm. If you can use an even bigger zoom that will be great.
Ideally the zoom lens will be a “fast zoom” with a wide aperture of F2.8; however in daylight conditions F4 or F5.6 is okay. F2.8 fast zooms are very expensive, but are needed for doing indoor sports photography.
It is true that expensive equipment can get much better shots, but we suggest starting off with a basic all round kit unless you have plenty of spare cash to spend.
We have found that during the last five years moving from a $1000 to a $2000 to a $4500 to a $7000 (Australian Dollars) setup has improved quality, but not in proportion to the dollar spend.
Eg. The $7000 setup gets pictures that are about 1.5 to 2 times better than the $2000 setup, not four times better!
At the present time it is not possible to capture very good sports photos with a mobile phone or iPad, and so we would say you need to spend around $2000 to $3000 on equipment to get started.
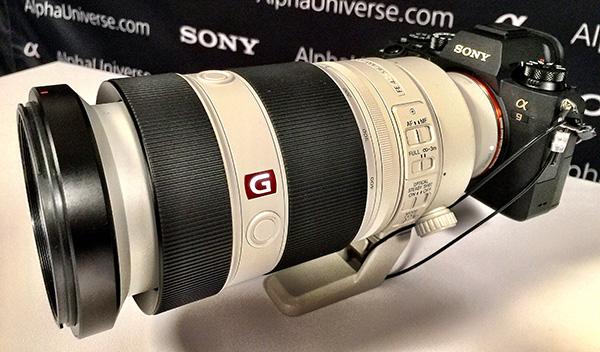
If you think this is a lot to spend, then consider the professional sports photographers you see at major events from Getty Images and the like. These photographers use $8000 camera bodies and $40 000 plus “hubble telescope” sports lenses on sticks, and they usually have two of them!
(Click Image to View Full Size)
Another reality to face is that it is very unlikely that you will make much money at all from taking sports photos of events, relative to the dollar outlay in equipment. This is pretty much a sad reality of modern professional photography in general.
2. Do Not Use Automatic Mode
Most amateur photographers set their camera to fully automatic mode, or a preset mode such as “Sports” or “Action”. Cameras are not intelligent enough yet to get the settings right for a reasonable percentage of the time doing sports photos. Only a few photos will turn out well in these modes, but most will not.
However, it can be okay to use “Sports” or “Action” the first couple of times you do sports photography, and then view the good photos you get, and see what Aperture, Shutter Speed, and ISO the camera chose to use for these good images. These values are often shown as information at the bottom of the picture when you play it back on the camera, or you can put the camera onto a computer and look at the “EXIF” properties data to find these values. Another way is to load your photo to Flickr and then view the EXIF data.
Professionals use semi-manual or full manual mode on their cameras when taking sports photos. The options they use are “Aperture Priority”, “Shutter Priority” or “Manual Mode”.
In Aperture Priority mode (Usually “A” on the camera dial) an aperture is set, and then the camera takes care of all of the other settings.
Set to the lowest number on your lens such as 2.8 or 4.0 to let the most light in, and to blur backgrounds.
In theory the camera should then automatically set the shutter speed high enough in bright daylight and choose a suitable ISO value.
We have tried this mode but do not like how it sometimes puts the ISO right up which makes grainy not fully clear images. Eg. We found that the camera sets itself to overly high shutter speeds of 4000 and then to compensate the ISO gets boosted making overly bright and grainey pictures.
We have found that this mode sometimes works well for Sports Photography, but we prefer to use Manual Mode most of the time.
Try it out and see what kind of pictures result.
In Shutter Priority mode (Usually “S” on the camera dial) a shutter speed is set, and then the camera takes care of all of the other settings.
For Sports outdoors use 2000 or higher, for indoors pictures may be dark and 1000 or 500 may need to be used. Sports Photos will usually be too blurred at 250 or lower.
We have tried this mode but found that this mode always sets the aperture to F2.8, which is not always the sharpest setting for our lenses, and F3.5 or F4.0 would work better.
Try it out and see what kind of pictures result.
In Manual Mode the photographer sets all of the values rather than the camera.
We have found that this works best for most of our Sports Photography, and gives consistent predictable results especially outdoors.
We set the Shutter Speed to anywhere between 2000 and 3200 depending on how sunny it is outside, and sometimes use 1600 if it is cloudy. Indoors we use 500, 1000, or 1600 if the lighting is not great.
For Aperture we like to use F3.5 a lot, but will sometimes use F2.8 or F4.0. For ISO in Sunny conditions we use 250 or 320 or 400 if it is not sunny. Indoors we have to put up the ISO to get enough brightness, sometimes as high as 800, 1200, or even 1600.
Manual Mode can be stressful at first, but experience has shown us that it always gets the best results. Just remember to try and have speed 2000, Aperture no higher than 4.0, and then set the lowest ISO possible to get a bright enough picture. Do the settings in that order: Speed, Aperture, and lastly ISO.
Try it out and see what kind of pictures result.
3. Use Burst Mode
In Sports Photography we always set our camera to take multiple images, usually referred to as multiple “frames per second”, “burst mode”, “rapid fire”, “continuous shooting”, or “motor drive”.
Always make sure that this Burst mode for shooting many pictures per second is always turned on when doing sports photos. Taking lots of shots at lightning speed like this greatly increases the chances of getting that picture that captures the perfect moment, known in the business as “The Money Shot”.
The downside is that there will be hundreds of photos to sort through from the camera.
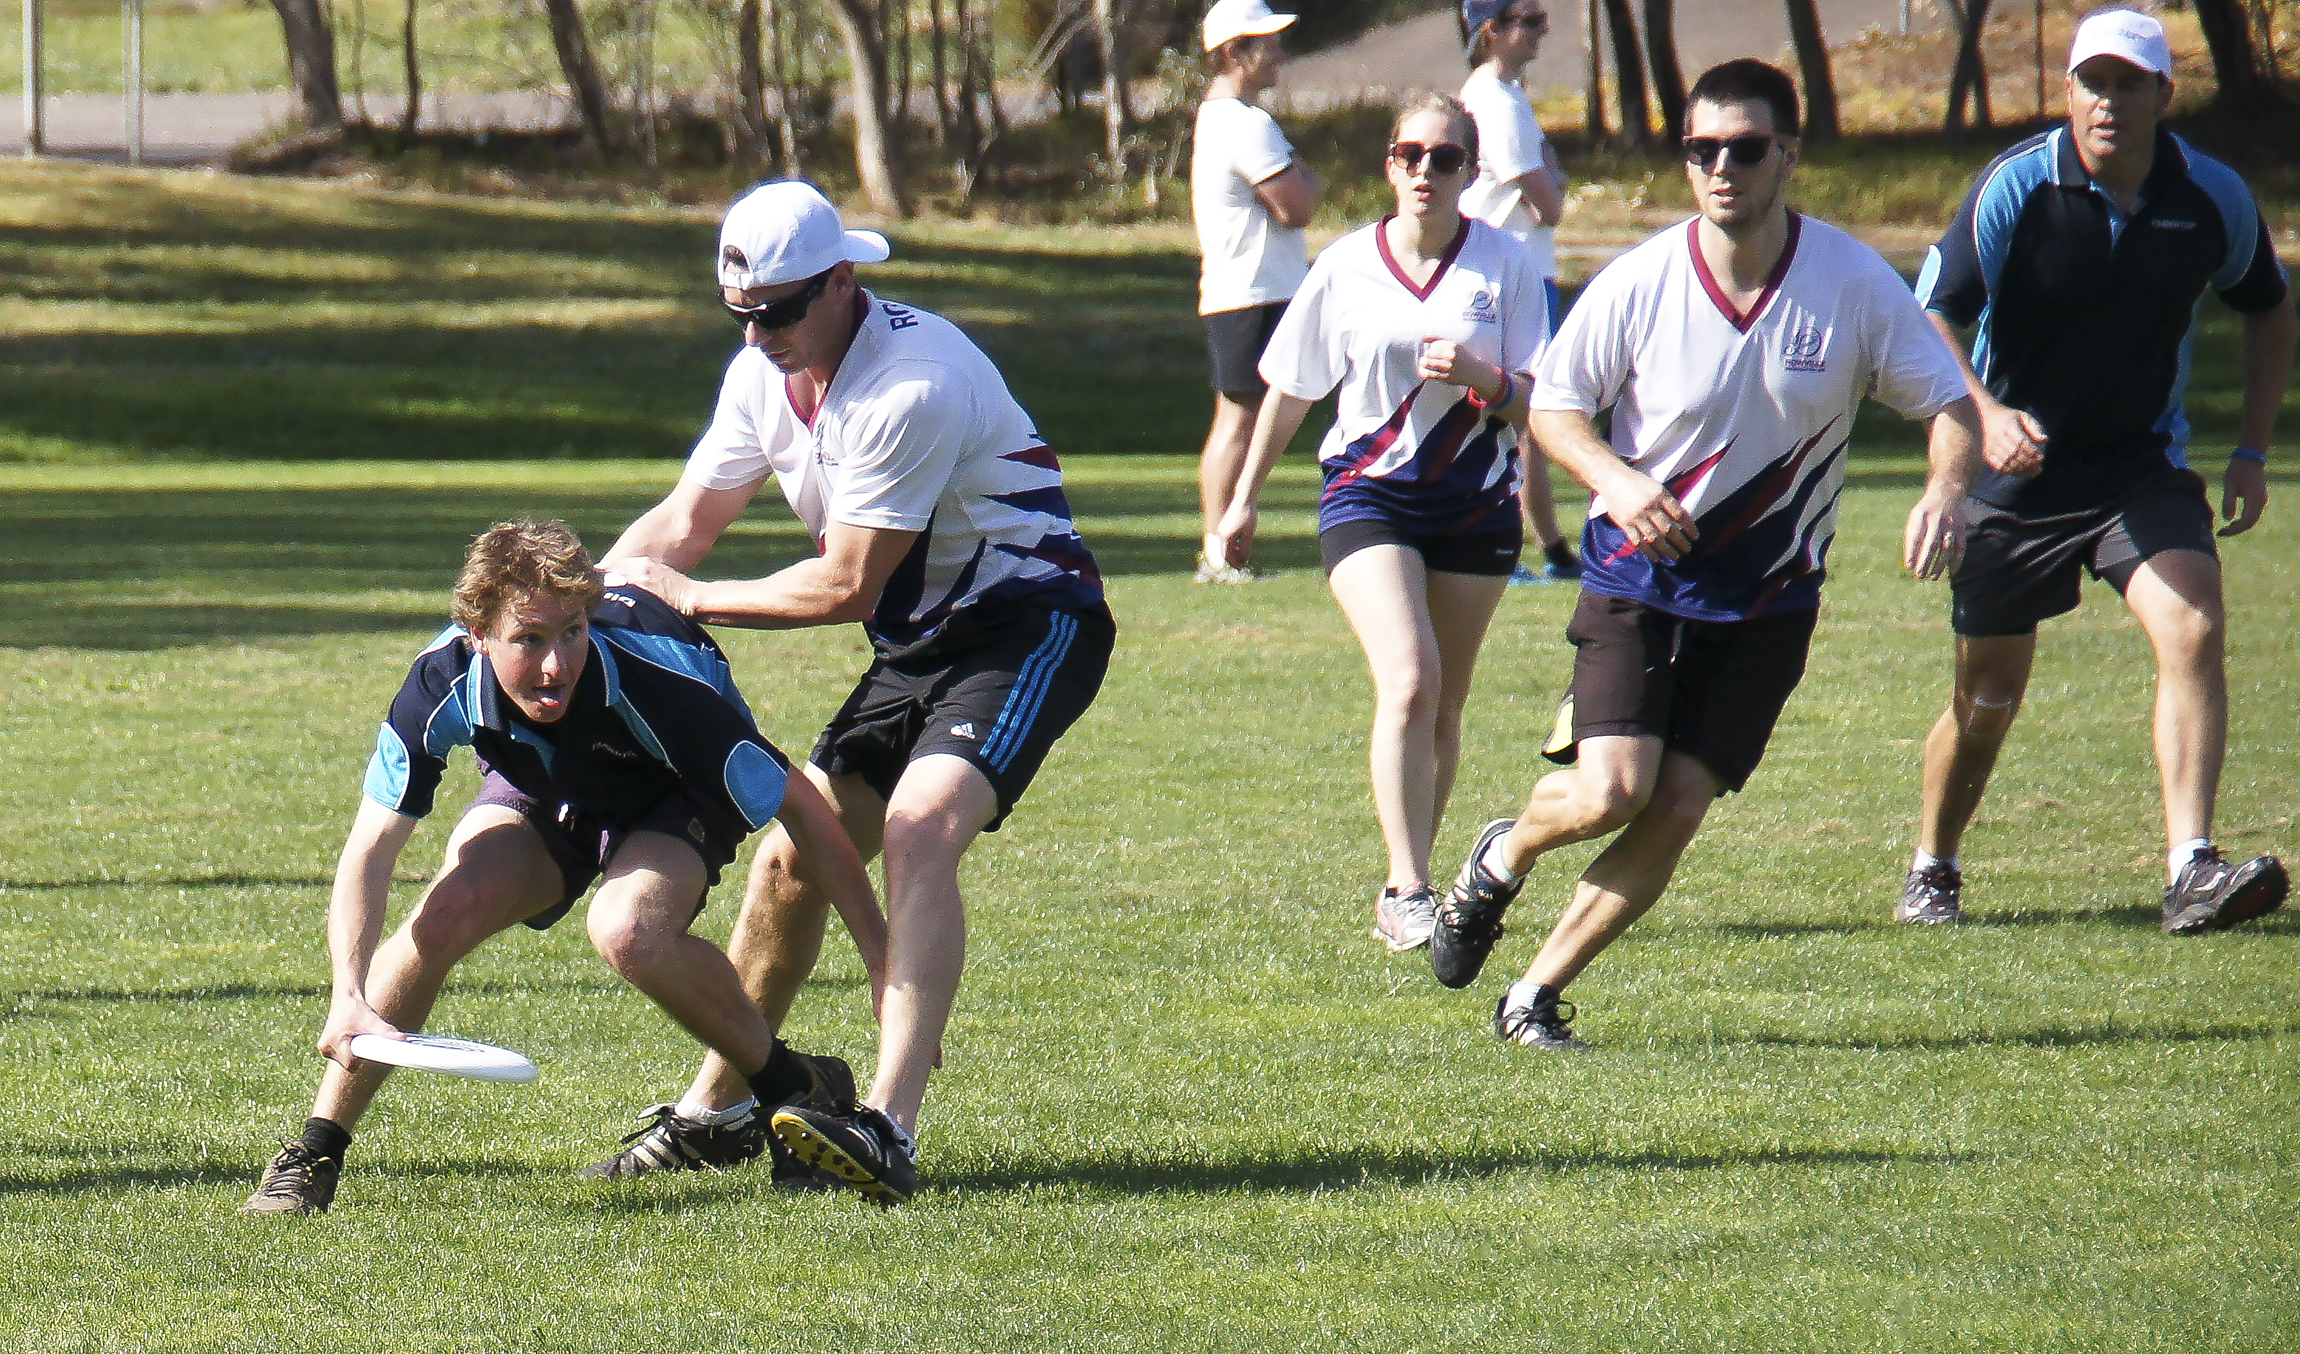
The effort is worth it when you get a great “Photo Finish” money shot like the one below.
(Click Image to View Full Size)
If your camera has Slow and Fast (Or Low and High) Burst Rate Options, go with the Highest Burst Rate to get the most images and not miss out on any critical moments. There should be no difference in image quality using the Highest Burst Rate, compared to the Lowest frames per second Burst Rate.
Also make sure that your camera has a very fast speed high capacity quality SD card in it, so it can write the many burst mode images to the card quickly ready for you to take your next set of shots.
We mainly use 32GB and 64GB Sony Class 10 94 MB/s SD Cards. (32GB is ample for sports events if you want to save a few dollars). We also use 32GB or 64GB SandDisk Extreme Pro SD Cards that are Class 10 and 95 MB/s as these are 10 to 20% cheaper than Sony ones and seem to do just as good a job.
Always have a spare SD Card with you. We have never had a card fail or filled a card up, but it is better to be safe than sorry. Think of it like having a spare tire in your car boot. If the day ever comes when you need to use it you will be very grateful.
4. Use Continous Autofocus Mode
Make sure your camera is set to continuous Autofocus. That way the camera should keep focussing as the subject moves, assuring that in focus shots are obtained during the burst shooting.
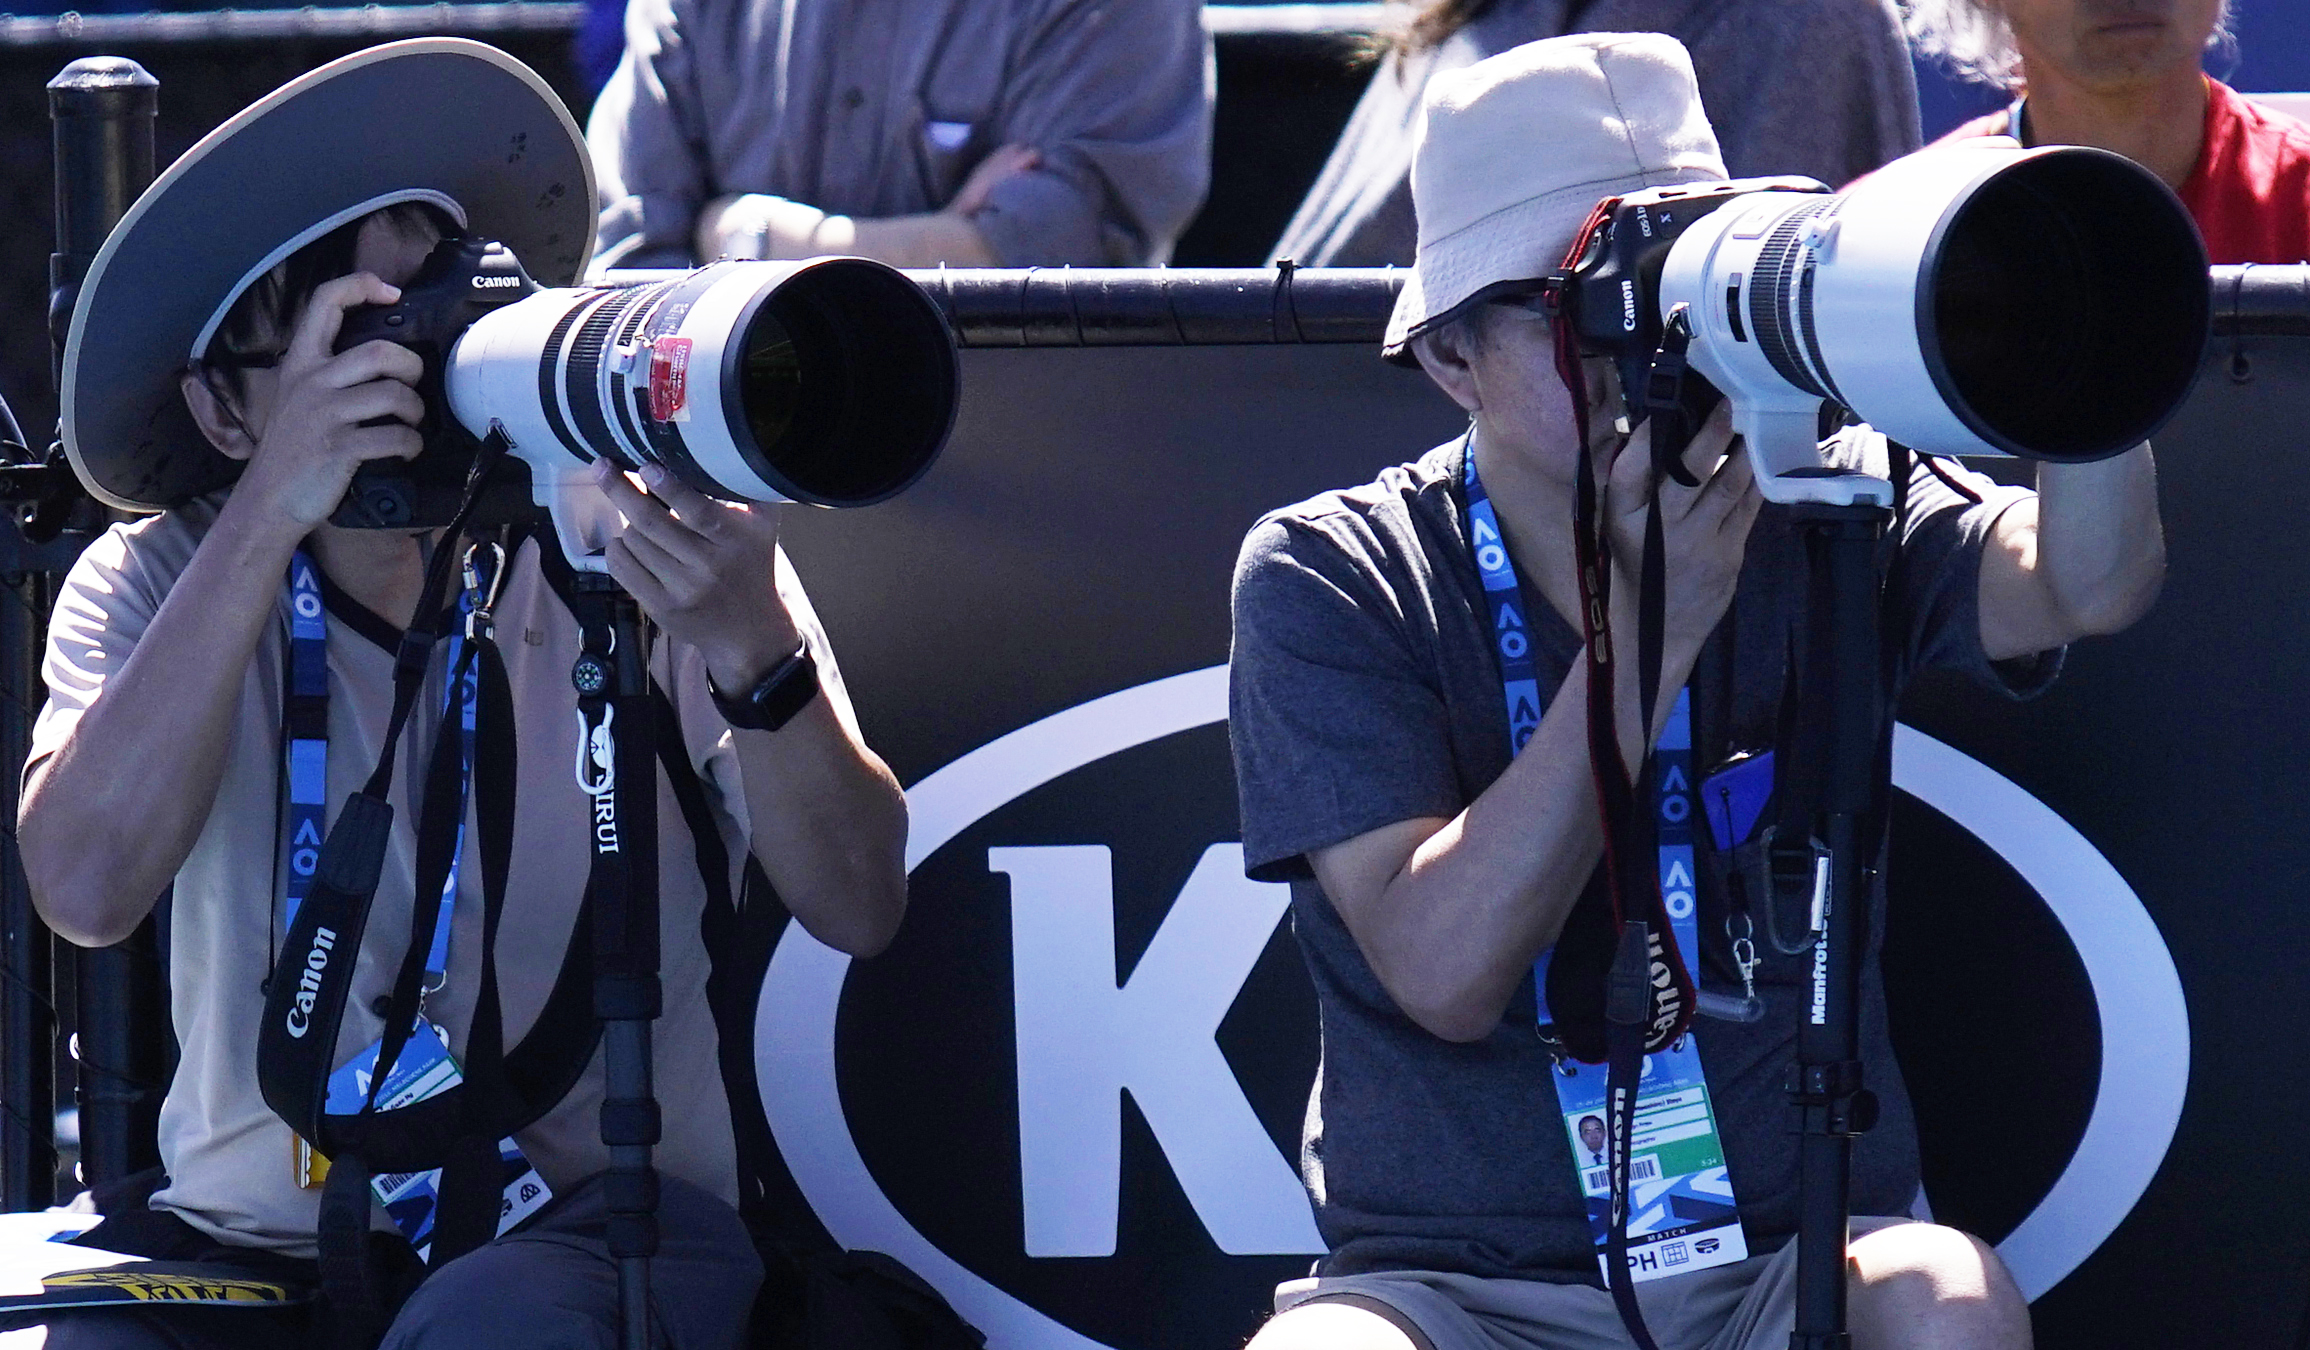
It is also important to pay close attention exactly where the camera’s focus squares are focussing. At events like the tennis, where there is advertising signage behind the player, the camera may choose to “back focus” onto the signage and the player will then be out of focus.
This can be seen clearly in the image below (click it to view full size) where “KIA” is in focus but the player is blurred and out of focus.
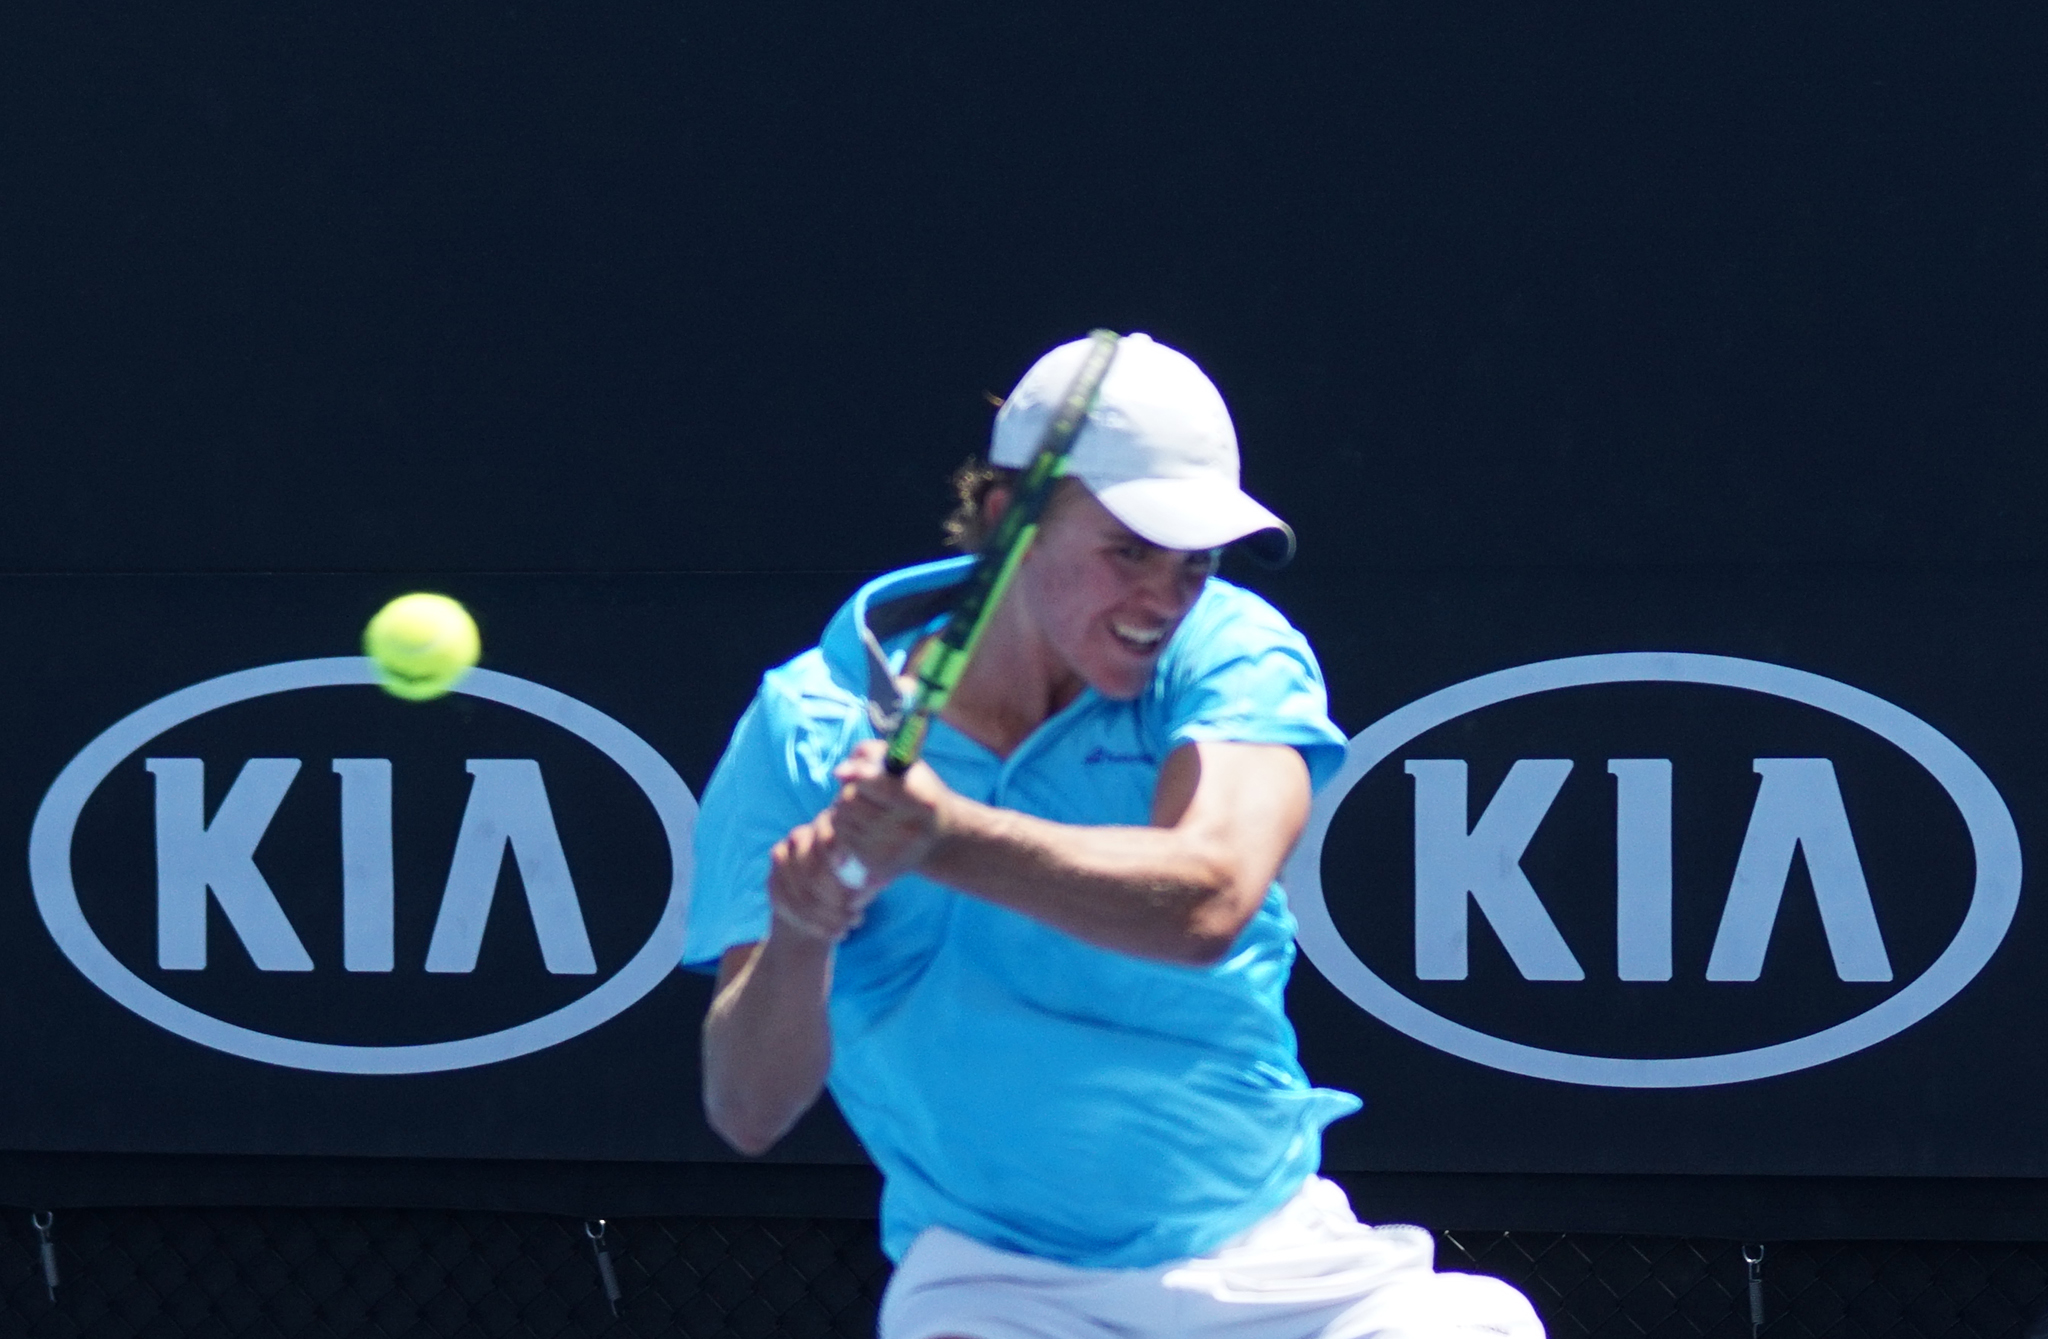
(Click Image to View Full Size)
Sony cameras are fantastic for sports because they have focus tracking that locks onto moving objects and stays with them.
On the Sony A99II camera just use AF-C and the camera will continuously focus on any movement when you half-press the shutter button. But it can be a problem if something in the background moves.Therefore make sure you concentrate on where the green focus squares are located before pressing the button all the way down.
For the Sony A77II we basically set the specific autofocus mode to “Lock-on Expand Flexible Spot” as shown in the video below.
There is a movable slightly bold black focussing rectangle that you need to lock onto the moving object. This is easier said than done. Black was not a good colour to make this focus square, I wish that Sony had made it a different colour, because it is hard to see amongst all the green squares. However we have tested it and it does work well if you can get it activated.
The following video explains Sony Focus Tracking in detail.
There are more details about using specific Sony cameras such as the A99II, A77II, A55, RX100V, and Ax Mirrorless cameras later in this article.
5. Shoot in JPG
Shoot in the highest quality JPG that your camera allows. On Sony Cameras this is called “JPG Fine”.
It is not worth shooting in Raw mode, as these are very large image files and will use lots of space on the SD Card and could possibly slow down the SD Card transfer when shooting in Burst Mode.
Raw mode is great for Landscapes, Sunsets, Portraits and low light Music Performance shots but is totally unneccessary for sports photos. The quality obtained from JPG is great, and it is very doubtful that Raw would produce any noticeable improvement.
6. Ask Permission For Children
In most countries including Australia it is not legal to photograph children, even in public places. If you are attending a sports event with young children competing then make sure you get permission from the team(s) or sporting organisation before taking any photos.
7. Take Lots of Photos
Burst Mode will produce lots and lots of Photos but sports photography is a percentage game, and the only way to get some great action shots is to take lots of pictures.
If you leave the process of going through all of the photos (called “chimping”) until you get home on a laptop or PC; it will be a mammoth job.
It is a good idea to check photos during breaks in the game play, and delete as many “Bad” photos as you can while at the event. Check the photos on your camera screen and zoom in to check focus and only keep the best ones.
This checking process is called “Chimping” because people look like a monkey chimp while they are doing it, as shown in the photo below:
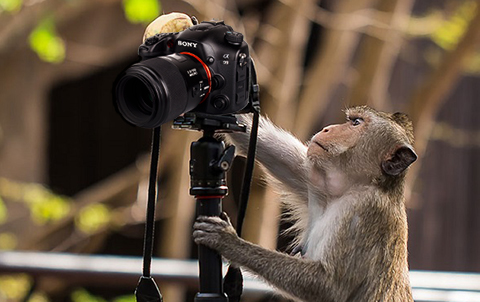
Be careful when Chimping at the event that you do not miss any vital game play or action by being distracted with chimping and not taking photos while the game is taking place. Do Chimping at breaks in play, or stop shooting and move to a quiet location, sit down and have a rest, and do some chimping. There is no worse feeling than hearing the crowd roar while you are chimping, and realising that you just missed out on getting the shot of the day!
8. Position is Everything
If you are outdoors then position yourself with the sun behind your back. This will make sure plenty of light will be hitting your subject so that you can use high shutter speeds like 2000 and 3200 and guarantee freezing the action.
Sometimes you will have to shoot into the sun, but avoid this if at all possible. It will make the players dark and dull sillouettes and can also create weird lens flares and glare.
The other thing is to know the Sport you are photographing and what makes a good image. Research on Google what are the most popular images and even put these onto a Pinterest Board to study them before going to the event.
To work out the best place to be located when taking photos, a great rule of thumb is to look at where the umpire of referee stands most of the time and try to get near that location. Later in this article we discuss shooting locations and techniques for various sports.
Try to workout where the ball or the action is most likely to be and concentrate on that area to get the best possible shots. Follow the action with your camera in continuous autofocus with tracking turned on and zoom in close enough to have most of the frame filled with the players. Use the camera’s viewfinder, and not the screen on the back of the camera.
If you are going to be in the way of spectator views, referees, or professional photographers with event ID Passes, you will have to use a daring “run and gun” approach of just quickly stepping into a location getting shots for 30 seconds, and then quickly vacating the area. Always turn around and thumbs up, nod, and/or verbally thank spectators and referees as you leave.
Sometimes on very crowded days at major events, or if security tells you to move, you will have no other option than to shoot from sitting in the stands. Sit down and rest your elbows on your knees to form a human tripod and go for it.
9. Shoot From Down Low
Some good advice from the Internet is to shoot from as low as where your knees are located to capture much more of a dramatic angle as well as letting in more of a clear background rather than other players and spectators. This lower perspective is a technique that you will see professional photographers using at events.
Shooting low does work well for Football, Soccer, Basketball, Mountain Bikes etc, but is not universally applicable for all sports. Getting a small fold up camping stool and sitting at the sidelines like the pros do should allow you to get this low perspective.
(Click Image to View Full Size)
At major events you will be very lucky to get a photo Pass or permission to sit courtside like the pros do, and so you will need to shoot hand held from the sidelines.
(Click Image to View Full Size)
Shooting low is a general rule, if you cannot sit on a stool then sit cross legged on the ground, or kneel on one knee to get lower if you can only stay a little while to take pictures at that particular location.
However for sports like Volleyball we mostly shoot standing up or kneeling on one knee, and we do most of our Tennis shots and Football shots like this as well.
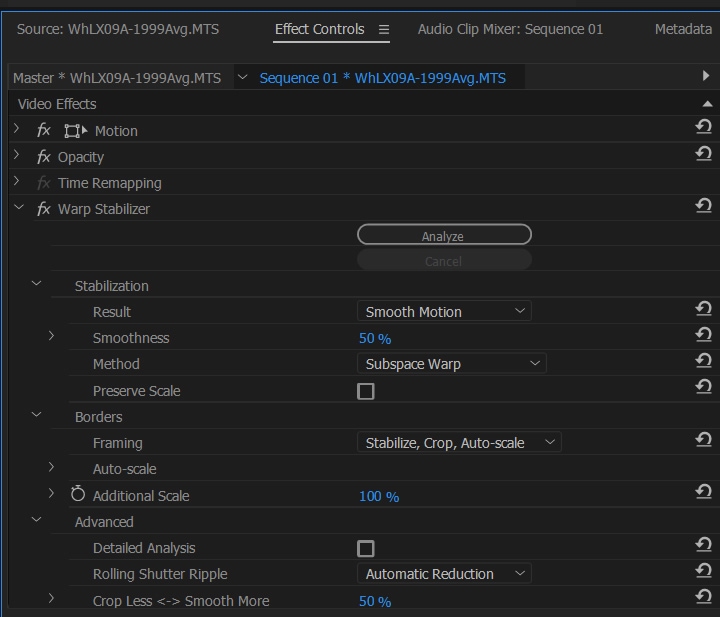
10. Post Process Your Images
Use Adobe Lightroom and Photoshop to post process your images.
For bright sunny outdoor shots like Tennis and Football there is never any need for Lightroom, and the exposure, colours, sharpness, etc can all be adjusted using Photoshop.
However, when we have indoor sports photos to process like Basketball, Volleyball, etc then using Lightroom first on the JPG files, and then editing in Photoshop is certainly the way to go.
You might not think of using Adobe Lightroom for Sports JPG images bit it works wonders on JPGs from Sony cameras!
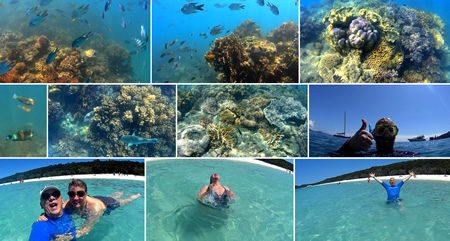
Exceptions to the JPGs only Rule might be for Beach Sports, or maybe an Indoor Stadium where the lighting is not great.
The Sony A99II can Burst Shoot in Raw + JPG shooting mode; we tried it out down at the Beach with a fast SD card and it worked fine at shooting Raw images for Kite Surfing.
But it in 90% of cases it is probably easier to actually just shoot in JPG and use Lightroom on the JPGs.
The original volleyball indoors photo shown below was dark and dull due to the high shutter speed used in an indoor stadium. The after photo was produced by taking the JPG image from the camera into Lightroom. Yes Lightroom is great for fixing dull indoor jpg files!

(Click Image to View Full Size)
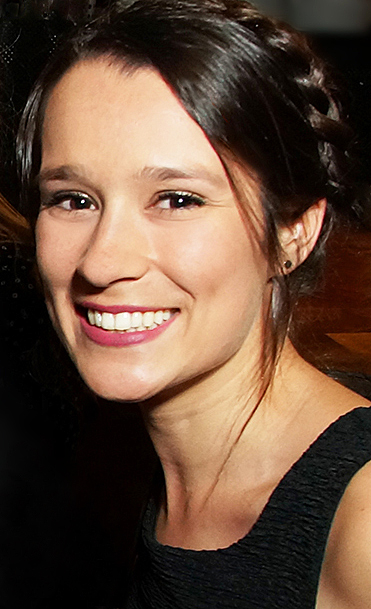
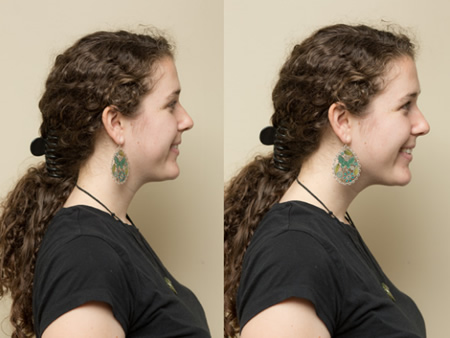
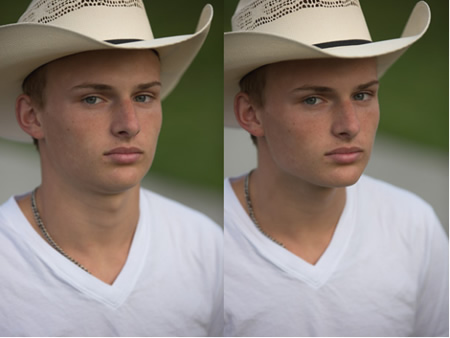
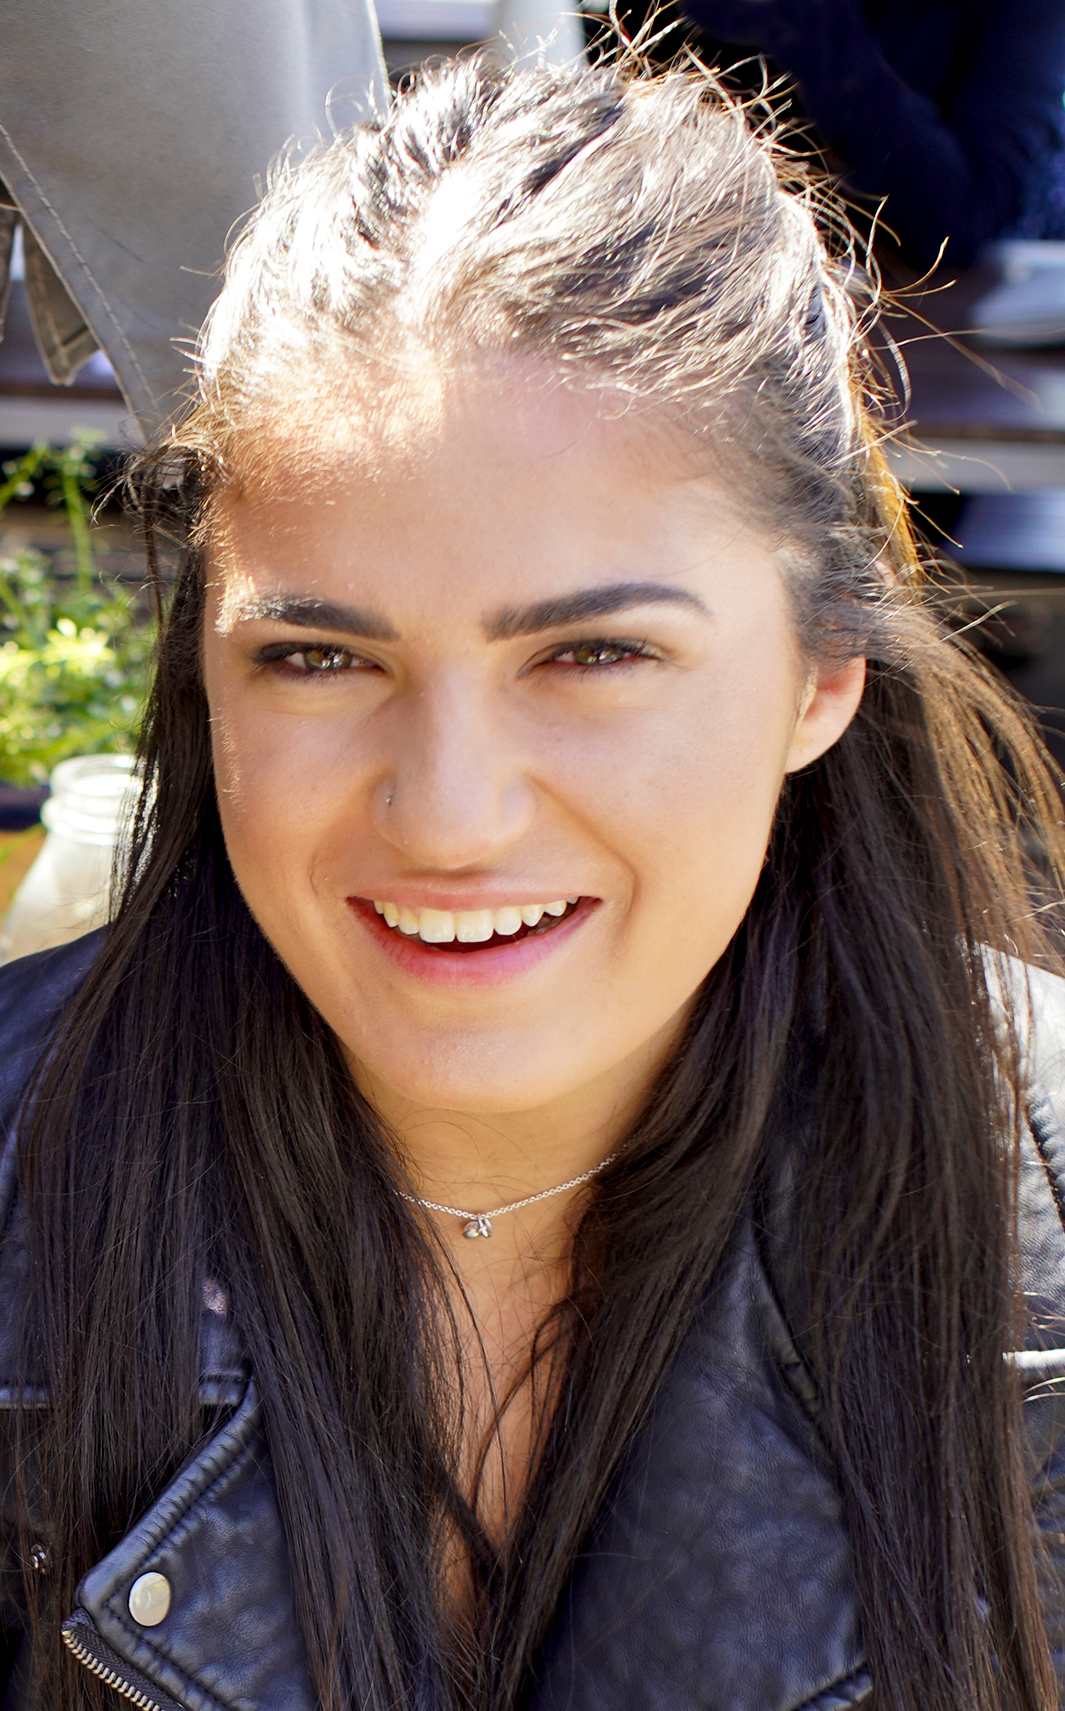
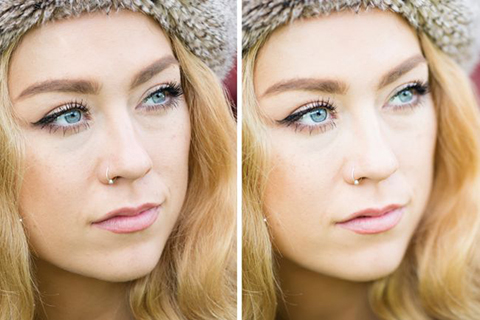
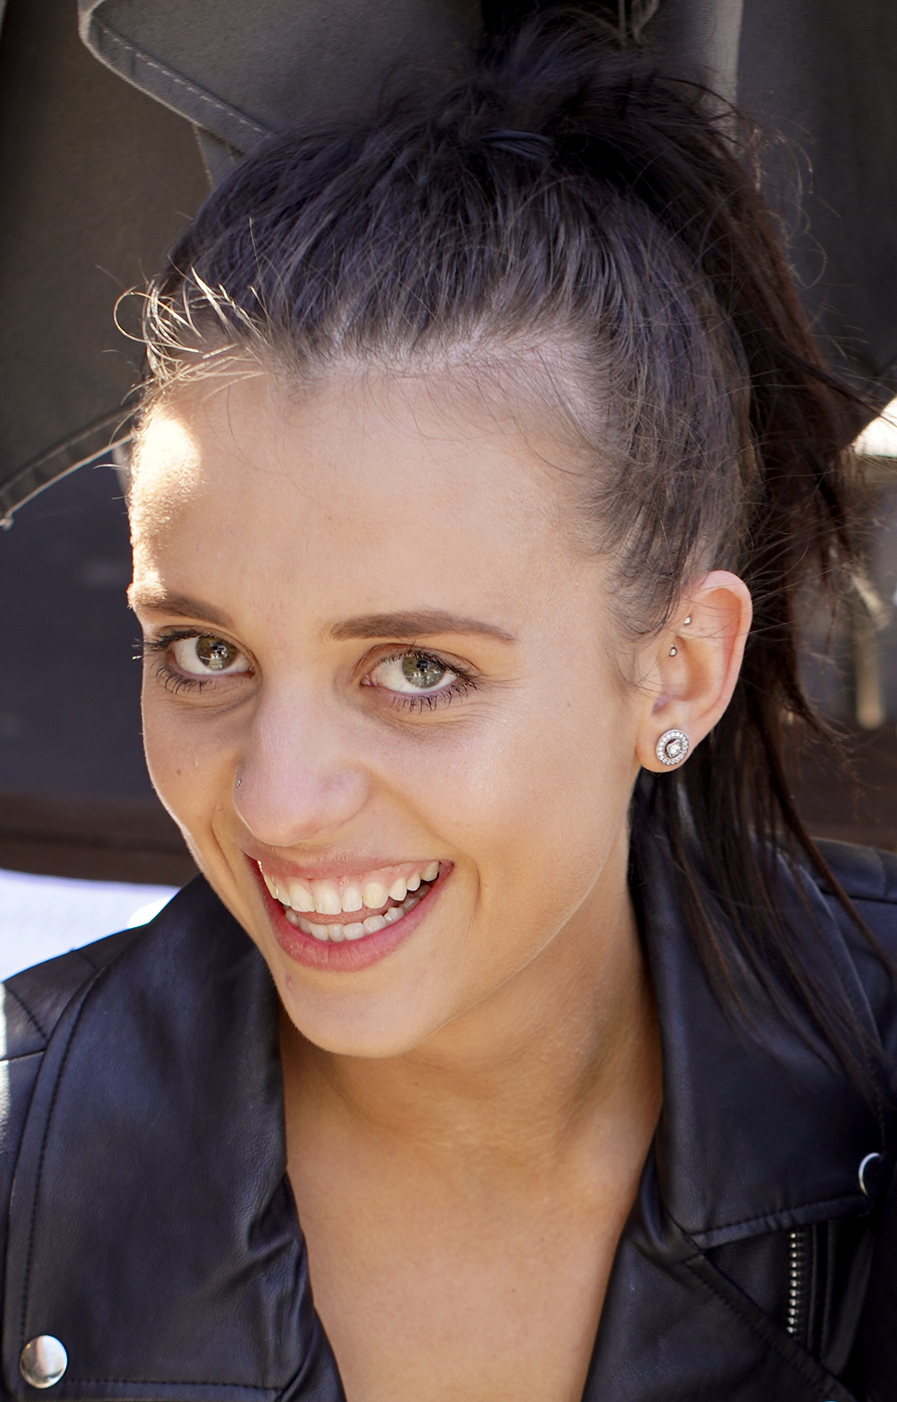
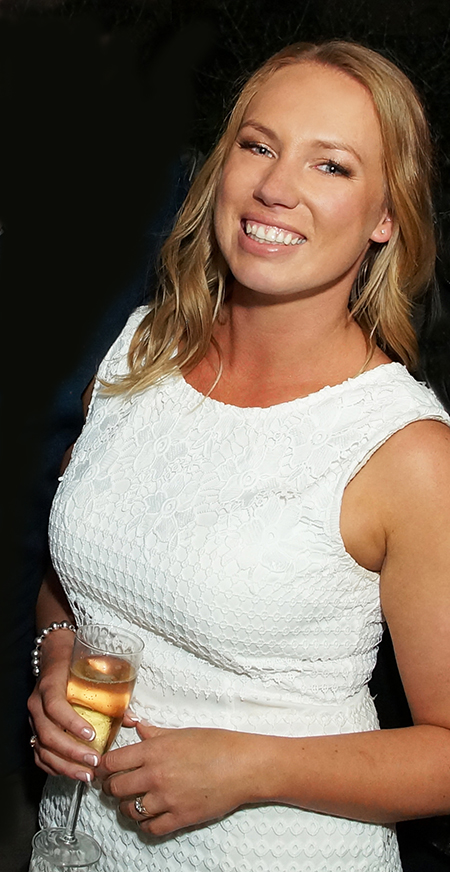
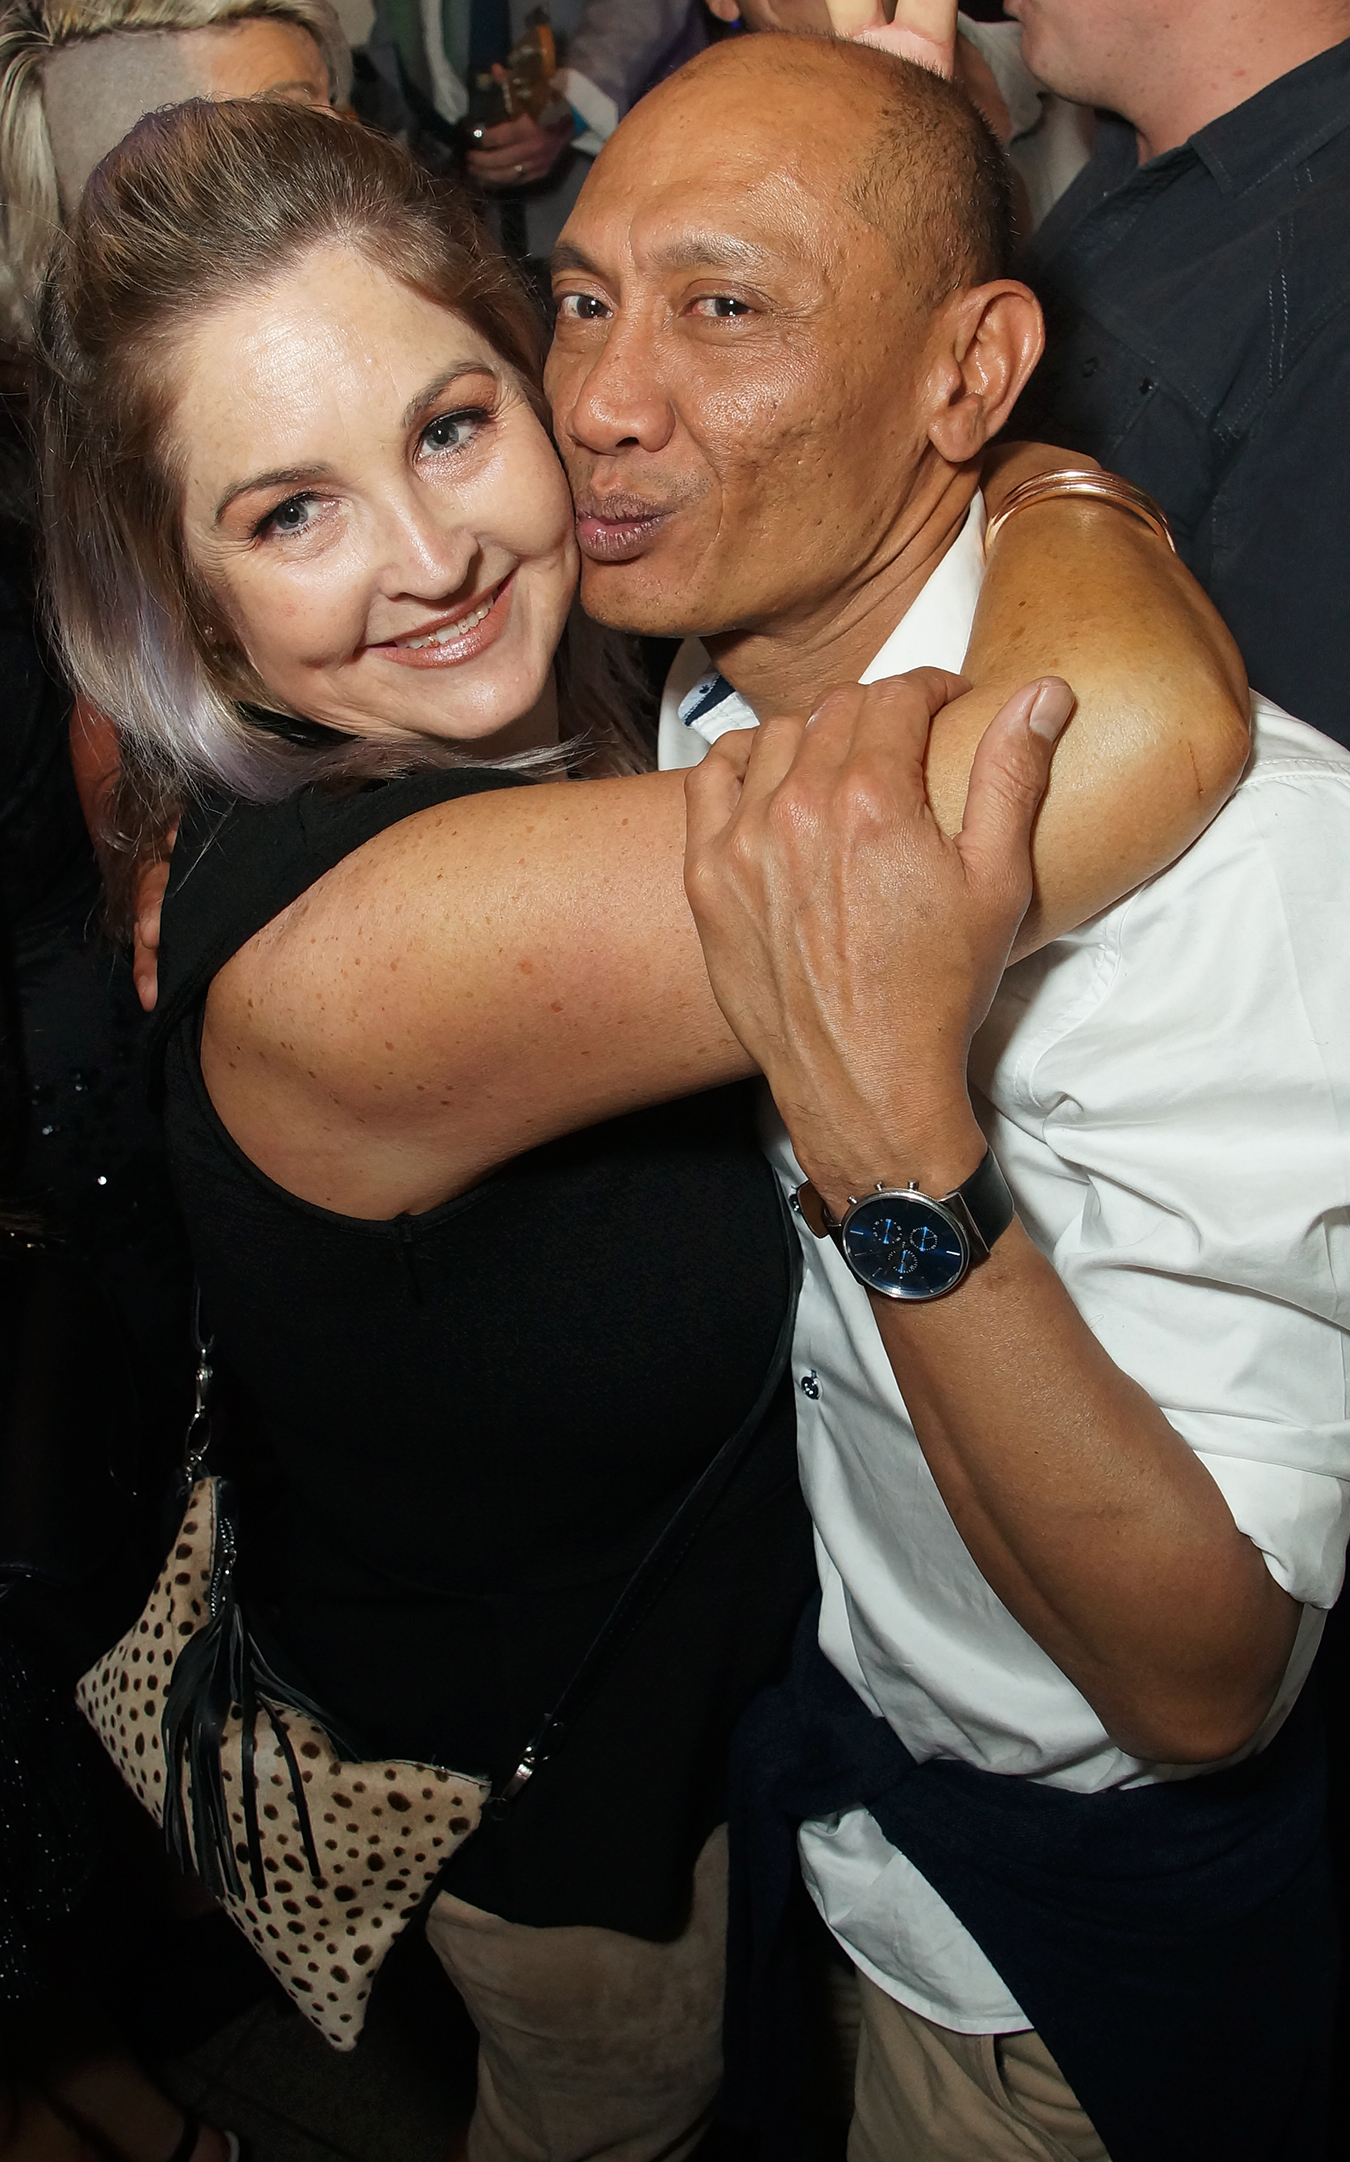
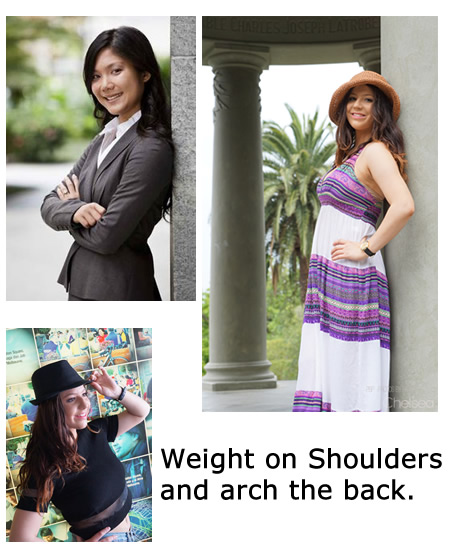
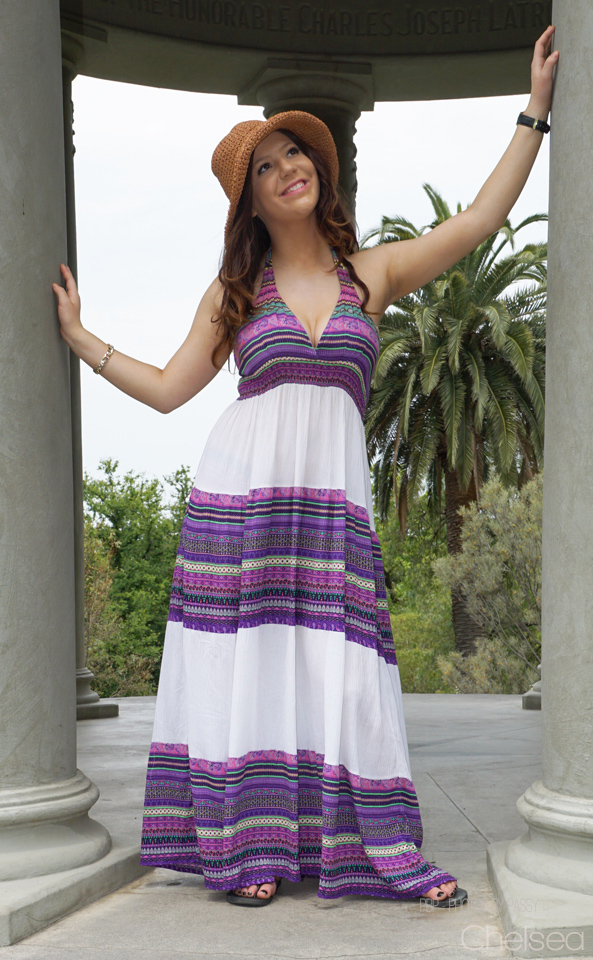
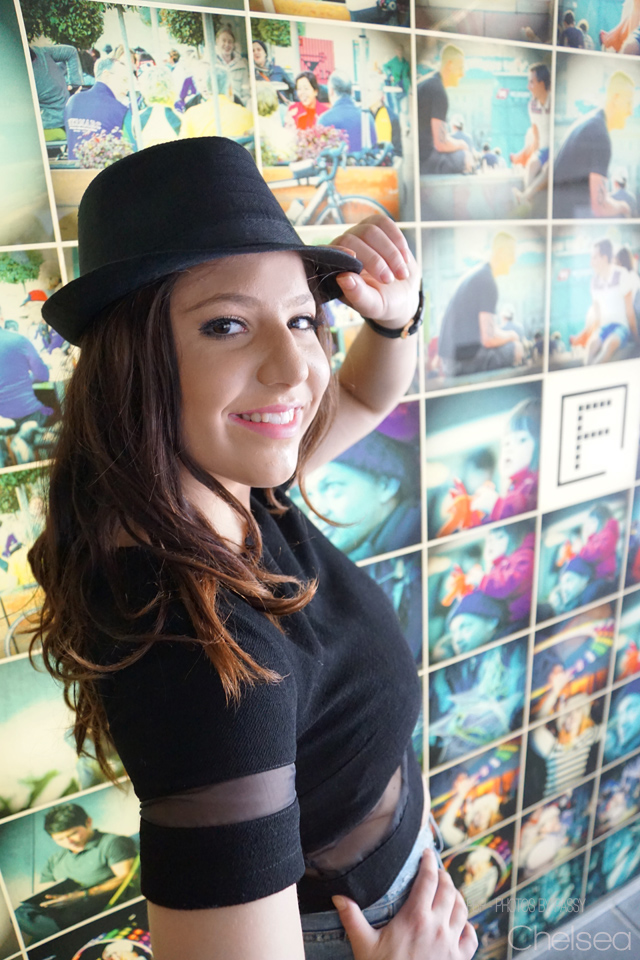
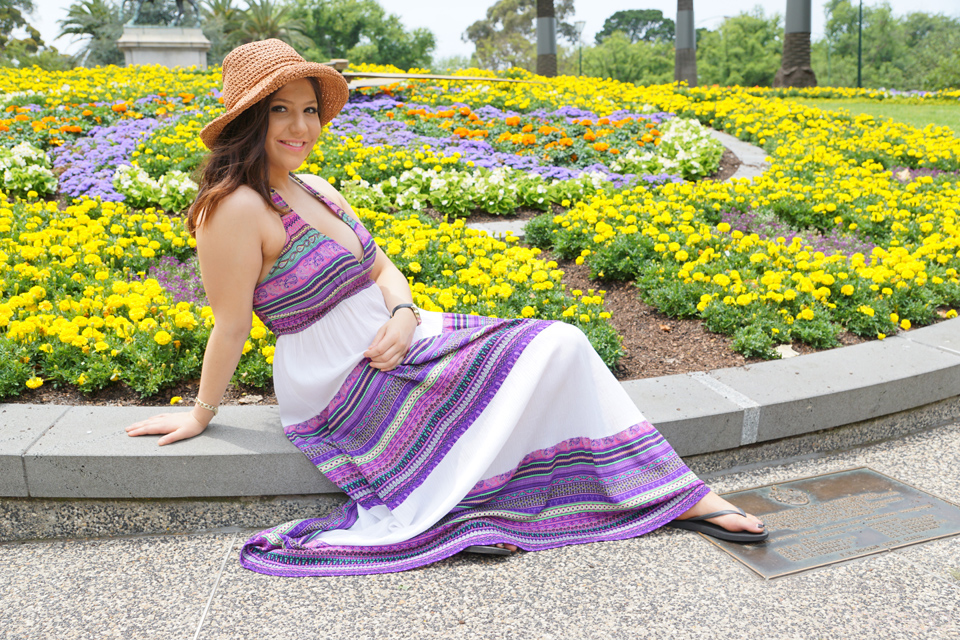
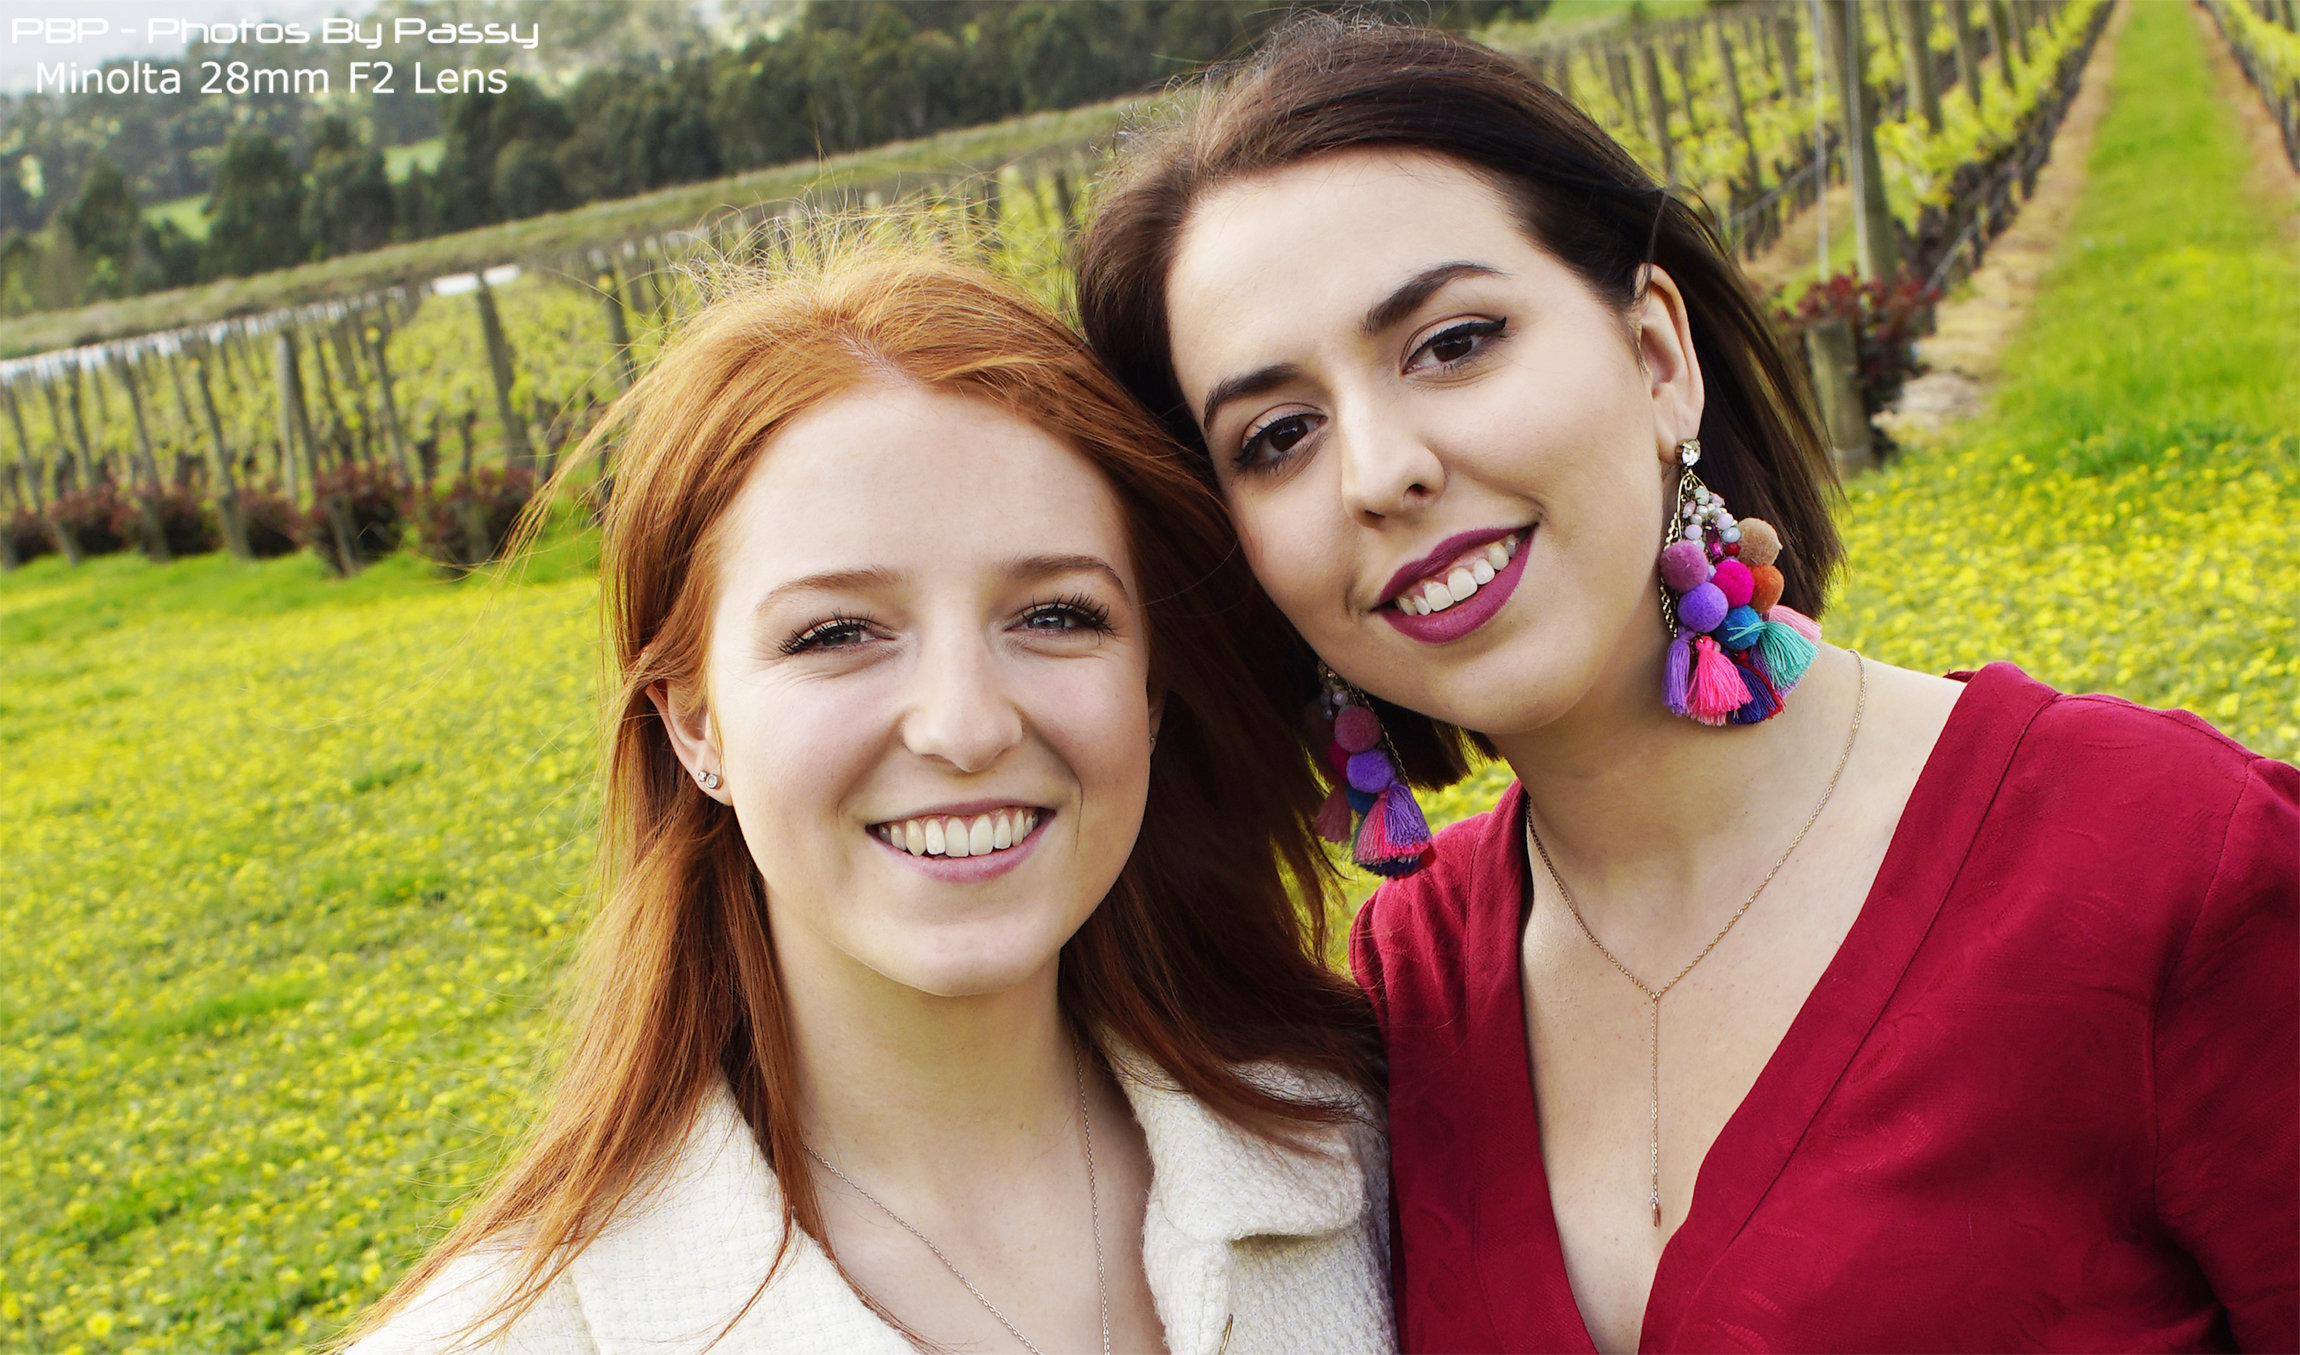
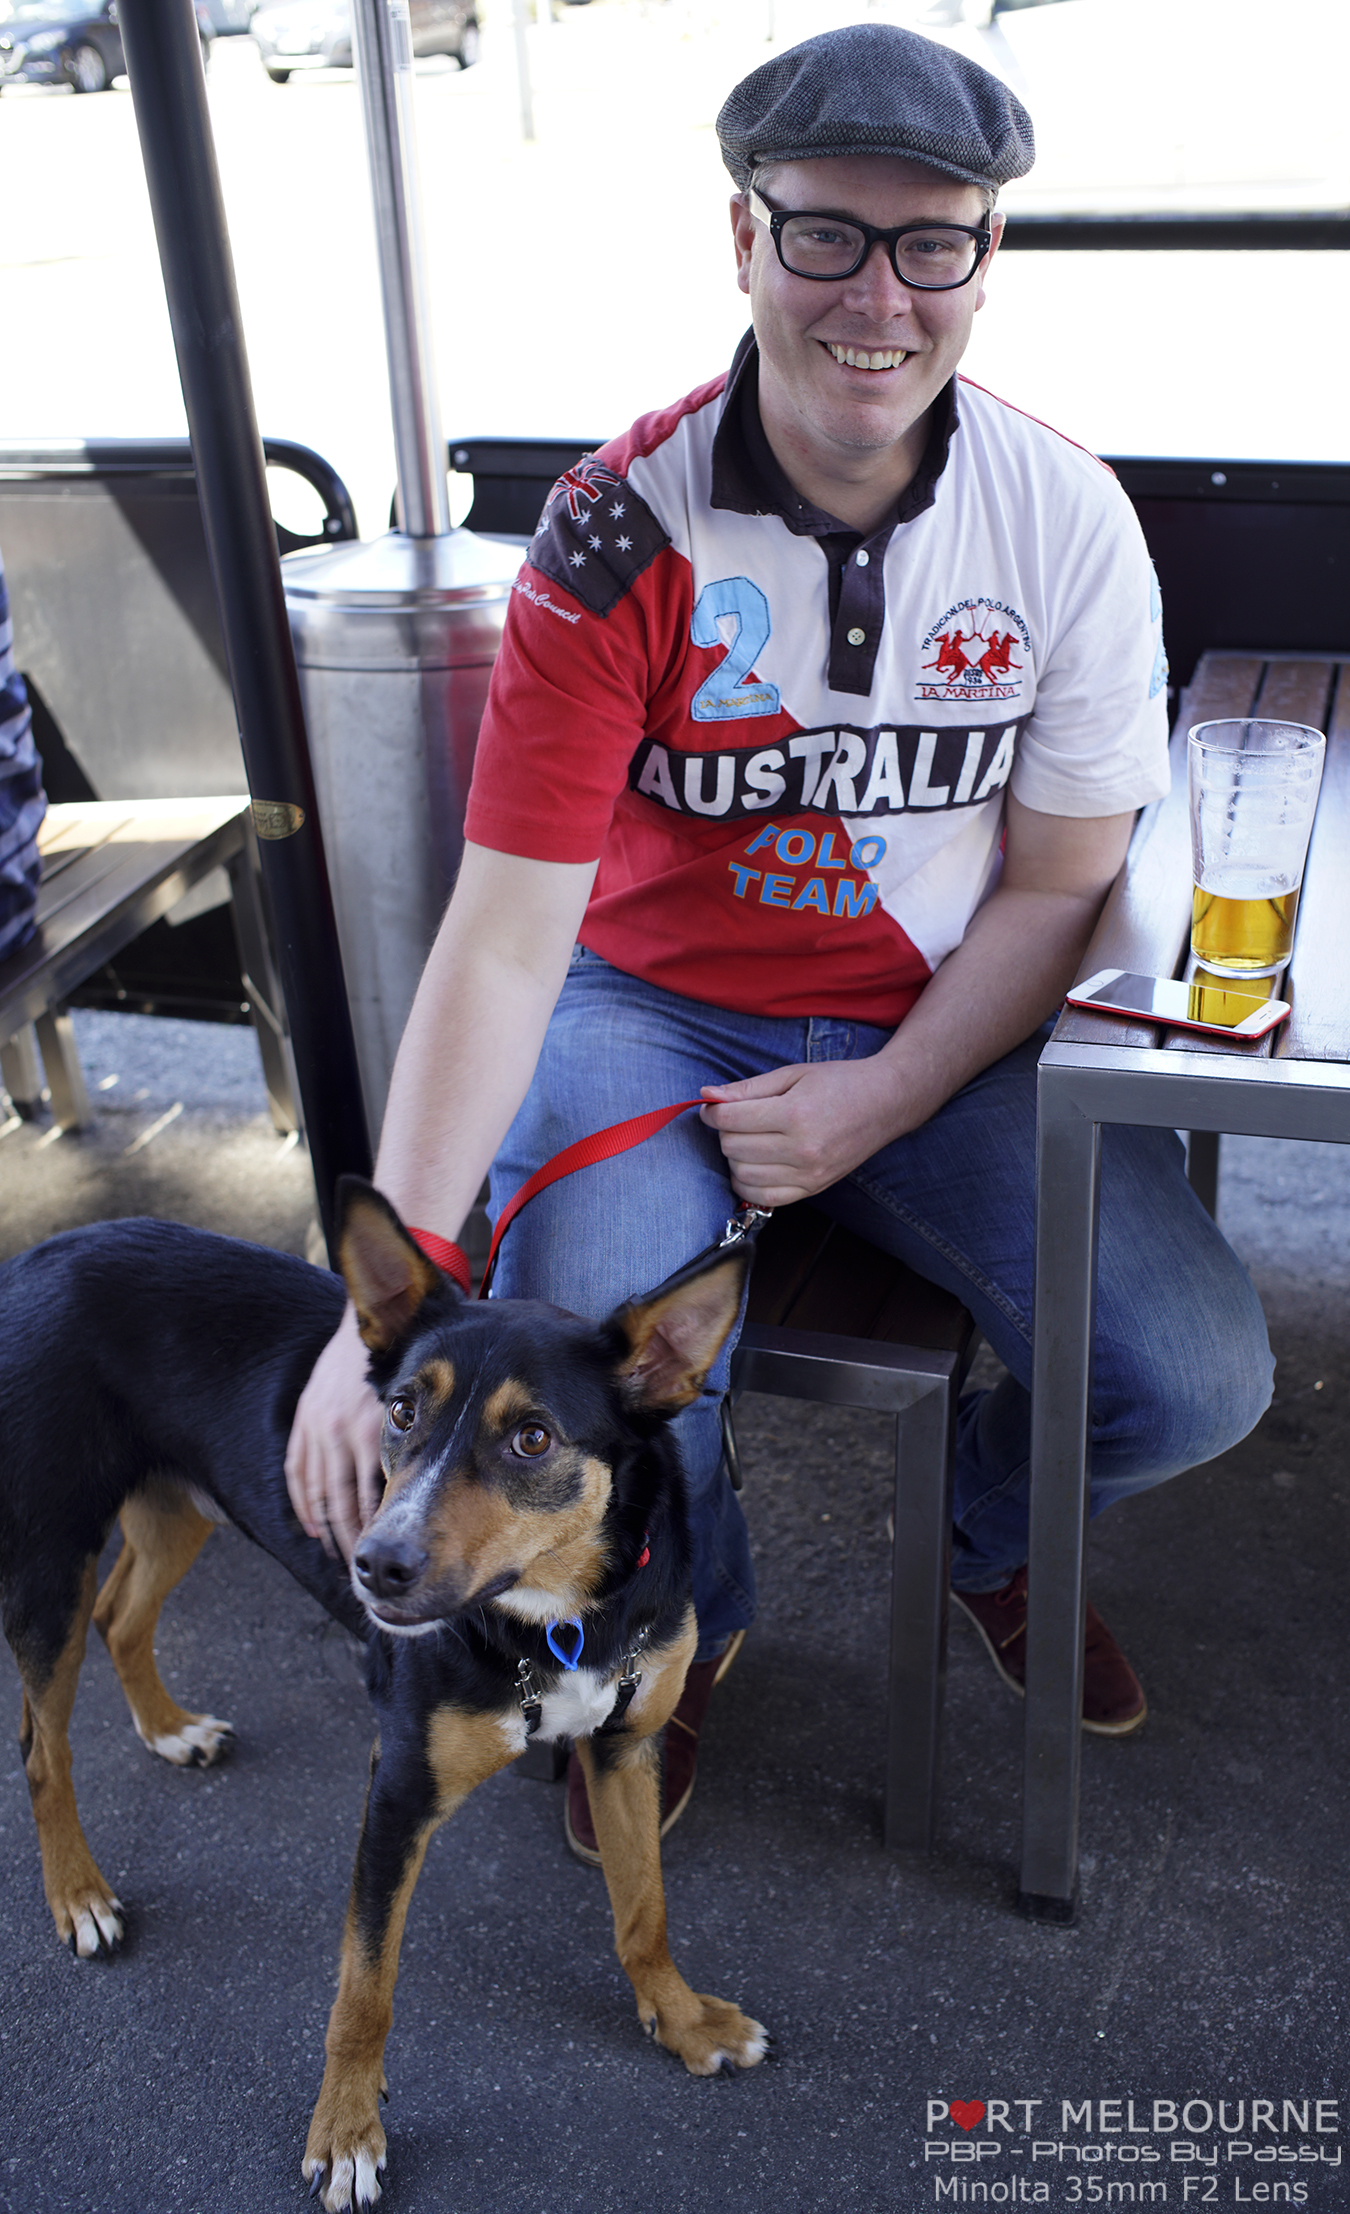
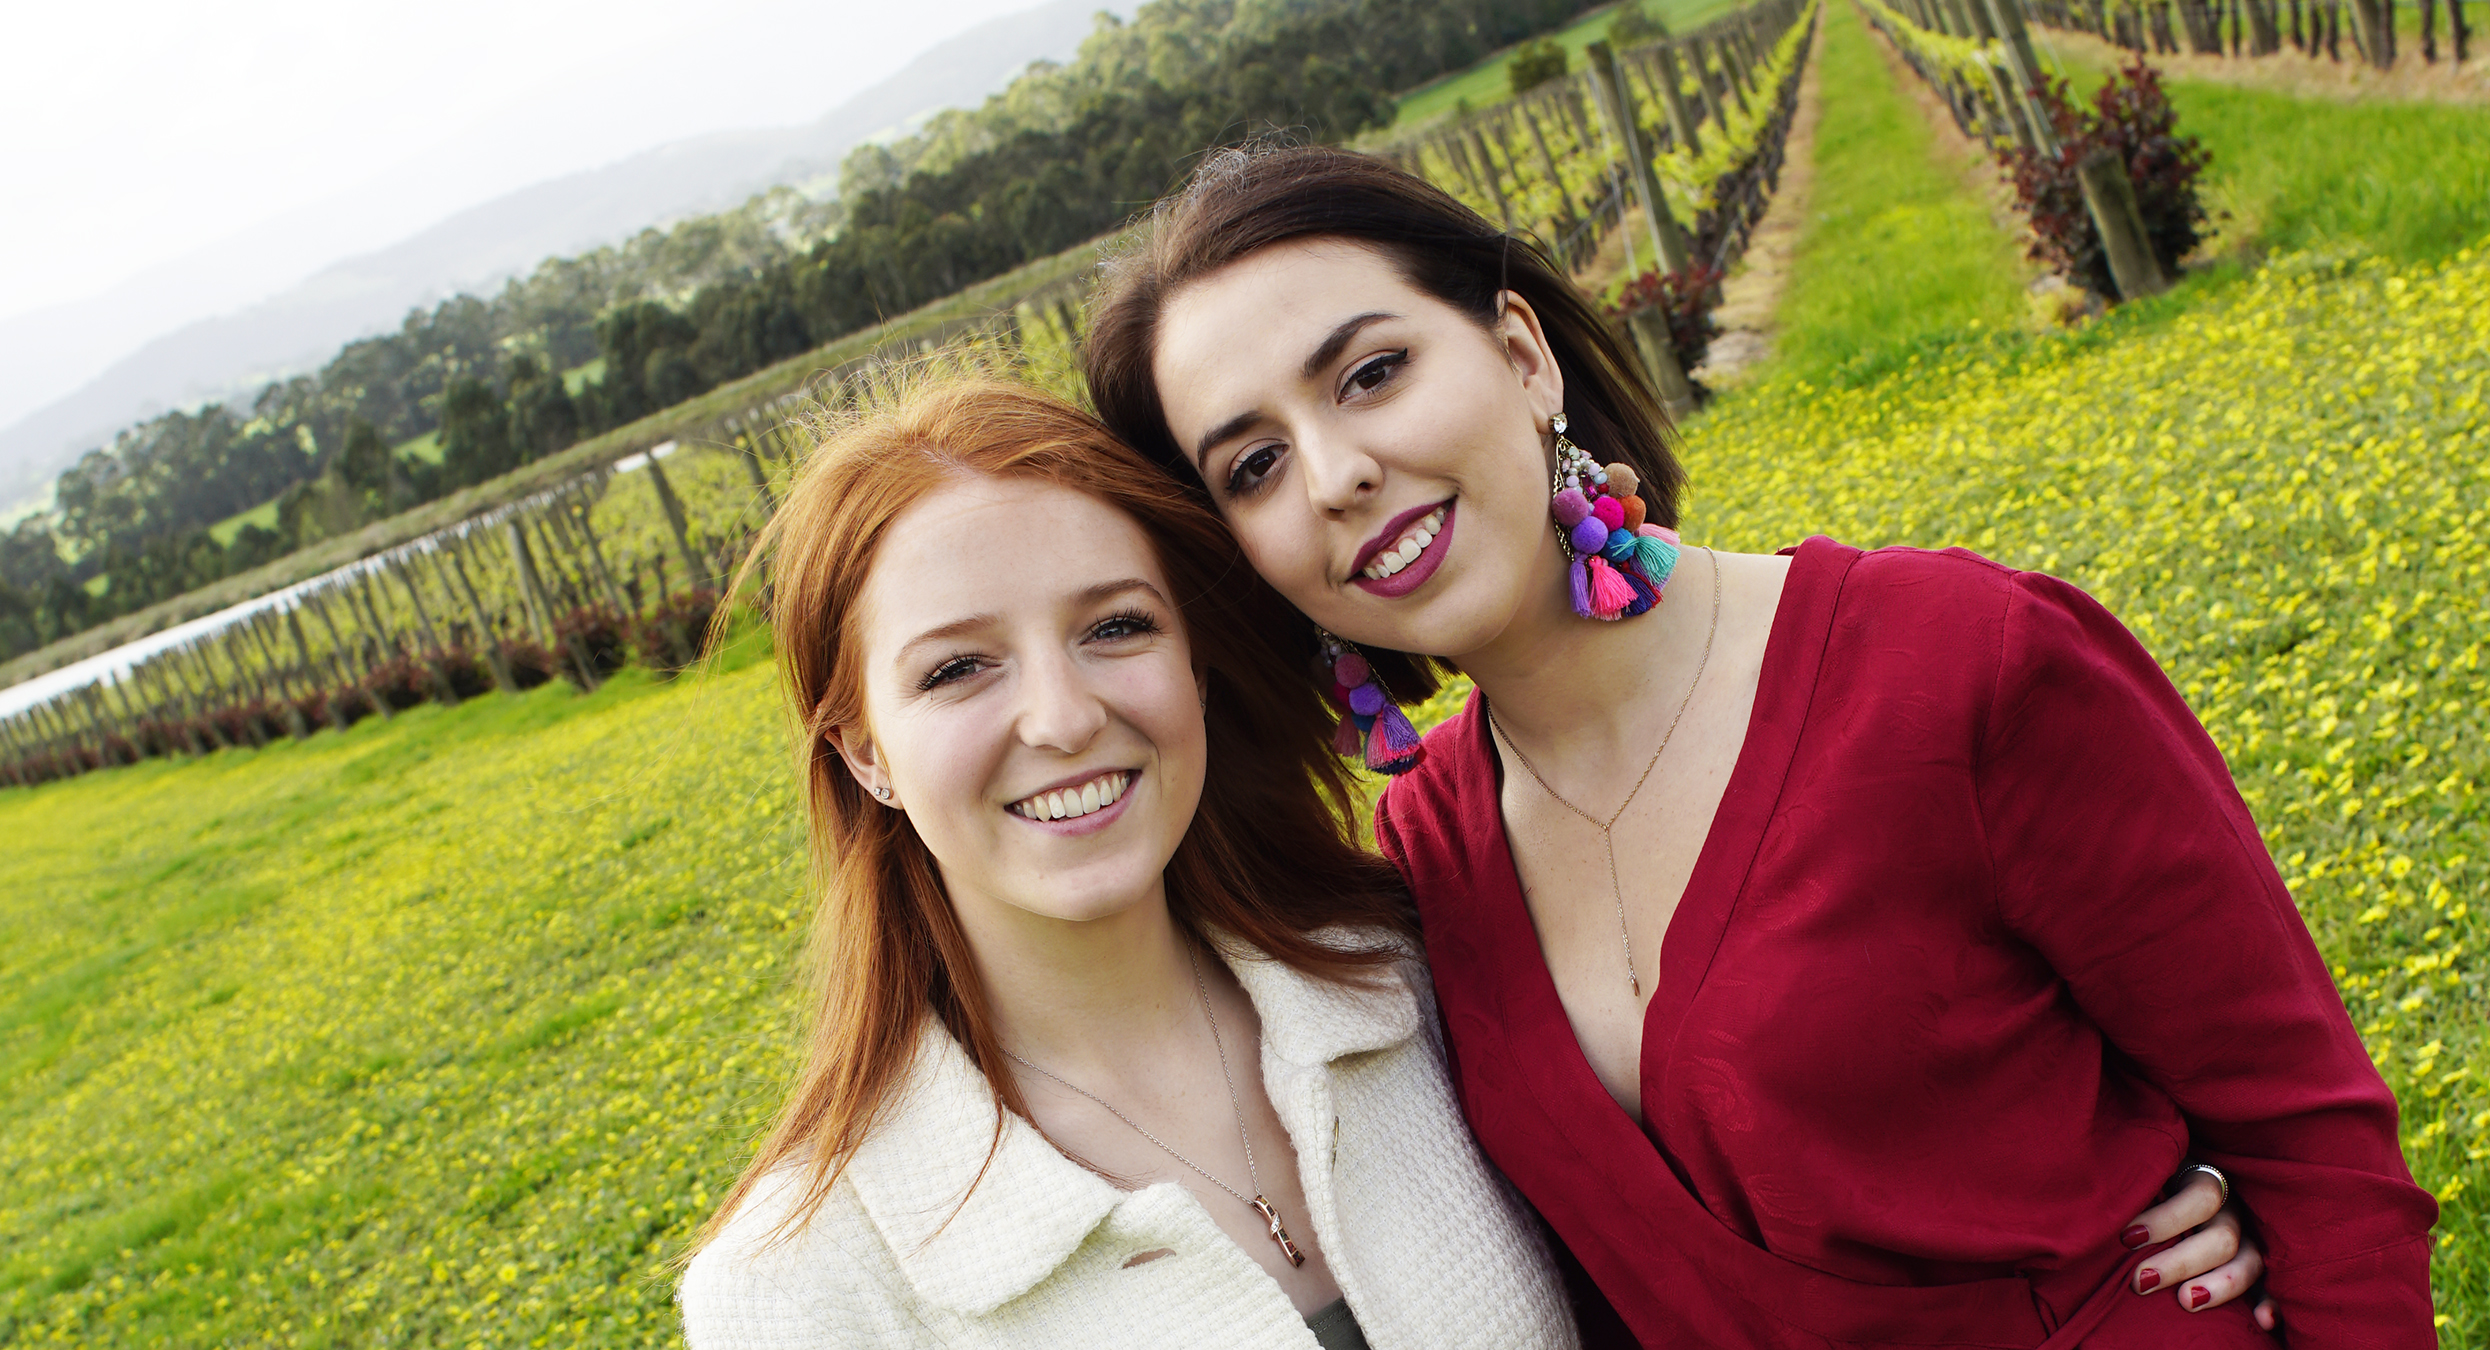
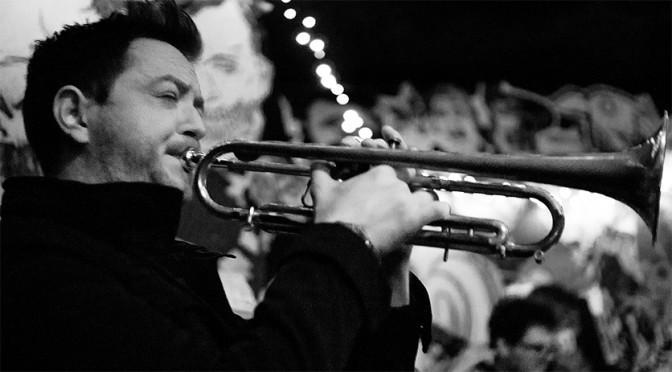
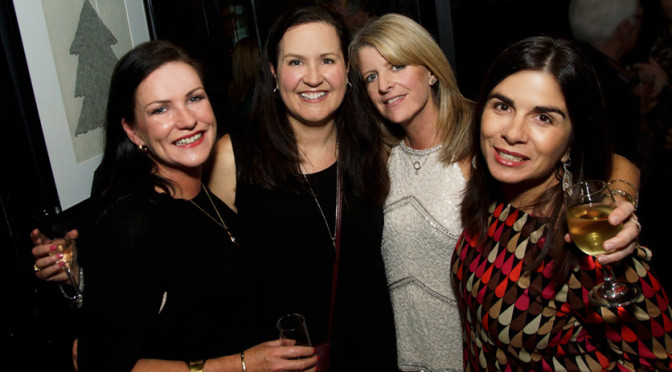
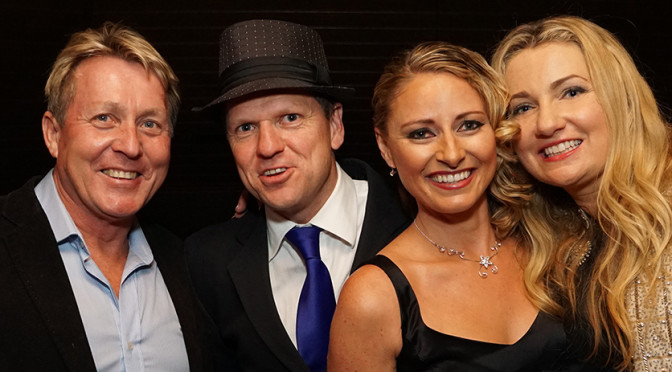
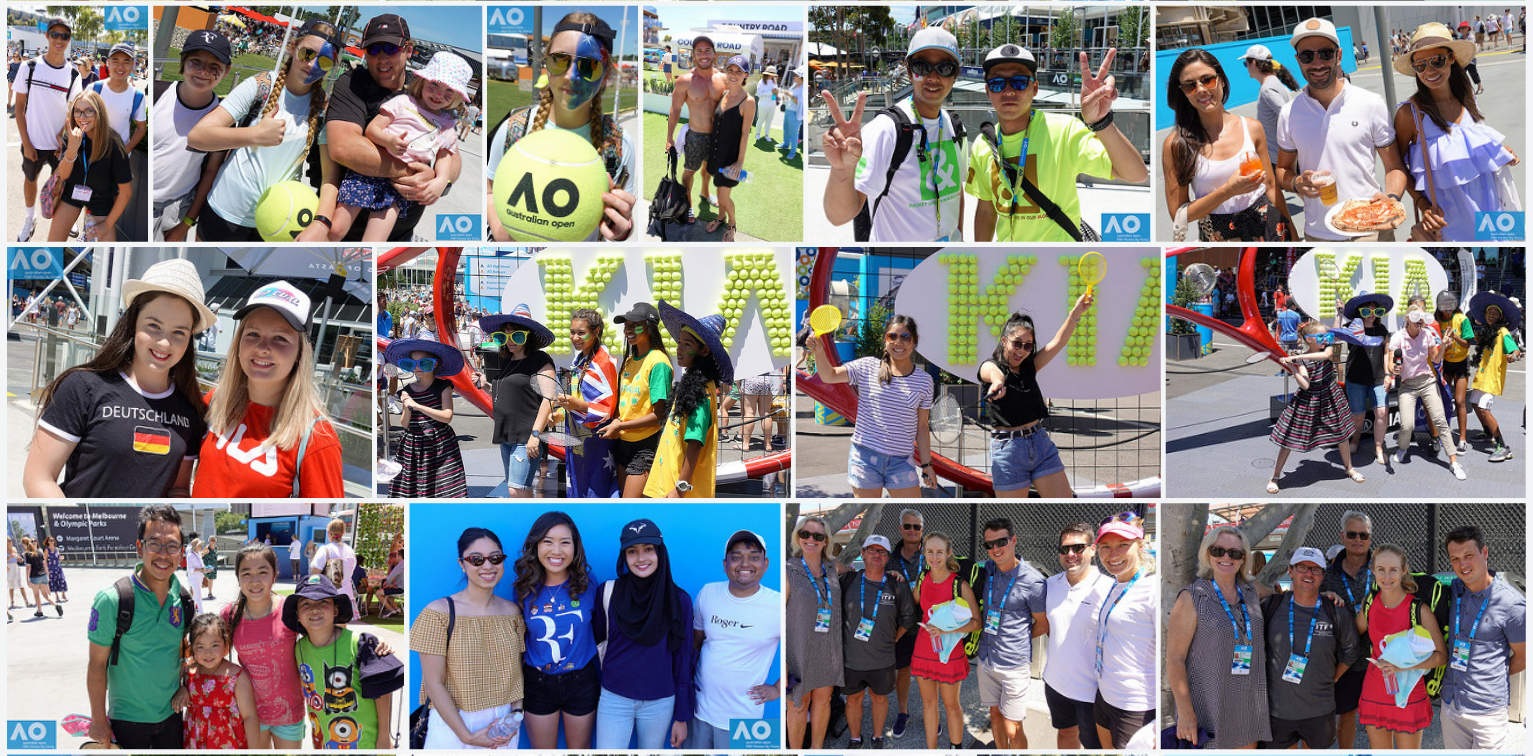
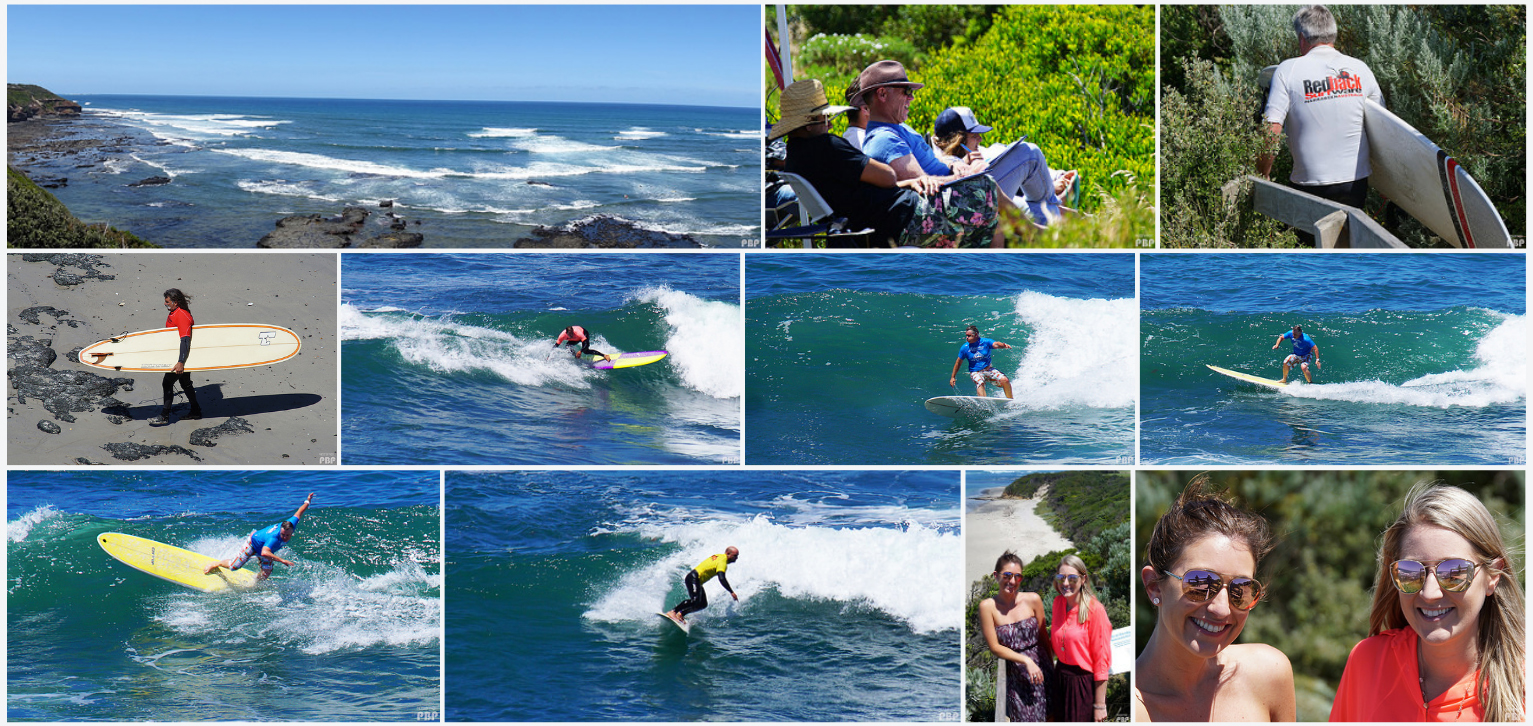
Extra Tip – People Pictures
At major events also take photos of Spectators, and casual shots of the Players.
People love looking at “People Pictures”,. These work well in the middle section of your final album to break things up and add some interest.
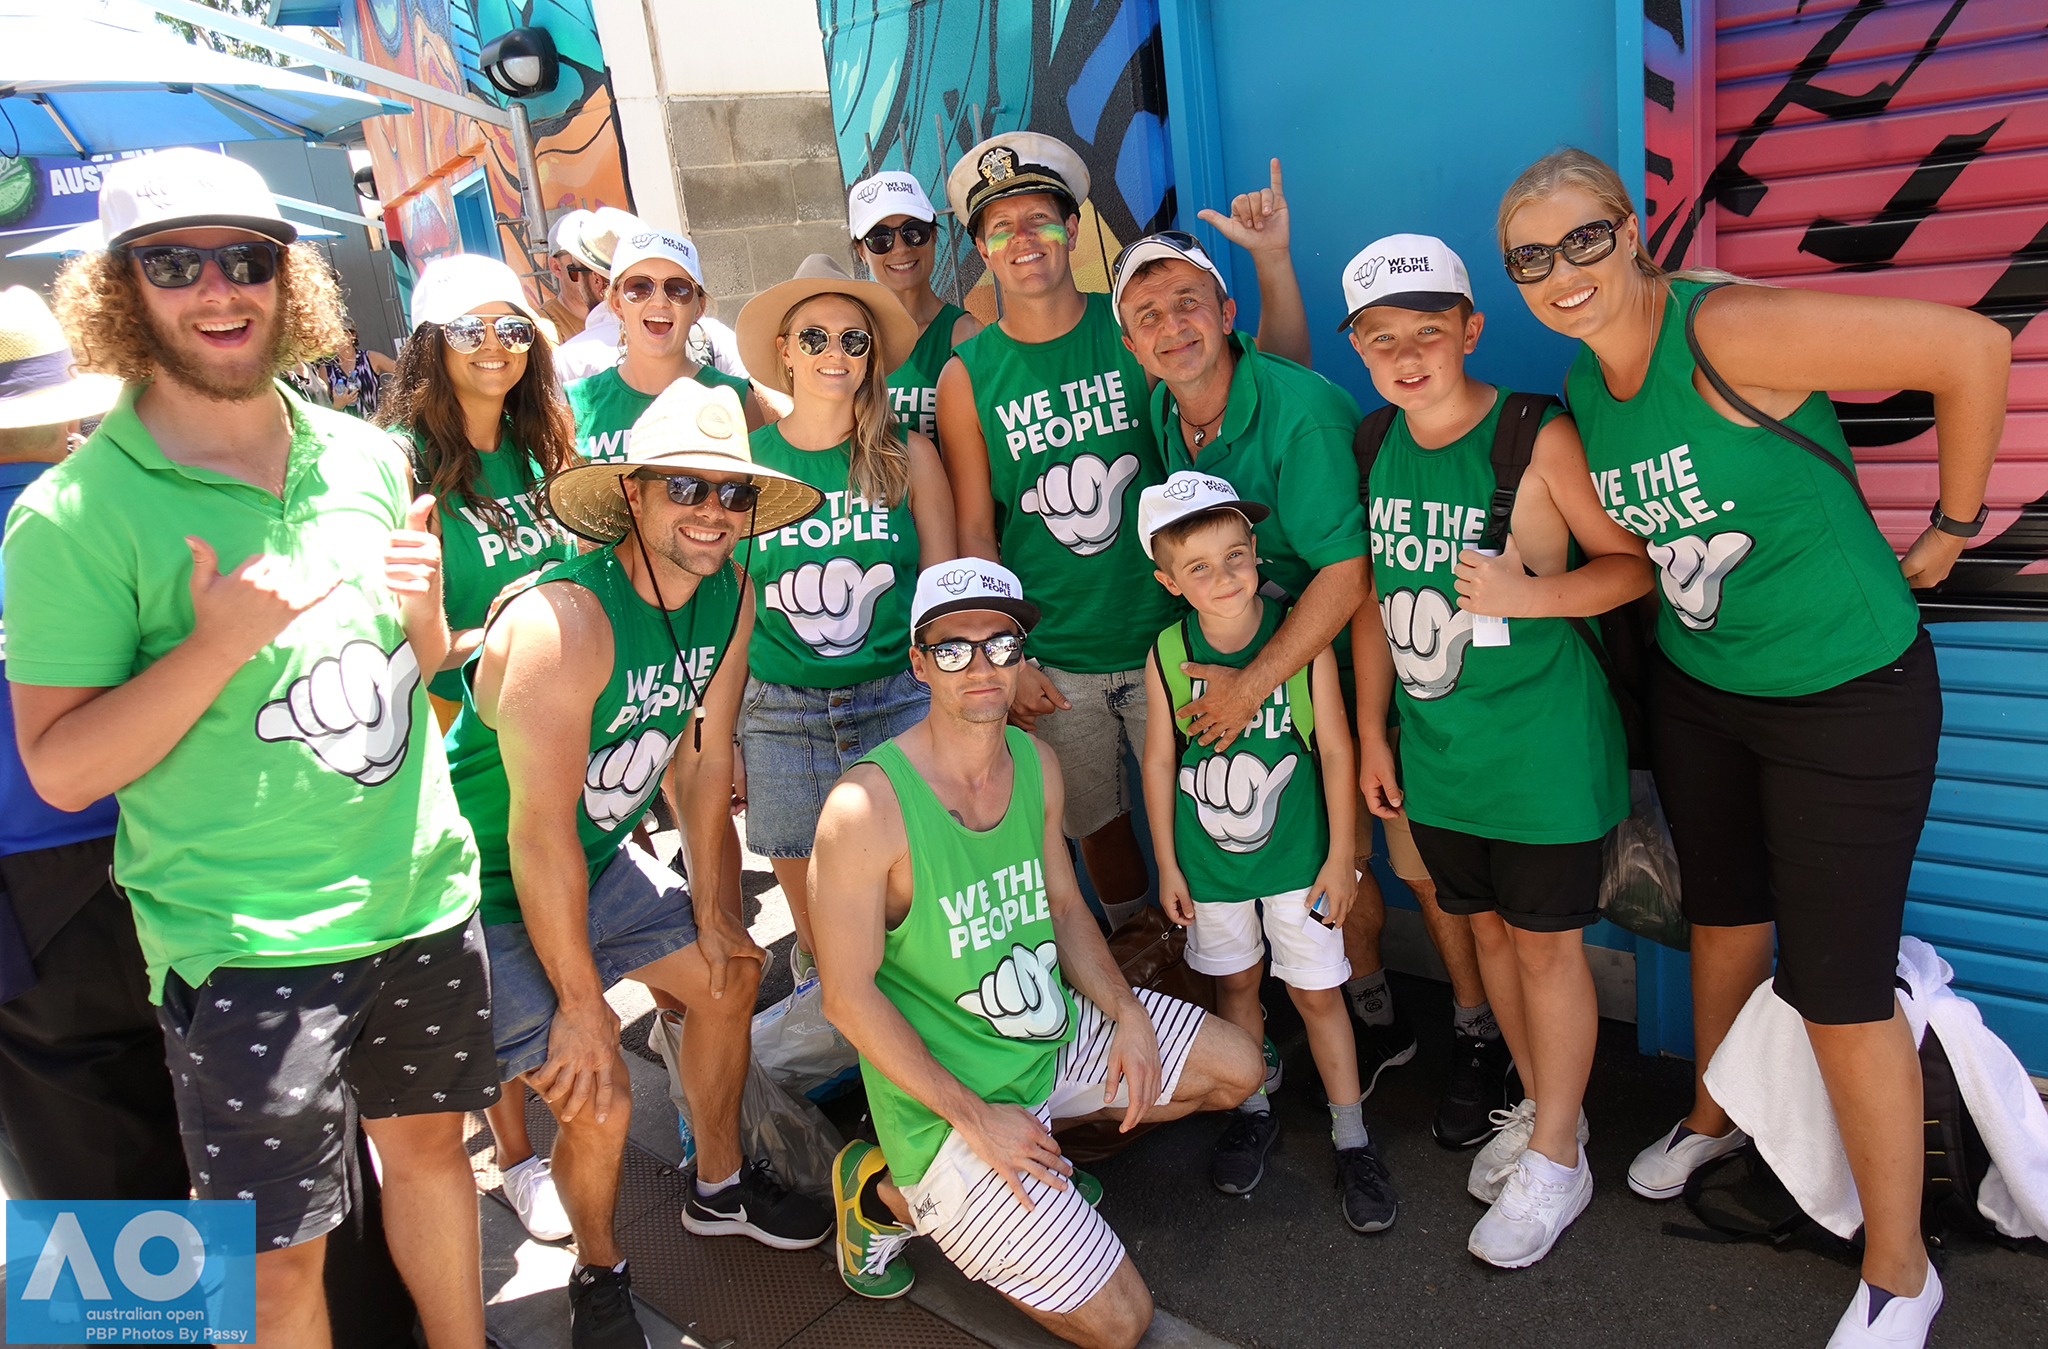
(Click Image to View Full Size)
We look at this as “the difference that makes the difference”.
Check out the following Tennis Album to see what we mean.
Tennis Album with People Pictures
Most photographers at Sporting Events only do action shots and do not even think about getting some people images to complement these.
Naturally you need to ask for people’s permission first when taking any images, but we have found that 80 percent of people are usually in a great mood just being out and about at a sports event, and are quite happy to be in a group photo.
Click either the image or link below to check out our People Pictures from the Australian Open Tennis.
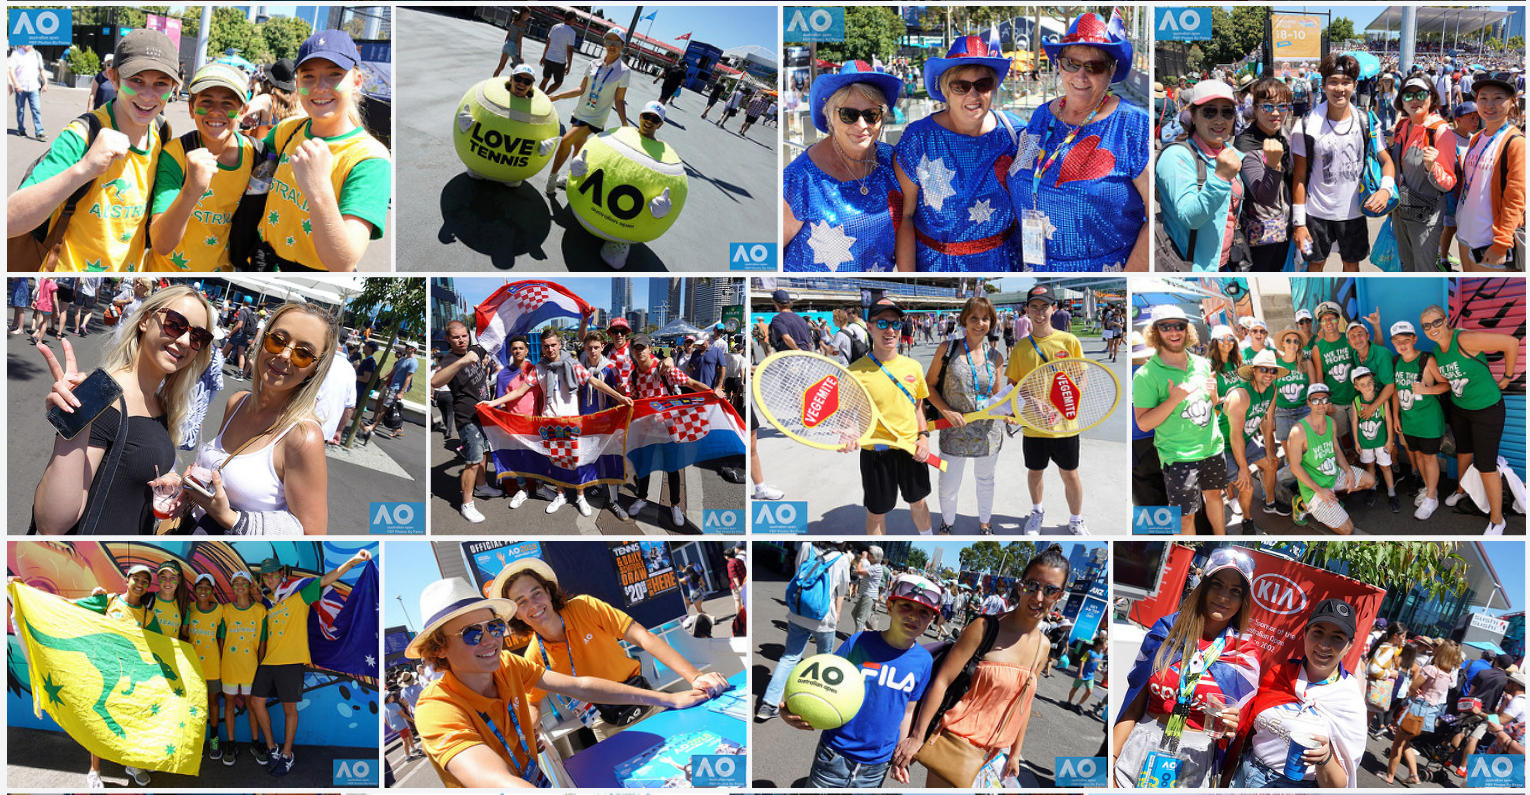
Australian Open People Pictures
Shutter Speed
High Shutter Speed is the key fundamental of Sports Photography, and so it warrants discussion in some detail.
Definition of Shutter Speed
Every digital camera (except the Sony A9) has a shutter which opens and closes quickly to let light through the lens to the image sensor.
Think of the shutter as like being in a dark room during the daytime, and opening and closing a set of venetian blinds quickly to let a burst of light into the room.
Basically a camera shutter is like a curtain in front of the camera sensor that stays closed until the camera fires and goes “click click”.
When the camera fires, the shutter opens and fully exposes the camera sensor to the light that passes in through the lens.
After the sensor is done collecting the light, the shutter closes immediately, stopping any more light from hitting the sensor.
The button that fires the camera is called the “shutter” or “shutter button”, because it triggers the shutter to Open and Close.
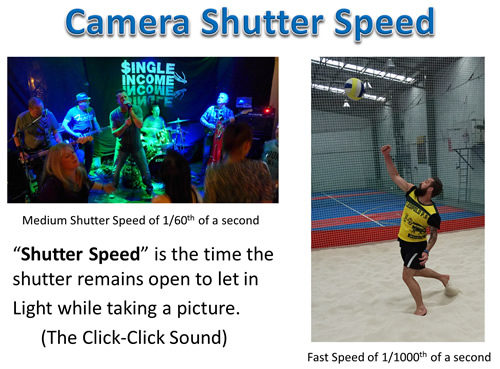
The speed at which the shutter opens and closes is usually a fraction of a second, such as 1/8, 1/15, 1/30, 1/60, 1/125, 1/250, 1/500, 1/1000, 1/2000.
The bigger the number in the bottom of the Fraction, the faster the shutter opens and closes.
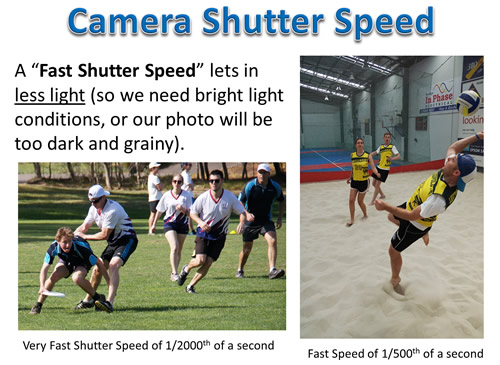
A “Fast Shutter Speed” is needed for Sports to freeze the action. But a fast speed lets in less light, and so we need good lighting conditions.
Standard Shutter Speeds
“Shutter Speed” is measured in seconds or fractions of seconds:
1, 1/2, 1/4, 1/8, 1/15, 1/30, 1/60, 1/125, 1/250, 1/500, 1/1000, 1/2000, 1/5000
Note that the bottoms of the fractions always double, except for the jumps between 1/8 and 1/15, and 1/60 and 1/125.
The doubling of the bottom of the fractions is a mathematical pattern called a “Geometric Progression”.
The jumping of 1/60 to 1/125, instead of 1/60 to 1/120, is deliberately designed that way so that the doubling pattern is simpler for the 1/125, 1/250, 1/500 end of the Range.
There is also the out of sequence jump between 1/8 and 1/15 for the same reason.

Note that the Speed is usually displayed as whole numbers on cameras, due to LCD and Viewfinder sizes.
Eg. 1, 2, 4, 8, 16, 30, 60, 125, 250, 500, 1000, 2000, 5000.
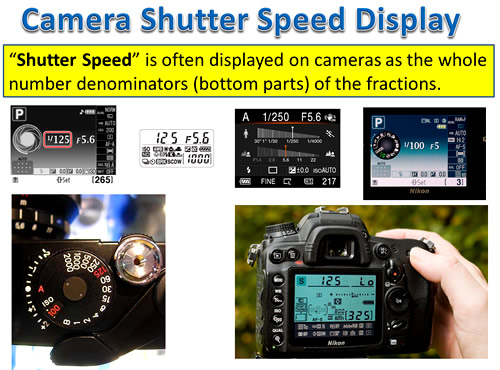
The above pattern where the numbers basically keep doubling is called a “Geometric Progression”.
The important consequence that photographers need to understand, is that each step between the numbers effectively halves the amount of light reaching the sensor.
Eg. If we give the shutter an open/close time which is twice as fast, we only let half as much light in.

Many modern Digital SLR cameras also have in between Shutter Speeds which can be dialled up and used.
For example in between 1/60 and 1/125, there might be speeds of 1/80, or 1/100, which are also available.
These in between values allow finer increments of speed increase and consequent light reduction.
Shutter Speed Guide
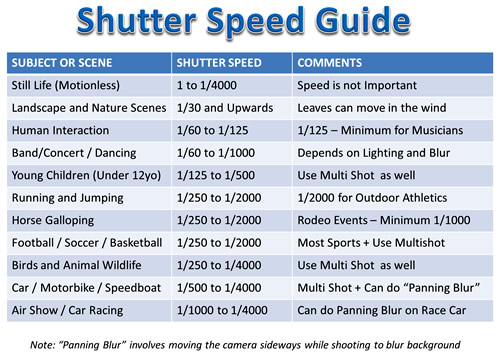
“Panning Blur” involves tracking the moving subject with the camera using multishot mode.
This creates motion blur in the background to give the viewer a sense of the speed.
Eg. For Panning Blur on a Runner in the Park, use speeds of 1/30, 1/60, or 1/100 so that the subject is captured, but the background is blurred.
The following video shows an example of how to do “Panning Blur”.
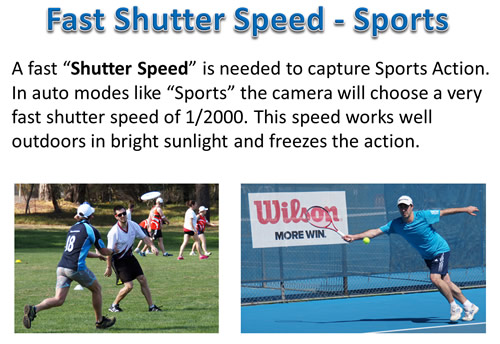
Fast Shutter Speeds for Sports
Capturing the action in Sports can be a trade off between freezing the action, and having enough light coming in through the shutter to get a good clear picture.
Outdoors in bright sunlight we are usually okay, and if we set our camera to “Sports” Mode, it will use a very fast speed like 1/2000 and get good clear shots.
Outdoors it is even better to use full Manual Mode and do higher shutter speeds like 1/3200, 1/4000, and possibly even 1/8000 if your camera can handle these and still produce good quality bright shots.
That way you are guaranteed of freezing the action, and also removing any blur that might come from your hands shaking the camera. Even the slightest shaking when being zoomed right in can make a photo blurry.
So the highest shutter speed possible is always the way to go, even with modern 5-axis auto stabilized cameras like the Sony A99II.
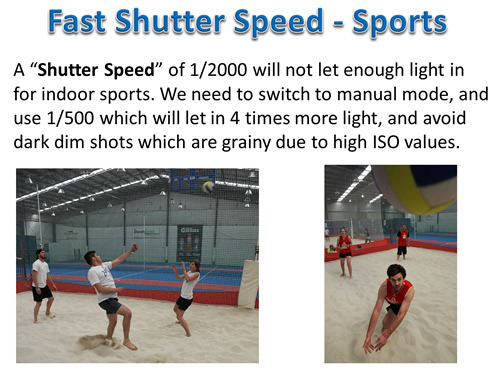
However for Indoor Sports, even if the stadium appears to have good lighting, a Shutter Speed of 1/2000 can make our shots come out too dark.
You can try shoot at 1/2000 and increase the Camera’s ISO Brightness to compensate, but be aware that high ISO beyond 400 can often introduce a lot of noisey graininess into photos. This graininess can be partially removed afterwards in Adobe Lightroom, but it is best to avoid having to do this if possible.
We need to remember that our human eyes adjust extremely well to reduced lighting conditions, but cameras do not!
If in “Sports” or “Auto” mode, we take an indoor shot, and it comes out too dark, then we will not be able to use our camera in automatic mode.
In these situations we can do some basic mathematics and figure out that 1/2000 + 1/2000 = 2/2000 = 1/1000.
This means that if we reduce shutter speed from 1/2000 down to 1/1000 we will get twice as much light onto the camera’s sensor.
If we change 1/2000 to 1/500 we will get four times more light, and reducing 1/2000 down to 1/250 will give us 8 times more light.
We will need to put our camera into either “Manual” mode “M”, or “Shutter Priority” mode “S” to be able to make these changes.
The trade off will be that we might not freeze the action perfectly, but sometimes a slightly blurred ball can help show some fast movement in the photo, and so it is actually a good thing.
Eg. Sometimes a slower Shutter Speed which does not totally freeze the action is good for two reasons:
Firstly it will let in more crucially needed light if shooting in an indoors situation.
Secondly having some blur gives a sense of fast movement occurring as in the “One that Got Away” Beach Volleyball action shot below:
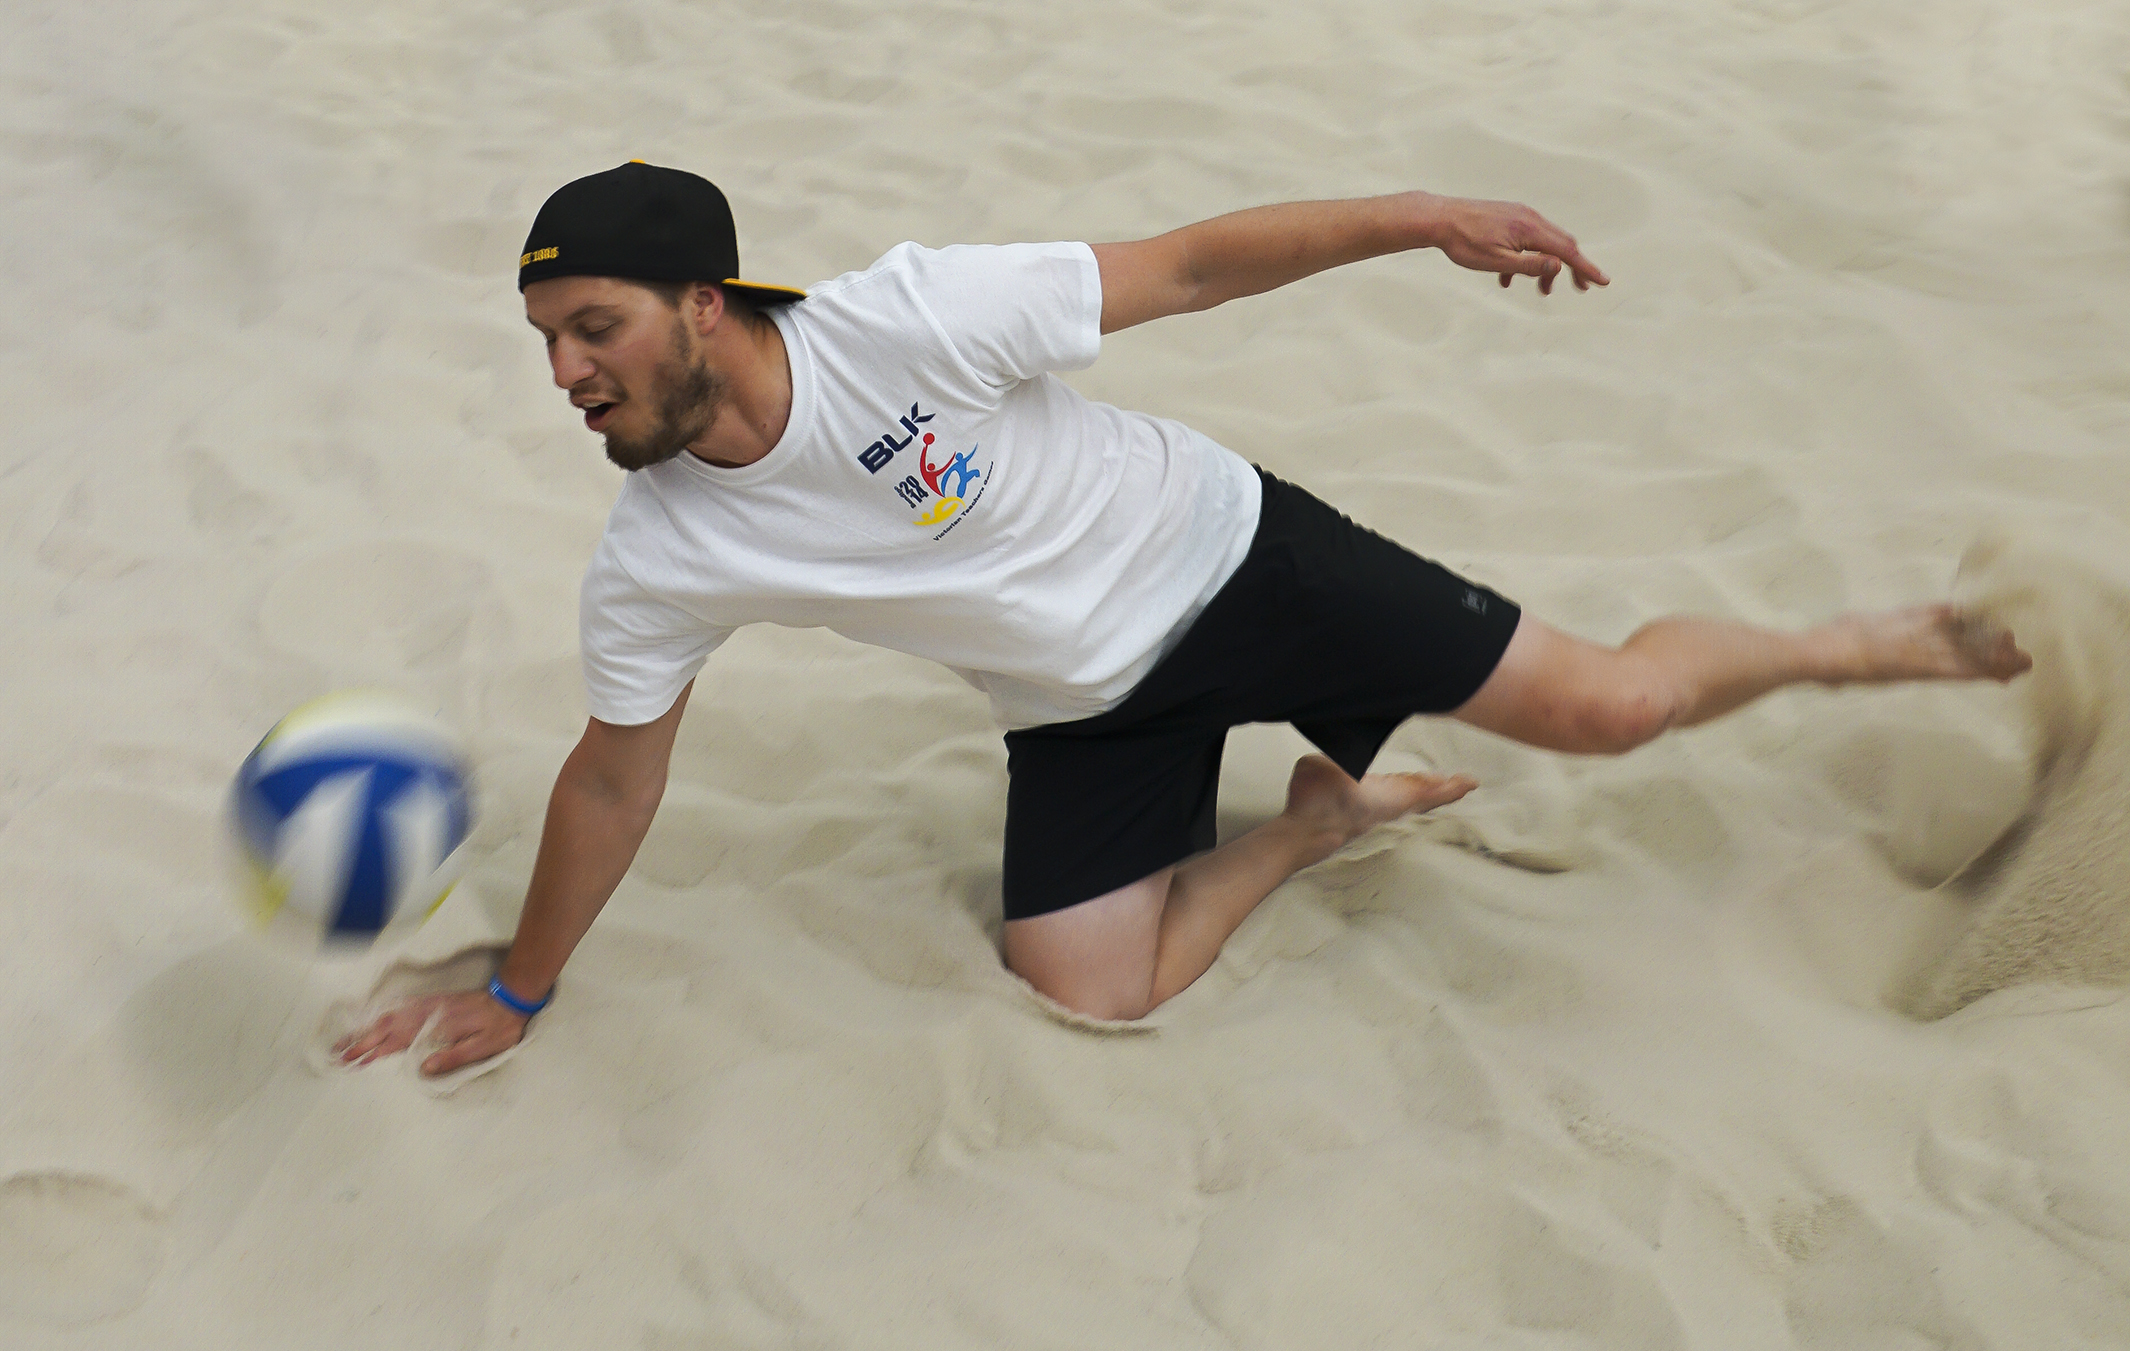
(Click Image to View Full Size)
Shutter Speed and Lens Aperture
A Faster Shutter Speed will let us freeze the action, but will let less light into the camera.
In bright daylight sports this will probably not be a problem as there is plenty of bright light available.
For sunny outdoors, we can capture action sports using a cheap f3.5 to f5.6 Zoom Lens and a speed of 1/1000 to 1/2000.
However for indoor sports, with less light, using a high / fast shutter speed to freeze the action can result in very dark pictures.
This is because we do not have enough light entering the camera when the shutter speed is higher than 1/250.
Increasing the ISO Light Sensitivity to lighten up the photo, can often result in ugly dotty grainy effects on our photos.
The only solution is to get more light in using a wider aperture, and for this we need an expensive f2.8 lens.
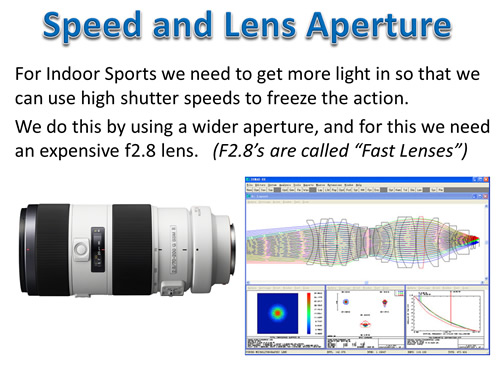
This is why f2.8 zoom lenses, and f1.4 portrait lenses are called “Fast” Lenses.
It is because these lenses can supply enough light using their wide open apertures to allow us to use a high shutter speeds indoors of 1/500, 1/1000, and even 1/2000.
f2.8 Fast Zoom lenses are very expensive due to the amount of high precision optical components and electronics inside them: eg. $2500 to $15000 to $45000 and beyond.
These lenses can be used for both Indoor and Outdoor Sports and are usually White in Color, and look like big “Telescopes” or “Bazooka Guns” mounted on cameras.
The other great thing about expensive f2.8 zoom lenses is that they can also be used for shooting high quality clear photos and videos indoors.
Using Burst Mode for Sports
For fast moving ball sports, especially Tennis and Volleyball, a lot of shots will be unusable because the ball moves so fast it is often out of frame by the time the camera fires.
The solution to this issue is to make sure that “Burst Mode”, or “Multi Shot” or “Rapid Fire” is turned on, so that several photos are quickly taken in a row, while the camera makes a machine gun type sound.
We can then pick the best photo from the multi shot sequence and use that one in our photo album.
Most cameras have a rapid shoot preset “Burst”mode that can be dialled in, and/or they have “Sports” as one of their Scene Modes, and “Sports” mode will automatically turn multi shot on.
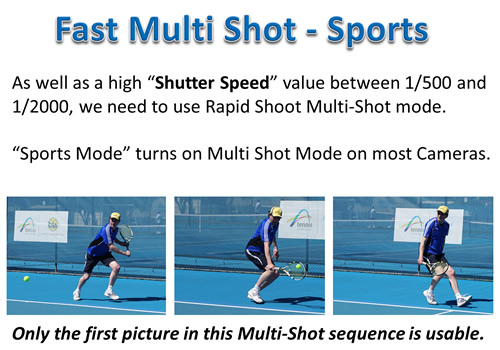
Make sure Burst Mode is used for all Sports Photography, not just Tennis and Volleyball. Having a full sequence of action is always going to give you the best chance of capturing a great shot.
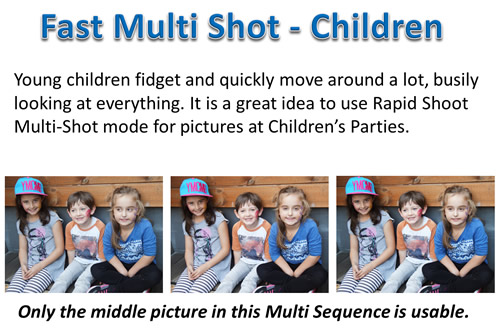
Burst Mode Multi Shot mode is also very useful to use at young Children’s Parties.
Kids move around a lot and are very easily distracted. It often takes several shots to get one where they are all sitting still and looking at the camera.
Cameras for Sports Photography
The following discussion covers various Sony cameras that can be used for Sports Photography.
This includes the Sony A55, Sony RX100, A77II with Minolta Lens, Sony A77II with Sony Lens, Sony A99II, and Sony A9.
The sequencing of the cameras in the list above is from cheapest to most expensive.
Sony A55, A57, A65 Series
These are old cropped sensor APS-C cameras, so any lens you put onto them is actually 1.5x more powerful.
Buying one of these old cameras second hand, with the Sony DT 18-250mm or the identical Tamron 18-250mm lens gives a good beginners sports setup for under $1000 Australian ($780 US).
With a bit of luck in the auctions on Ebay you might even get this setup for as low as $550 Australian ($430 US).
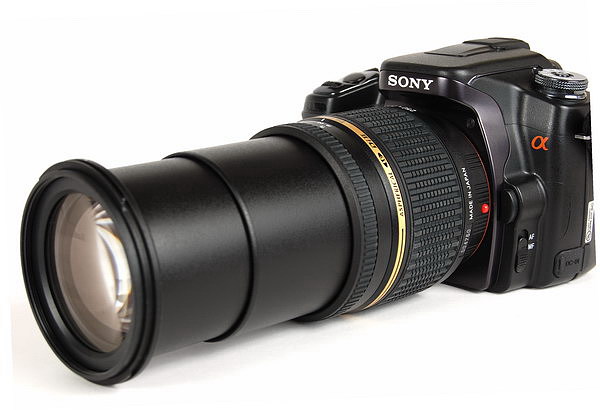
An 18-250mm lens on an old cropped camera like the A55, 57, 58, or 65, has a 35mm Full frame equivalent of 27-375mm and so gives a great range for Sports Photography.
My first Sports Photography setup was an A55 with the Sony DT18-250mm zoom lens.
The outdoor images were reasonable, but with the Aperture shrinking from 3.5 to 6.3 as you zoom into a subject, it was not very good indoors.
Here is a typical sports image taken with this camera setup.
(Click Image to View Full Size)
Typical Camera Settings:
Aperture F5.6 at 135mm Zoom
Shutter 1/2000th
ISO 800
We highly recommend to Post Process JPG images in Lightroom and Photoshop to reduce ISO grainey noise and sharpen up what will probably be fairly soft images straight out of the camera.
Sony RX100 Series
The Sony RX100 is a very compact high powered pocket camera. It has often been voted the best compact camera that you can buy.
The latest model is the Sony RX100V that can be obtained new for around $1100 Australian ($860 US) on eBay; older models can easily be purchased for $400 to $500 Australian ($310 to $390 US).
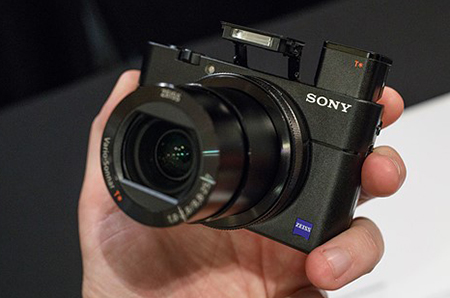
(Click Image to View Full Size)
The RX100V is a very high performance compact pocket camera. It even has a pop up viewfinder which is essential for outdoor sports photography.
It has a 1 inch 20.1MP sensor, 24-70mm equivalent F1.8-2.8 Zeiss lens, and 24fps burst shooting in both JPEG and Raw with full autofocus and autoexposure.
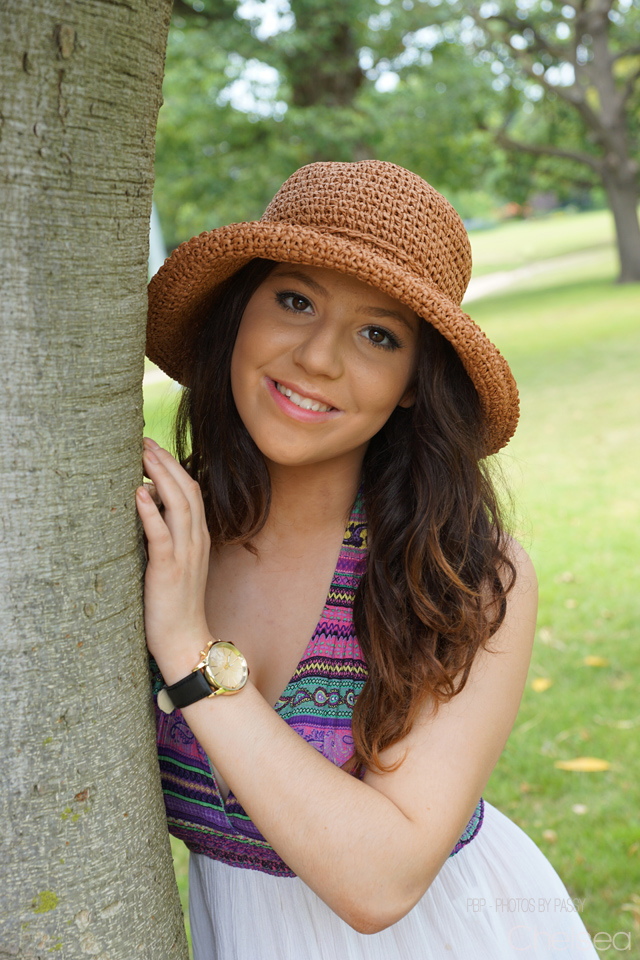
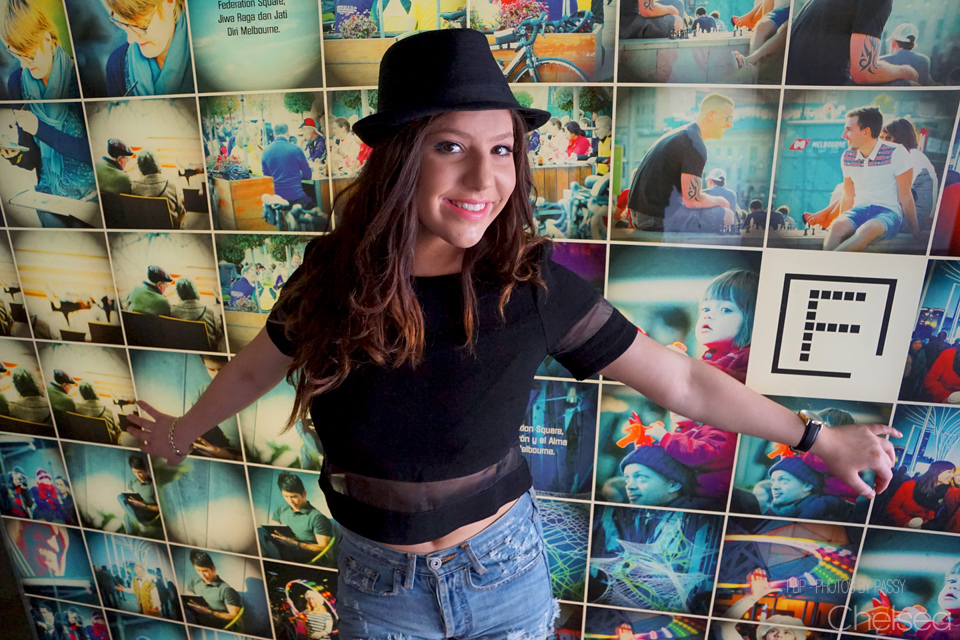
We have found that set into Portrait Mode it is a brilliant people pictures camera, and used it for all of our People Pictures of sports fans at the Australian Open tennis.
Click either the image or link below to check out an album of these people pictures taken with the Sony RX100V.
Australian Open People Pictures
Given its 24fps burst mode specification, the camera should be good for freezing fast action and getting sports photos.
We tried out the RX100V compact camera for some sports action tennis photos.
We used the camera’s SCN Sports Mode which seems to automatically set aperture to F2.8 and Shutter Speed to 1/1600th.
ISO in bright sunlight conditions then seems to be manipulated by the camera between 160 and 320 to get a bright exposure.
The camera shoots at up to 24 fps with tracking AF and so it has no problem freezing the action.
However we found you need to stand right on the court sidelines fence, and be no more than 3m to 4m away from the player to be able to get reasonable results.
Close proximity to the subject is necessary because the camera only has a 24-70mm zoom lens. Usually for sports photos on DSLR cameras a 70-200mm zoom lens is used, and so the RX100 zoom lens is very small and does not have much reach. At F2.8 the lens is fast and therefore should allow enough light at high shutter speeds to capture reasonable sports images.
The images looked okay previewed on the camera; however we found on the laptop zoomed in they were a bit “pastey” with smudgey skin features on players faces like one would expect at very high ISOs. Even though the images were shot by the camera at ISO 160 to 320, they were a bit overly bright straight out of the camera and looked like they had been shot at ISO 1600 or 2000.
HOWEVER, cropped and adjusted in Photoshop (reduce brightness of the camera exposure), and then put onto a phone the images are quite acceptable.
You can check out our small collection of sample images taken with the Sony RX100V and RX100II by clicking on either the image or link below.
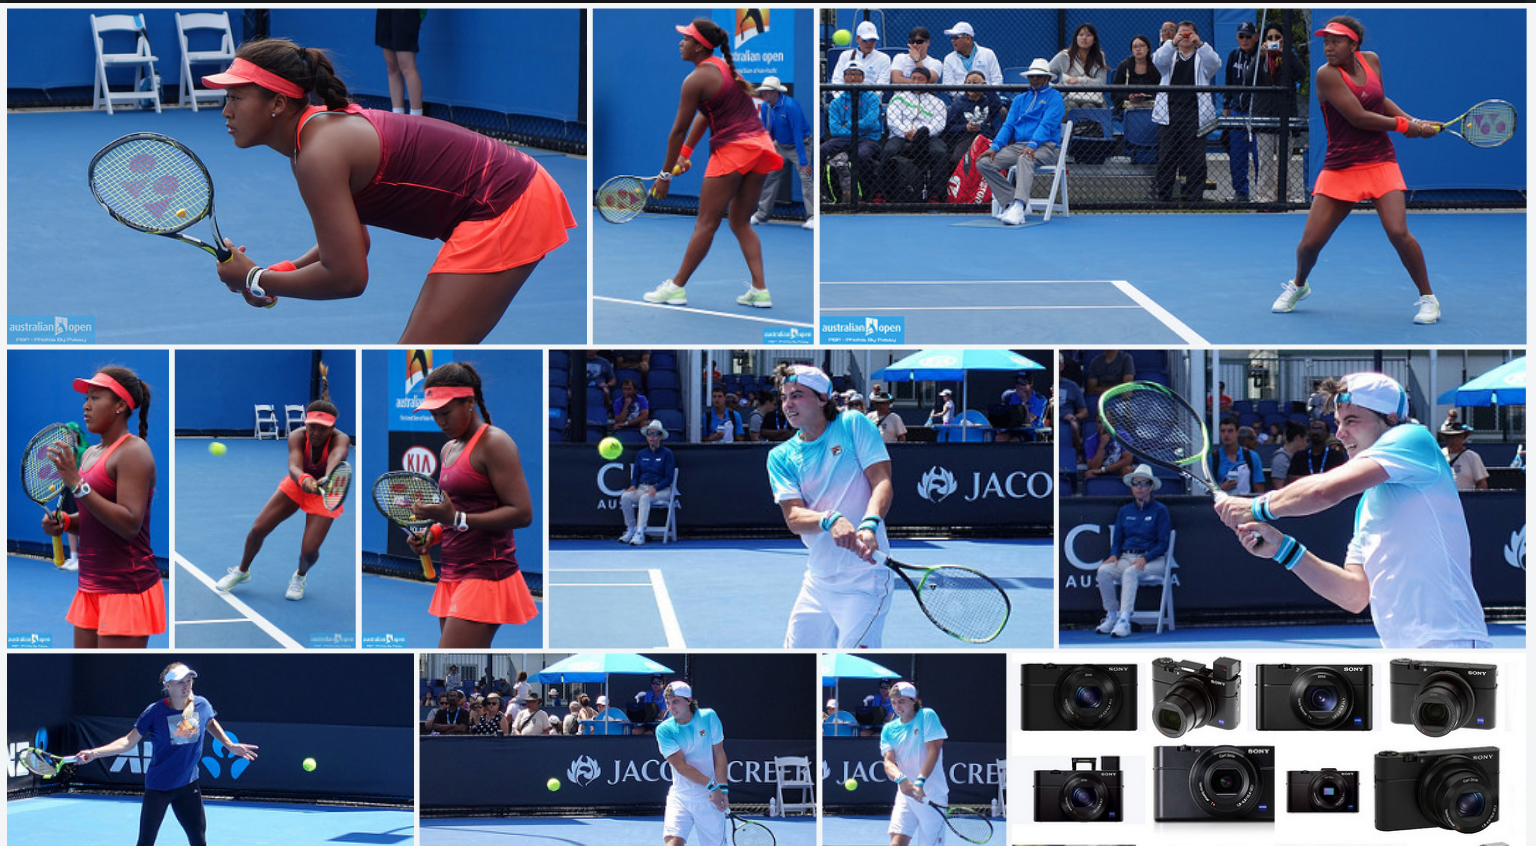
The female player in the orange was taken with the Sony RX100II and the photos of the male player were taken with the RX100V.
The resultant quality of the images indicates that the RX100II is quite adequate at close range.
It is also available for about one third of the price of the latest RX100V.
So our advice would be to just get an RX100II camera for doing some snaps if cost is an issue.
Verdict on RX100V Camera
The sports photos capablity of the RX100V is reasonable, but not good enough to warrant buying this camera just because you want a compact sports camera.
However the RX100V (and the earlier RX100 models) are great all round pocket cameras, and so if you have one, by all means try it out on Sports Photos.
As we mentioned previously, if you just want to take some close range sports pictures, and video is not important, then get the RX100II as it only costs a few hundred dollars (eg. about one third the price of the RX100V).
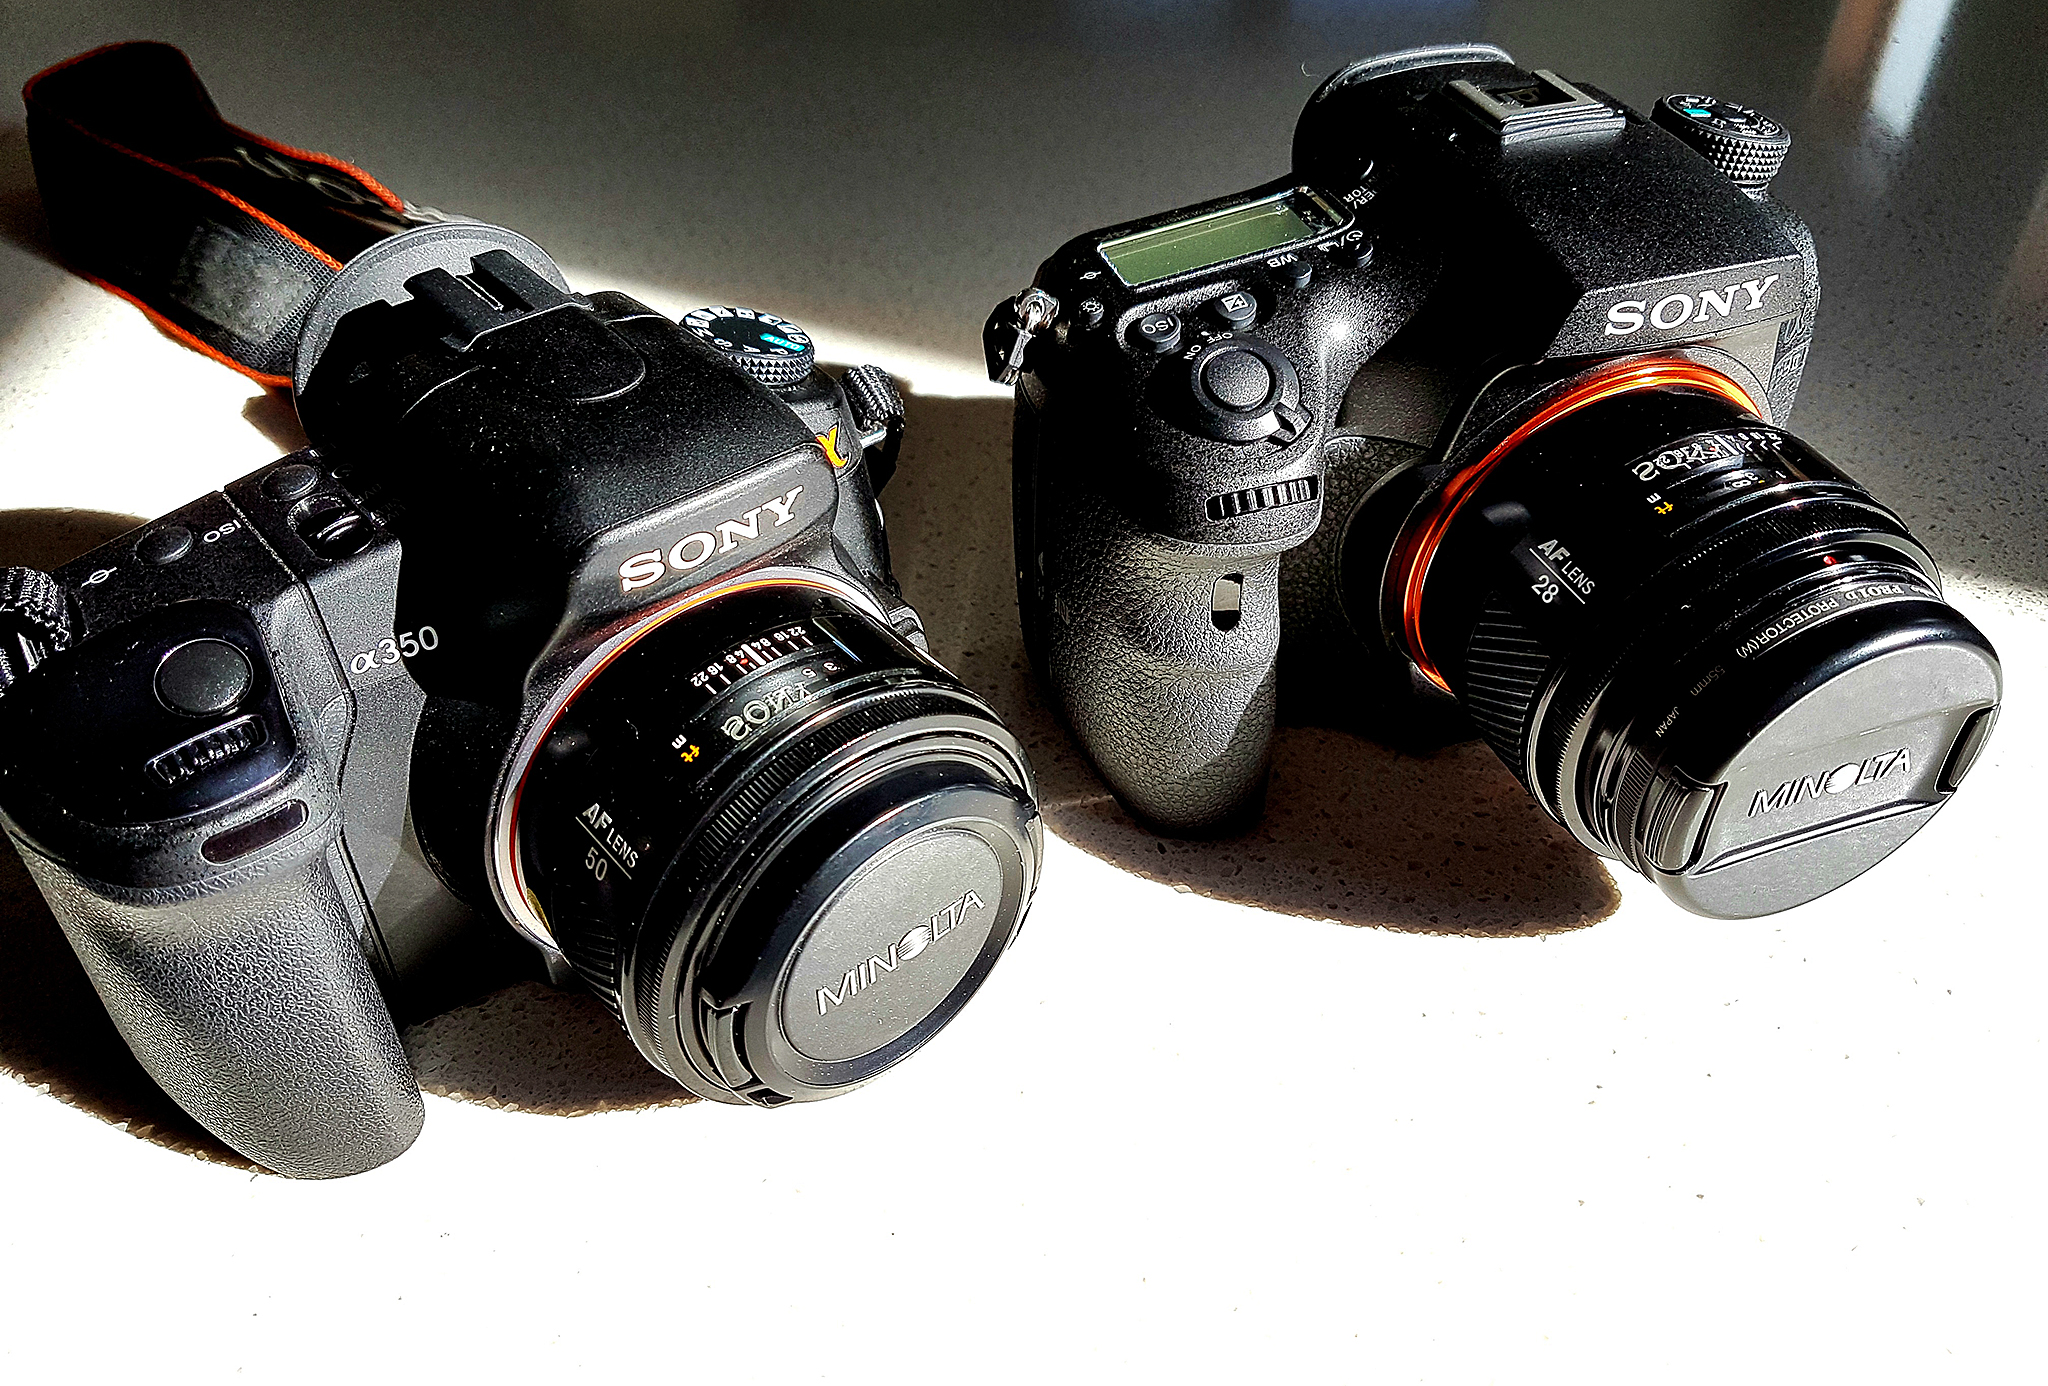
Minolta with A77II
For photographing the Australian Junior Open we used our “old” setup for Sports Photos.
This consisted of the Sony A77II camera with the 1980’s Minolta 80-200 F2.8 APO high speed lens.
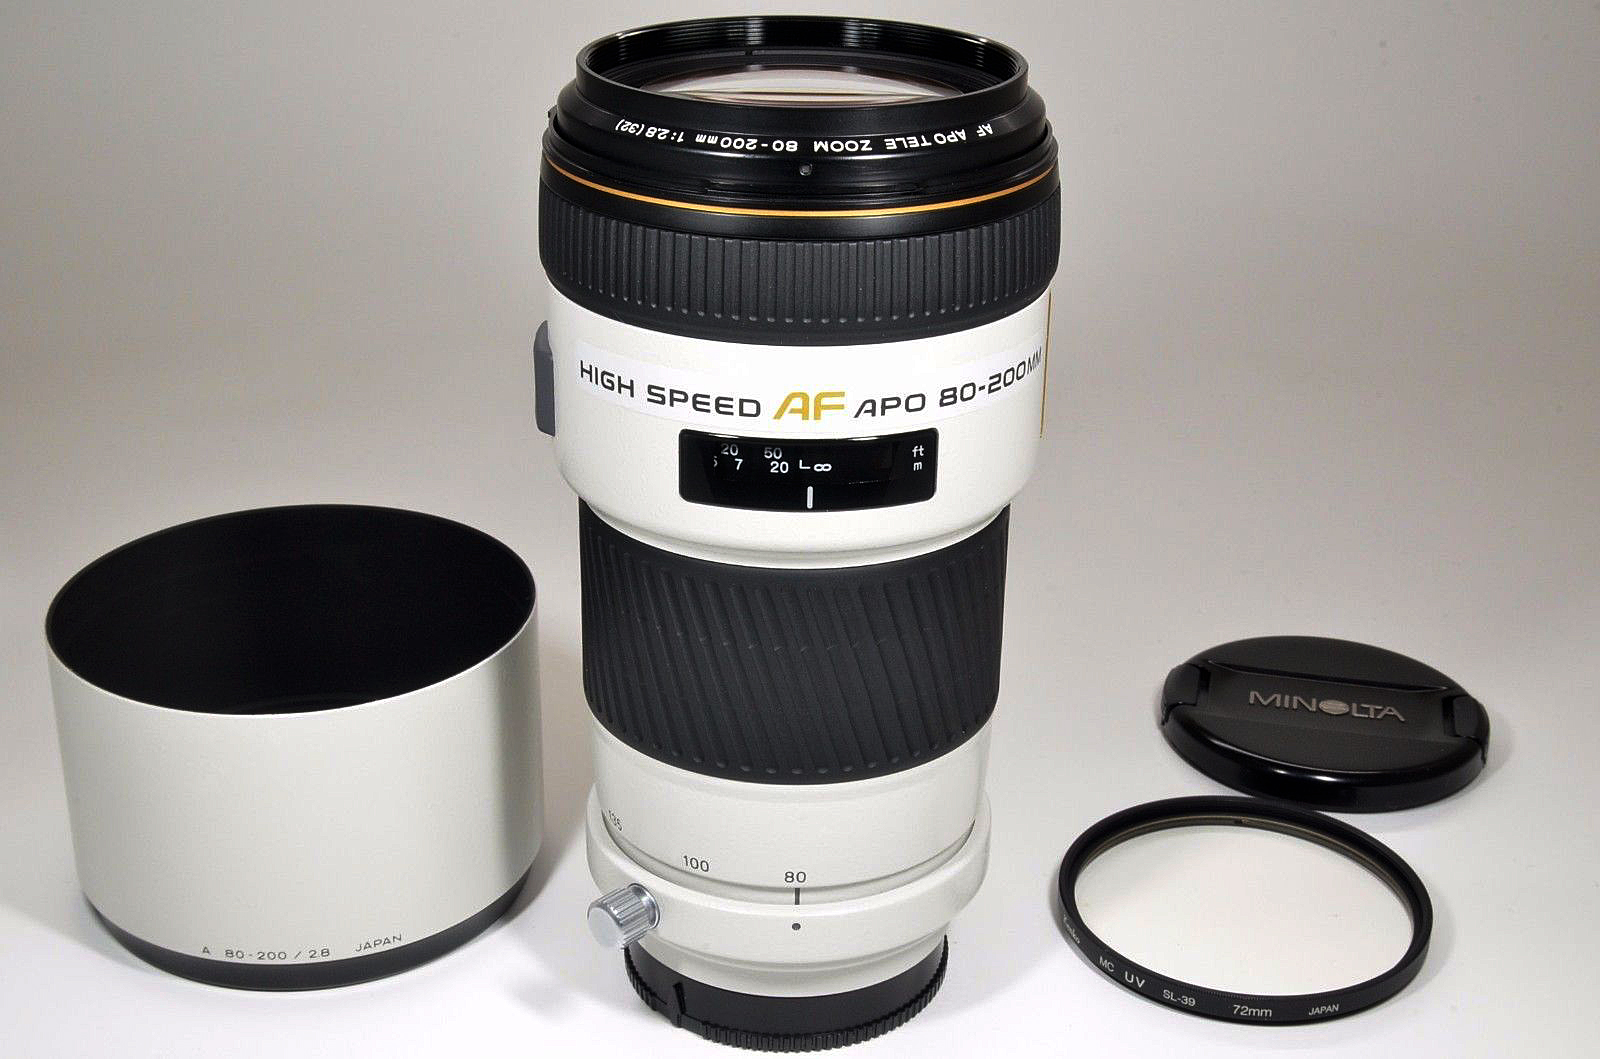
(Click Image to View Full Size)
You can check out the resulting Tennis photos from this fabulous vintage lens at the link below:
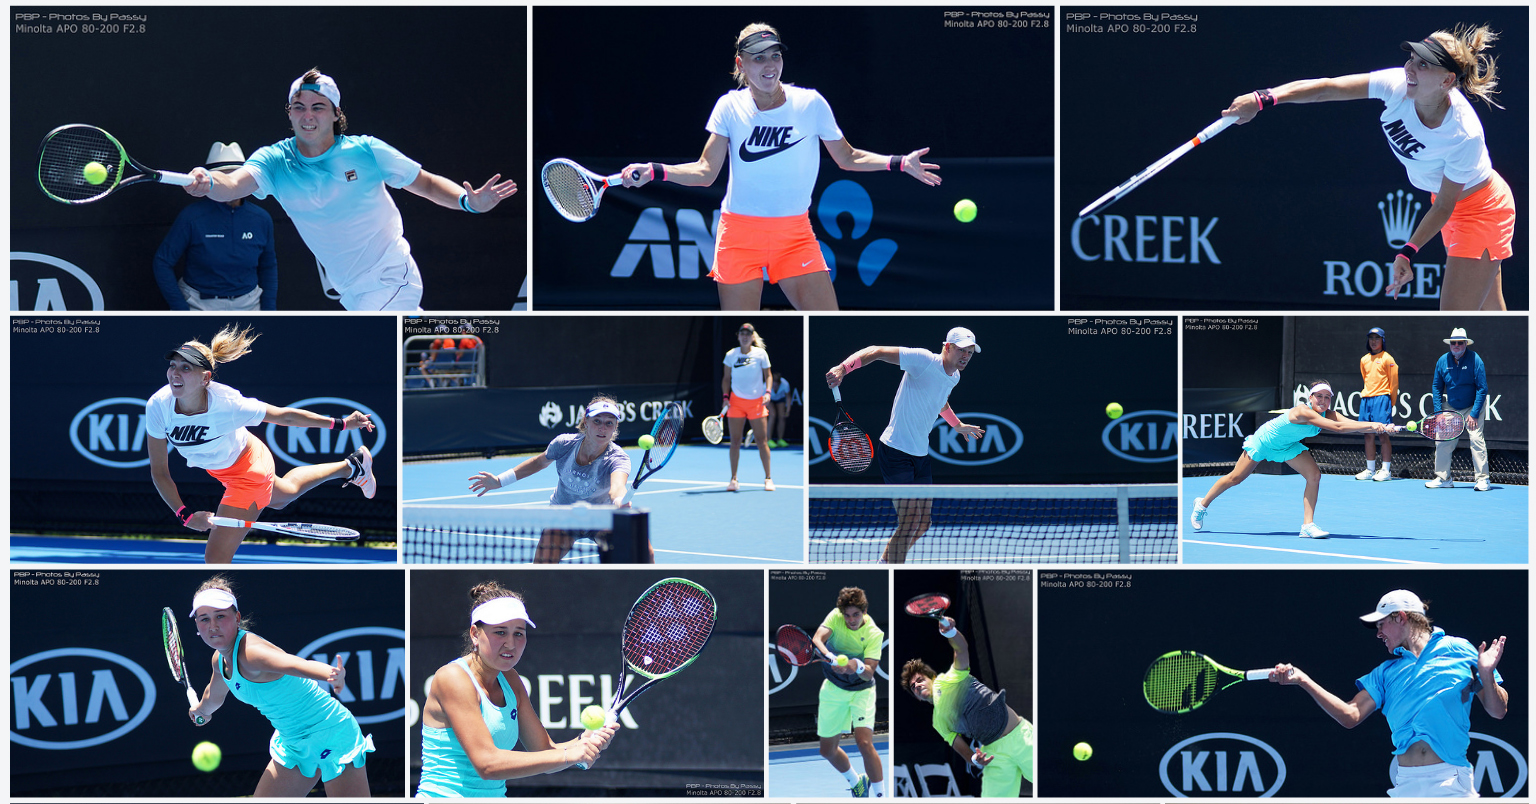
Minolta 80-200 Lens Tennis Photos
The setting we used on the Sony A77II camera was “M” manual mode, rather than SCN Sports mode.
Shutter Speed was always kept at 1/2000th, Aperture at F2.8 or F3.5 and sometimes F4.0; ISO was manually set at either 320 or 250 depending on sunlight brightness.
The A77II Minolta setup can get great photos, but the “hit rate” is not as good as the state of the art Sony A99II with Sony 70-200 F2.8 G2.
We had a number of unusable images because the camera focused on the advertising signage behind the player and so the player ended up blurred.
This happened even though we were set on AF-C continuous focus with one of the tracking focus modes turned on for the A77II.
The way to overcome this is to really concentrate on the green AF squares while shooting and make sure they are on the player, and do not jump onto background signage.
The average hit rate with the A77II setup is about 1 in 10 shots being satisfactory, whereas the A99II setup can supply about 1 in 6 perfect shots.
The thing to keep in mind is that the A99II sports kit costs about $7000 Australian ($5700 US);
whereas a brand new A77II can be had for about $1500 Australian ($1200 US), and a mint condition second hand Minolta 80-200 F2.8 lens for $900 Australian ($730 US).
So basically we are looking at a $2000 AUD ($1500 US) setup with the A77II versus a $7000 ($5500) setup with the A99II.
The equivalent mirrorless setup would be either the Sony A7RII, A7RIII, or A9 and be around $7000 to $10,000 Australian, ($5500 to $7800 US).
So if you are on a budget and want to do some sports photography, then we recommend the Sony A77II with Minolta 80-200 F2.8 lens.
This setup is not just great for sports, but also great for general walk around, portrait, and low light music photography.
If you want to see a full album of our Minolta 80-200 F2.8 APO images, (not just Sports images), then check out the Flickr album at the link below:
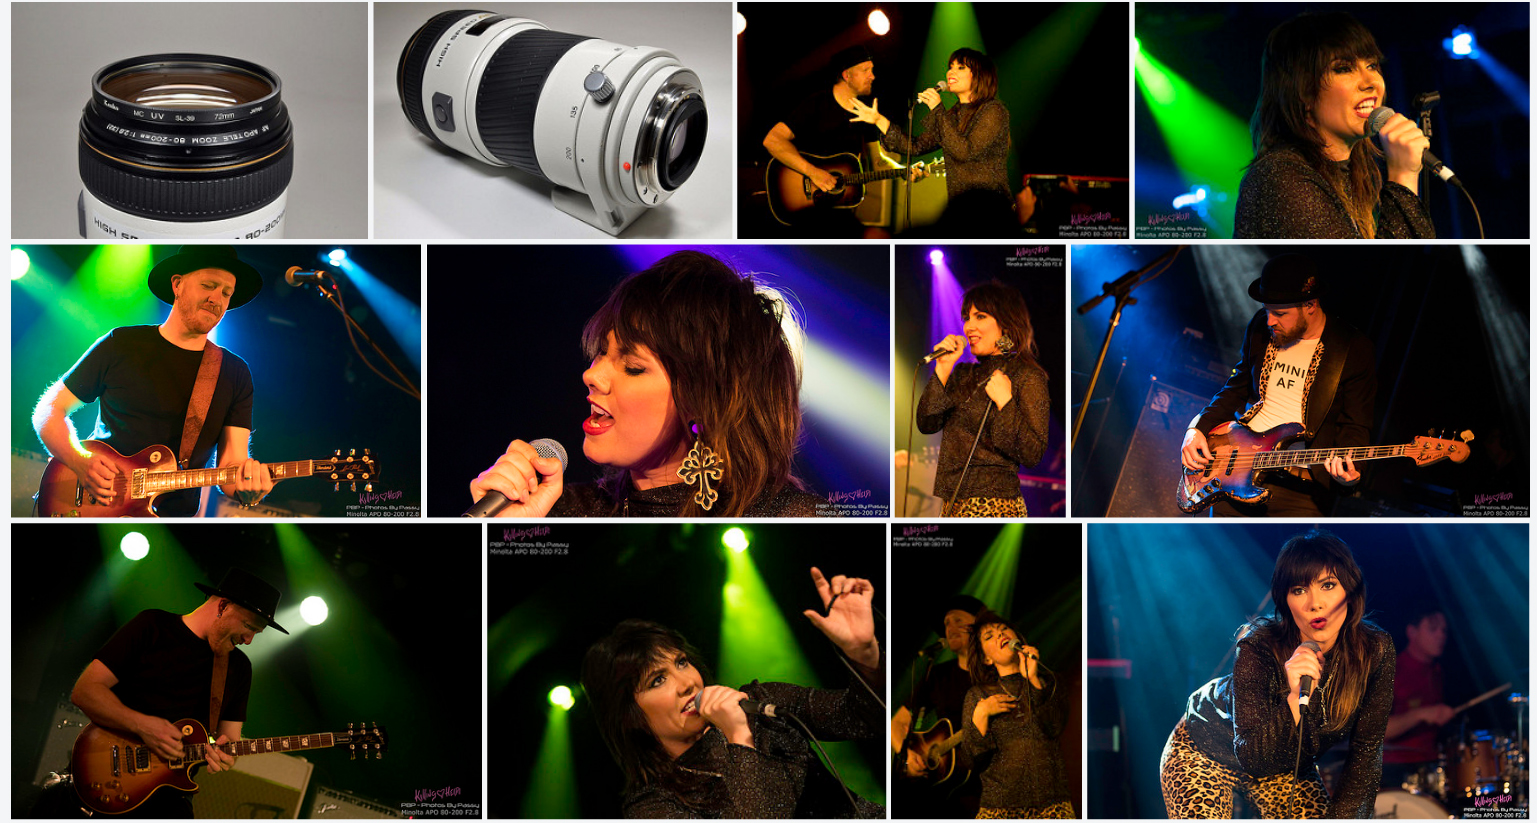
Minolta 80-200 Lens Assorted Photos
As shown in our photo album, The Minolta 80-200 lens is also usable on full frame Sony cameras like the A99 and A99II. It is a lifetime keeper!
The Minolta 80-200 F2.8 lens could also probably be used on Sony A7x mirrorless cameras with the Sony LE-A4 adaptor.
No matter what Sony setup you go with, you can be assured it will be great for high speed sports photos.
Sony A77II 70-200mm F2.8
The Sony A77II with the Sony 70-200mm F2.8 G2 Lens is an awesome combination for Sports Photography.
Because the A77II is a cropped sensor we essentially have a factor of 1.5x giving 100-300mm full frame equivalent zoom power.
The A77II is a 24MP camera and performs really well outdoors with reasonable cropping ability on shots.
The A77II has a special focus tracking option, but we did not have much luck using this at the Tennis.
You basically set the Sony A77II autofocus mode to “Lock-on Expand Flexible Spot” as shown in the video below.
There is a movable slightly bold black focussing rectangle that you need to lock onto the moving object. Why did Sony not make this square a different colour to black: it is so hard to see when chasing action with the camera).
Perhaps the Lock On function works better for Football and Soccer than for Tennis.
The price of the A77II Sports kit is a step up at around $4500 Australian ($3500 US).
Eg. A brand new A77II can be had for about $1500 Australian ($1200 US), and a Sony 70-200 F2.8 lens for around $3000 Australian ($2400 US) brand new.
For doing Surf Photography the Sony “2x Teleconverter” SAL20TC costs an additional $840 Australian ($650 US) but triples** the zoom range to 200mm to 600mm and gives usable images.
** The Zoom Range is tripled because the 70-200 lens is doubled by the 2X Teleconverter, then increased a further 1.5 times due to the A77II cropped sensor.
2 x 1.5 = 3 times increased zoom power when compared to having the 70-200 lens on a full frame camera like the Sony A99II.
Check out some Surfing Photos done with the A77II using the 2X Teleconverter at the link below:
Check out some Tennis Photos (without any Teleconverter) done with the A77II camera at the link below:
Note that in the album of Tennis photos, all of the people pictures were done with the Sony RX100 pocket camera, and not the A77II. All action shots are from the A77II.
Sony A99II 70-200mm F2.8
The Sony A99II is a 42 Megapixels beast of a full frame camera with 5-axis built in image stablisation and is our current “Go To” sports camera.
We use the A99II with the same 70-200 F2.8 lens that we use on the A77II.
The extra megapixels mean there is incredible cropping ability on shots to make close up images that are crisp and clear.
However with the extra quality and possibilities comes a steep rise in price.
The A77II rig as mentioned previously costs around around $4500 Australian ($3500 US).
The equivalent rig (same lens) with the A99II comes in around $7200 Australian ($5600 US).
Does this 60% increase in price give 60% better images ?
As with most technology there is a decline in bang for buck as you move up through the offerings, and we would say the 60% price increase only gives you about 20 to 30% better images.
But the big thing is the cropping ability it gives you and increased yield: eg. We get 1 in 6 good images on average from the A99II, versus 1 in 10 out of the A77II rig.
The Sony A99II is a greatly more complicated camera than the A77II and so setting it up for the first time can be a bit overwhelming.
Thankfully YouTube came to the rescue with this video all about how to set up the A99II for Sports Photography.
Check out some of these Tennis Photos (without any Teleconverter) done with the A99II camera at the link below:
Sony Ax Mirrorless Cameras
Sony’s latest cameras are the A7 and A9 series of Mirrorless cameras.
These Ax mirrorless cameras use a different lens mount to the Alpha A-mount cameras that we use here at PBP like the A77II and the A99II.
The A7RII and A7RIII (costing about the same as the A99II) are basically the same large sensor full frame camera that the Sony A99II is, and so the Sports Photography capabilities on these A7R’s should be about the same as the A99II.
However the A9 flagship mirrorless model is something really special when it comes to Sports Photography. It uses an electronic “virtual shutter” and can shoot at an incredibly fast and reliable 20 FPS Burst Mode. (The Sony A99II shoots 12 FPS in Burst Mode).
This is combined with a 24 Megapixels sensor and hundreds of focal points. It is the most advanced AF system yet to be developed on any Sony camera.
Check out this video showing the quality of images a sports novice can capture from this amazing camera.
Joe Black is a Melbourne Photographer who shot some of the Tennis action at the Australian Open.
He used a Sony A9 and E-Mount 70-200 F2.8 lens with Sony E-mount 1.4x Teleconverter.
Compare his A9 shots in the following album with my shots at the same event using the A99II. You can clearly see the improvement in richness of colour and clarity and crispness.
Joe did shoot at high ISOs of 3200 and 6400 and very high shutter speeds of 1/16000 and 1/32000 to push the limits of the A9. However one could probably reduce these down to 1/4000 and shoot at lower ISOs and thereby obtain negligible background graininess in shots.
The cost of the A9 with the 70-200 lens is about $8000 Australian dollars ($6250 US).
This is about $1000 Australian or 12.5% more than the Sony A99II rig we have here at PBP.
So if you want to get the best possible sports rig, and you have the money to finance it, then the Sony A9 package is the ultimate sports camera for you.
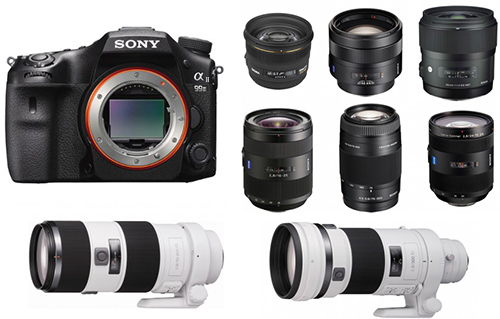
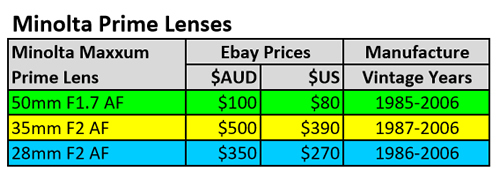
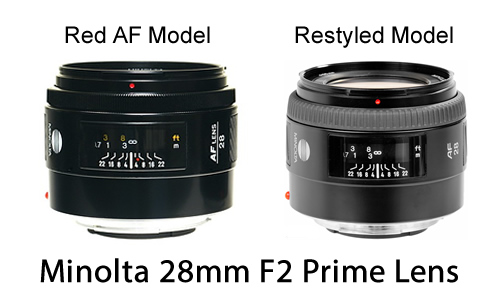
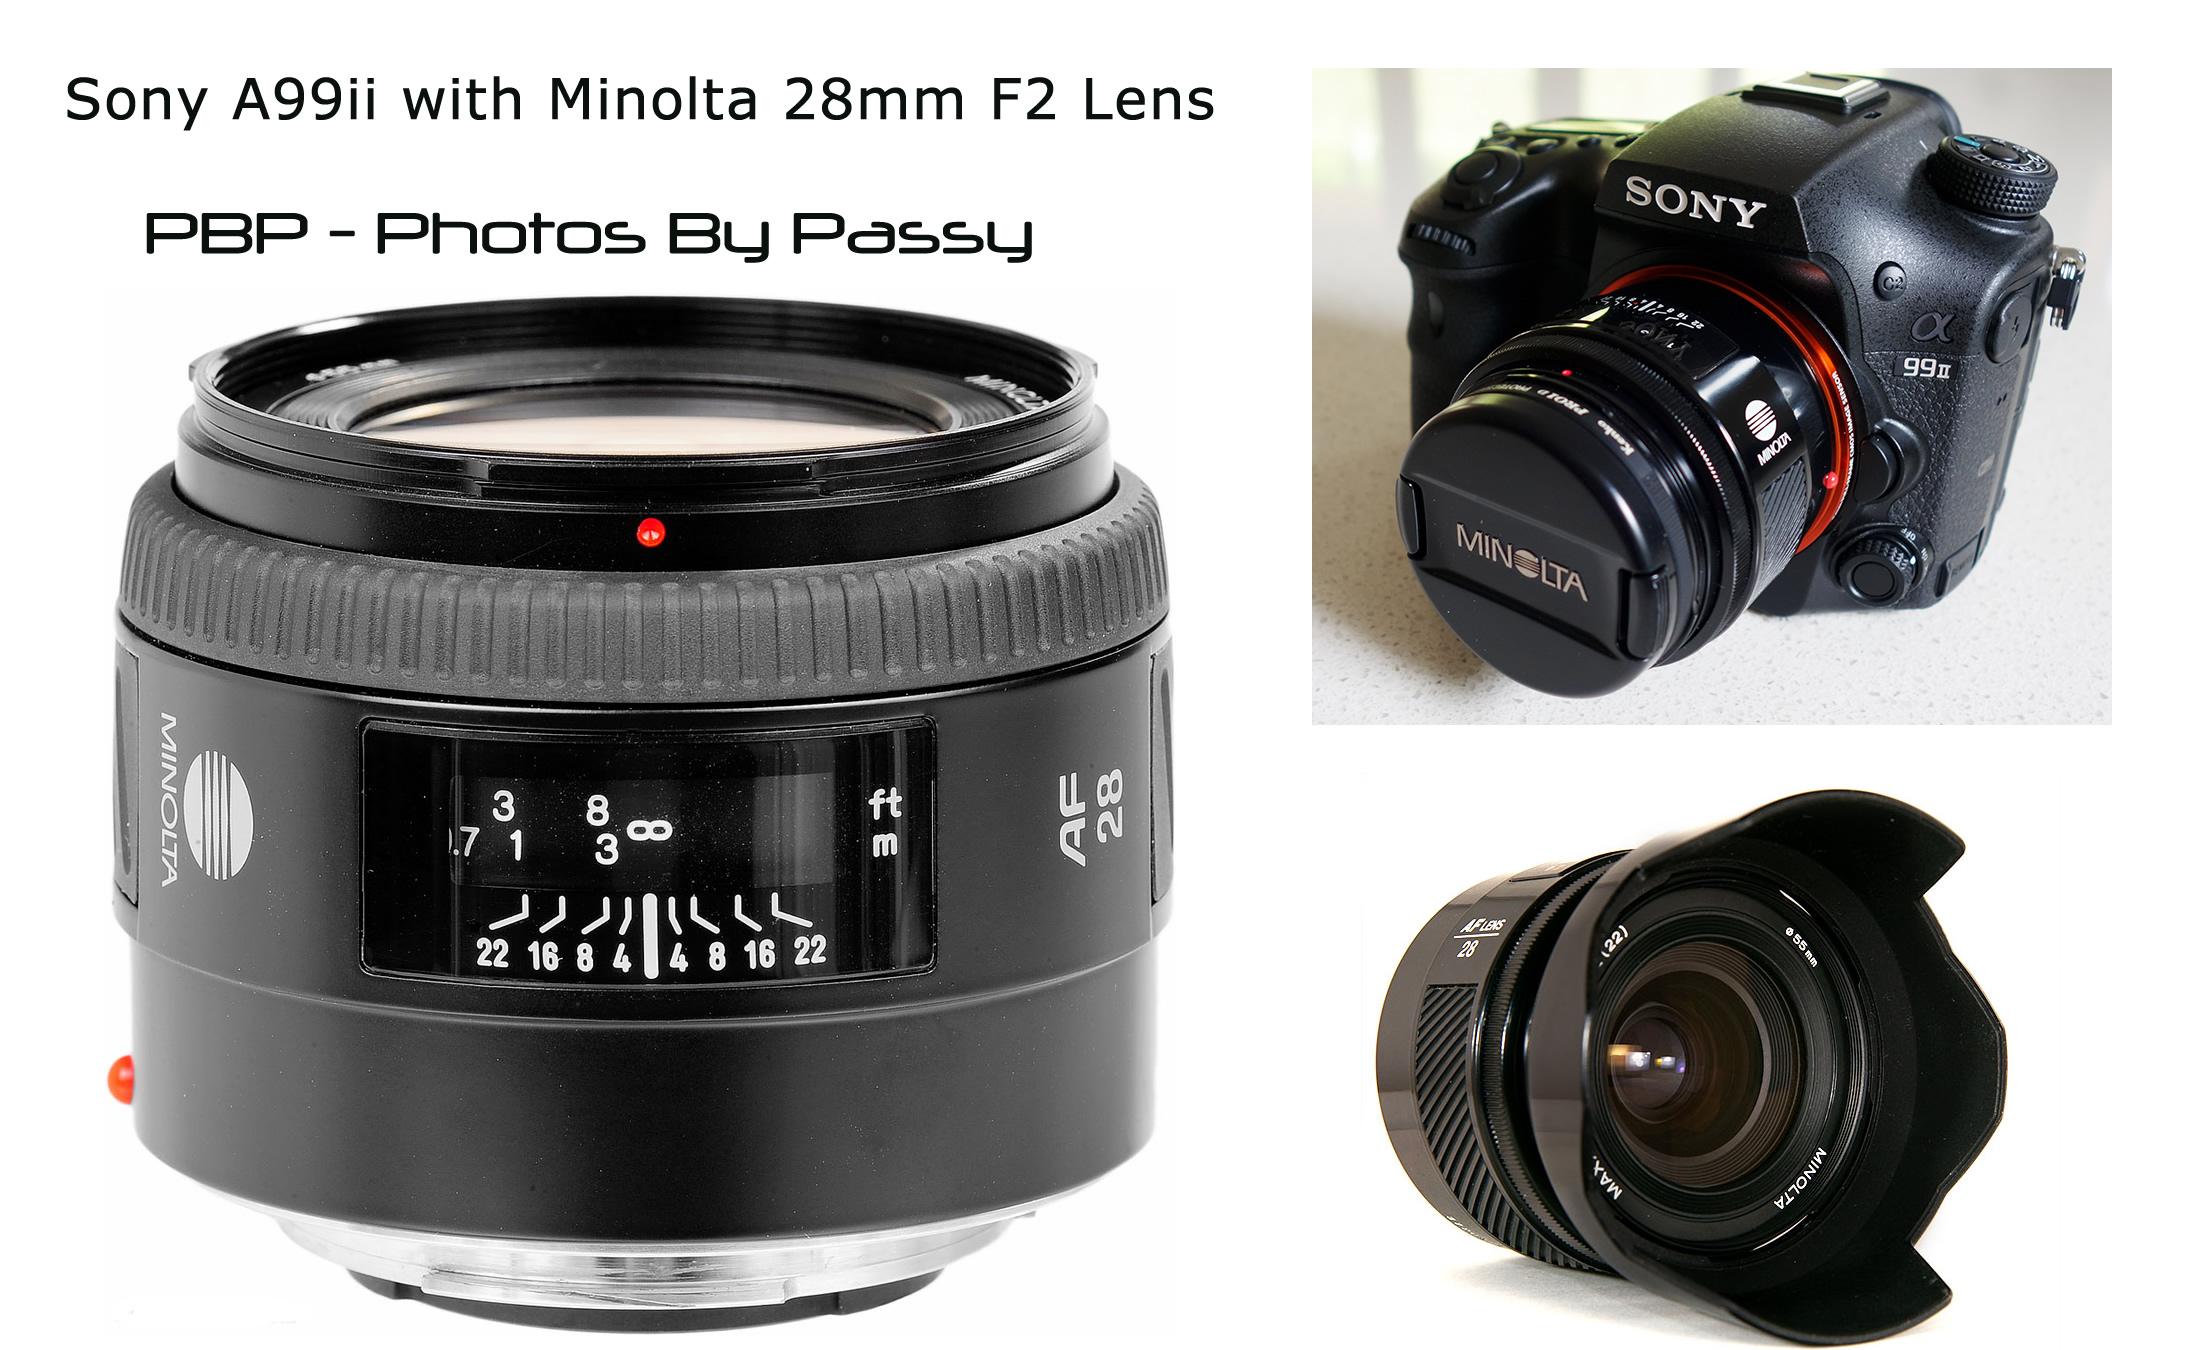
Here at PBP we purchased our A99II months before the A9 was publicised and released. The A99II suits us better for the variety of photography we do (not just sports photos), as it has a much larger 42 megapixels sensor giving amazing cropping capabilities. (The A9 has a 24 Megapixels sensor). We can also use all of our fabulous retro 1980’s Minolta 28mm, 35mm, 50mm, and 85mm prime lenses on the A99II because it is an A-mount camera. However eventually we would love to get an A9 setup for Sports and low light Music Photos. At the moment we simply do not have the ten thousand dollars needed to make the upgrade, and we want to keep the A99II and all of its lenses rather than trade them in.
Also….. Get Insurance!
We have full insurance for our Equipment here at PBP and the best Australian Company for this is PPIB (Professional Photographers Insurance Brokers).
Lenses for Sports Photography
Because Sports Photography requires lots of light to enable fast shutter speeds, then the best Sports Lenses are any that are F2.8 Aperture.
F2.8 Lenses enable both outdoors and indoors photos to be taken, without having to go to very high ISO values to get brightness which can then produce grainey blurry photos.
F2.8 lenses have a lot of glass and sophisticated motors in them, and so they are very expensive. The first F2.8 lens that we started off with was a 24-70mm Tamron F2.8 which is a great lens costing around $1200 Australian.
At the moment we are now using a Sony F2.8 70-200 zoom lens for Sports Photos. A 70-200 zoom should be the first lens that you purchase at a cost of $2000 to $3000 Australian Dollars ($1500 to $2300 US).
Sports Photography is expensive ! The upside is that you will also be able to use the 70-200 lens for low light band photos in big venues. It is also an excellent portrait lens.
When we need further reach for Surfing or Kiteboarding, we use a 2X teleconverter which changes our lens to 140mm to 400mm, but this causes a maximum Aperture of 5.6 rather than 2.8.
The best lenses that professionals use are Telephoto Lenses with no zooming which are called “Prime” Telephoto lenses. These are very expensive eg. $10,000 to $40,000 Australian dollars and upwards.
Typically Professional Football and Tennis Photographers use 400mm or 500mm F2.8 or F4 Prime lenses.
Tips for Different Sports
We have mentioned this previously that if you do not know where to stand, then the best vantage point for a given sport is where the Umpire is located. So try and get close to that position without interfering with the Umpire or spectator views.
Shooting players with the crowd in the background is often not good, because it makes it hard to see the player against a multicolour background of people. That is unless you are in a huge stadium or at a large Football Field, where the crowd will be blurred away in the distance.
Often you will have to sit in the stand with other spectators. If possible get a vantage point looking at the back wall or sight board as much as possible, so that this forms the background. However this has problems with the camera wanting to focus on advertising signage instead of the player(s); be aware and be careful of this.
If shooting outdoors, always try and have the sun behind you. It is possible to shoot into the sun but the results are not nearly as good.
The better the standard of the players, the better the photos will be. In low skilled matches players make awkward movements and pull horrible faces while doing them. Avoid photographing such games if you can.
Check out our album of selected Sports Photographs at the link below.
Album of Selected PBP Sports Photos
One of the most important rules for getting good Sports Photos is:
ALWAYS SHOOT IN MANUAL MODE WITH CONTINUOUS AUTOFOCUS TURNED ON.
The first couple of times out doing sports it is okay to use the preset “Sports” or “Action” mode on your camera.
Load the images up to Flickr and individually browse them to see the “EXIF” data that tells you what settings the camera used for Shutter, Aperture, ISO Brightness, etc.
But after that always use full Manual Mode. We have supplied a good set of Manual Settings for particular Sports in the next few sections of this article.
From the Sports we have done photos for, here are some specific tips and general camera settings for each of the sports.
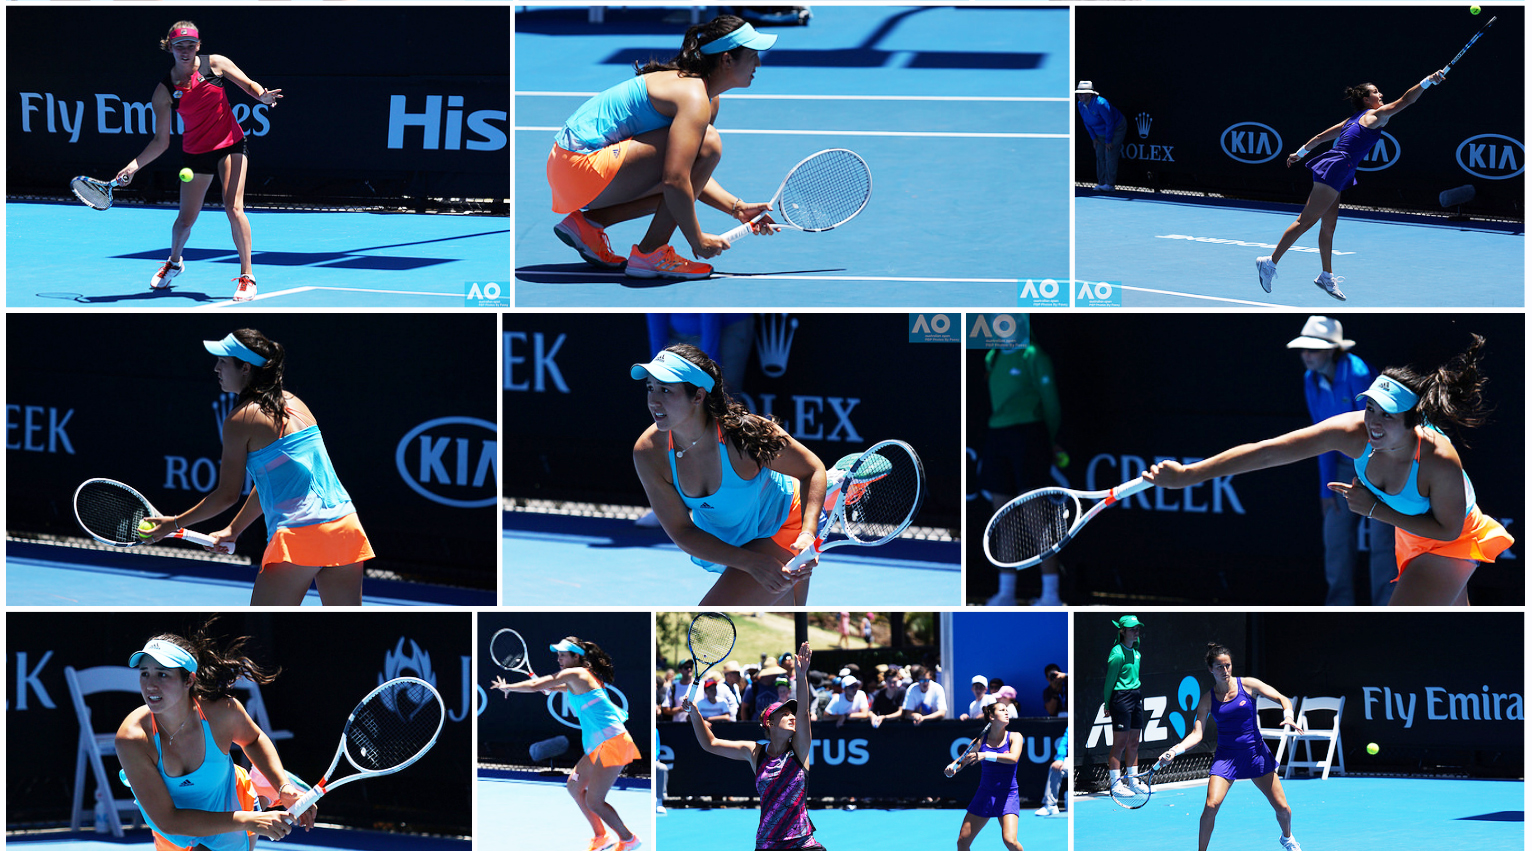
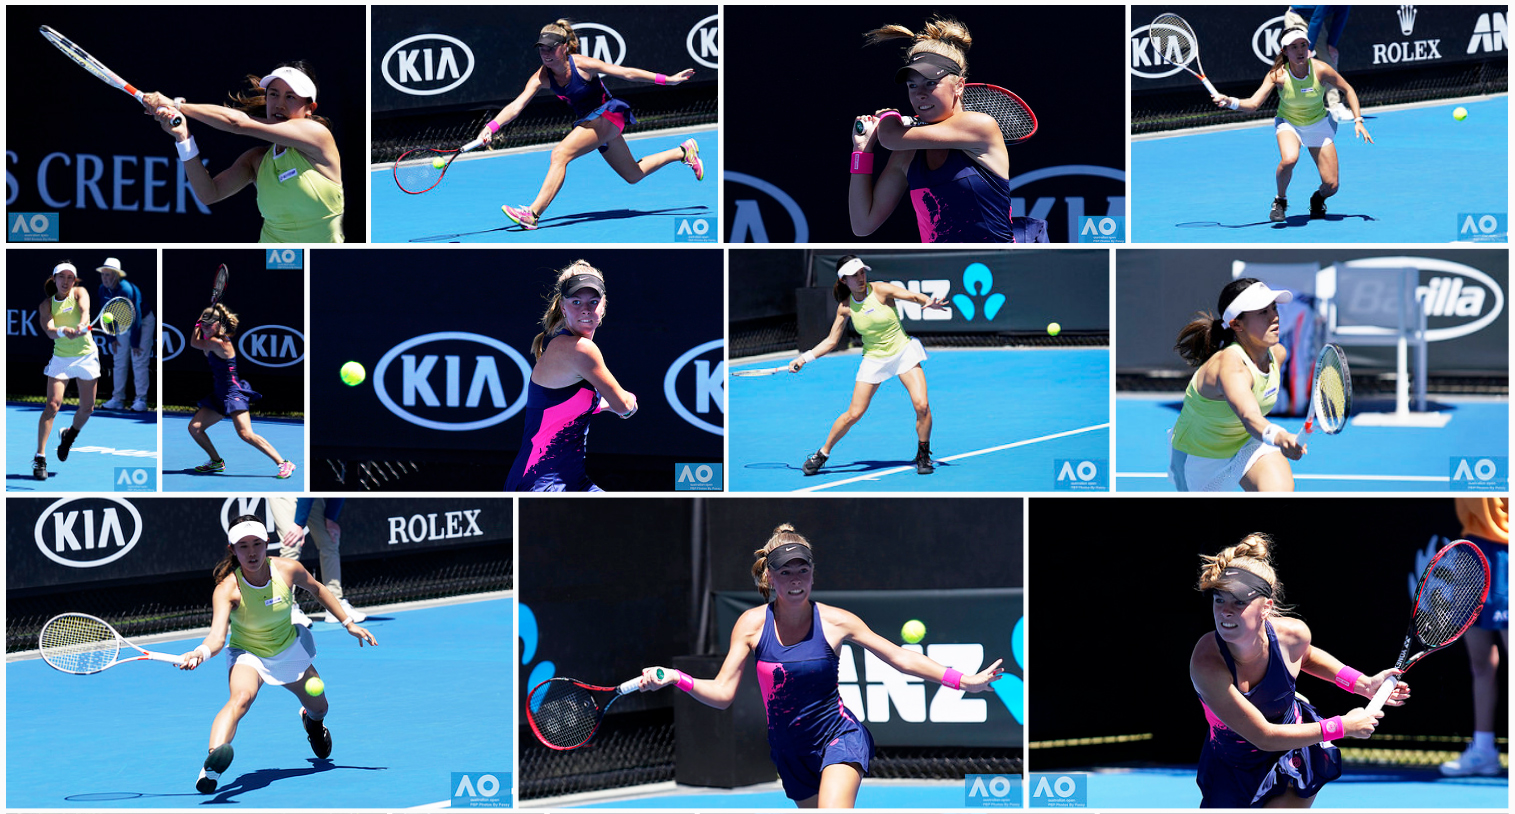
Tennis Photography
One of our own personal favourite places to take photos is at The Australian Open Tennis each summer.

(Click Image to View Full Size)
It comes as no surprise that the best location for shooting Tennis photos is where the Professionals do it from.
The Pros get access to sit courtside on the court just down from the net. That means they can shoot towards the back of the court and get good front on shots of all the action.
We cannot get courtside like this, but we need to think about getting positioned somewhere so we can shoot at the same kind of angles that the Pros do.
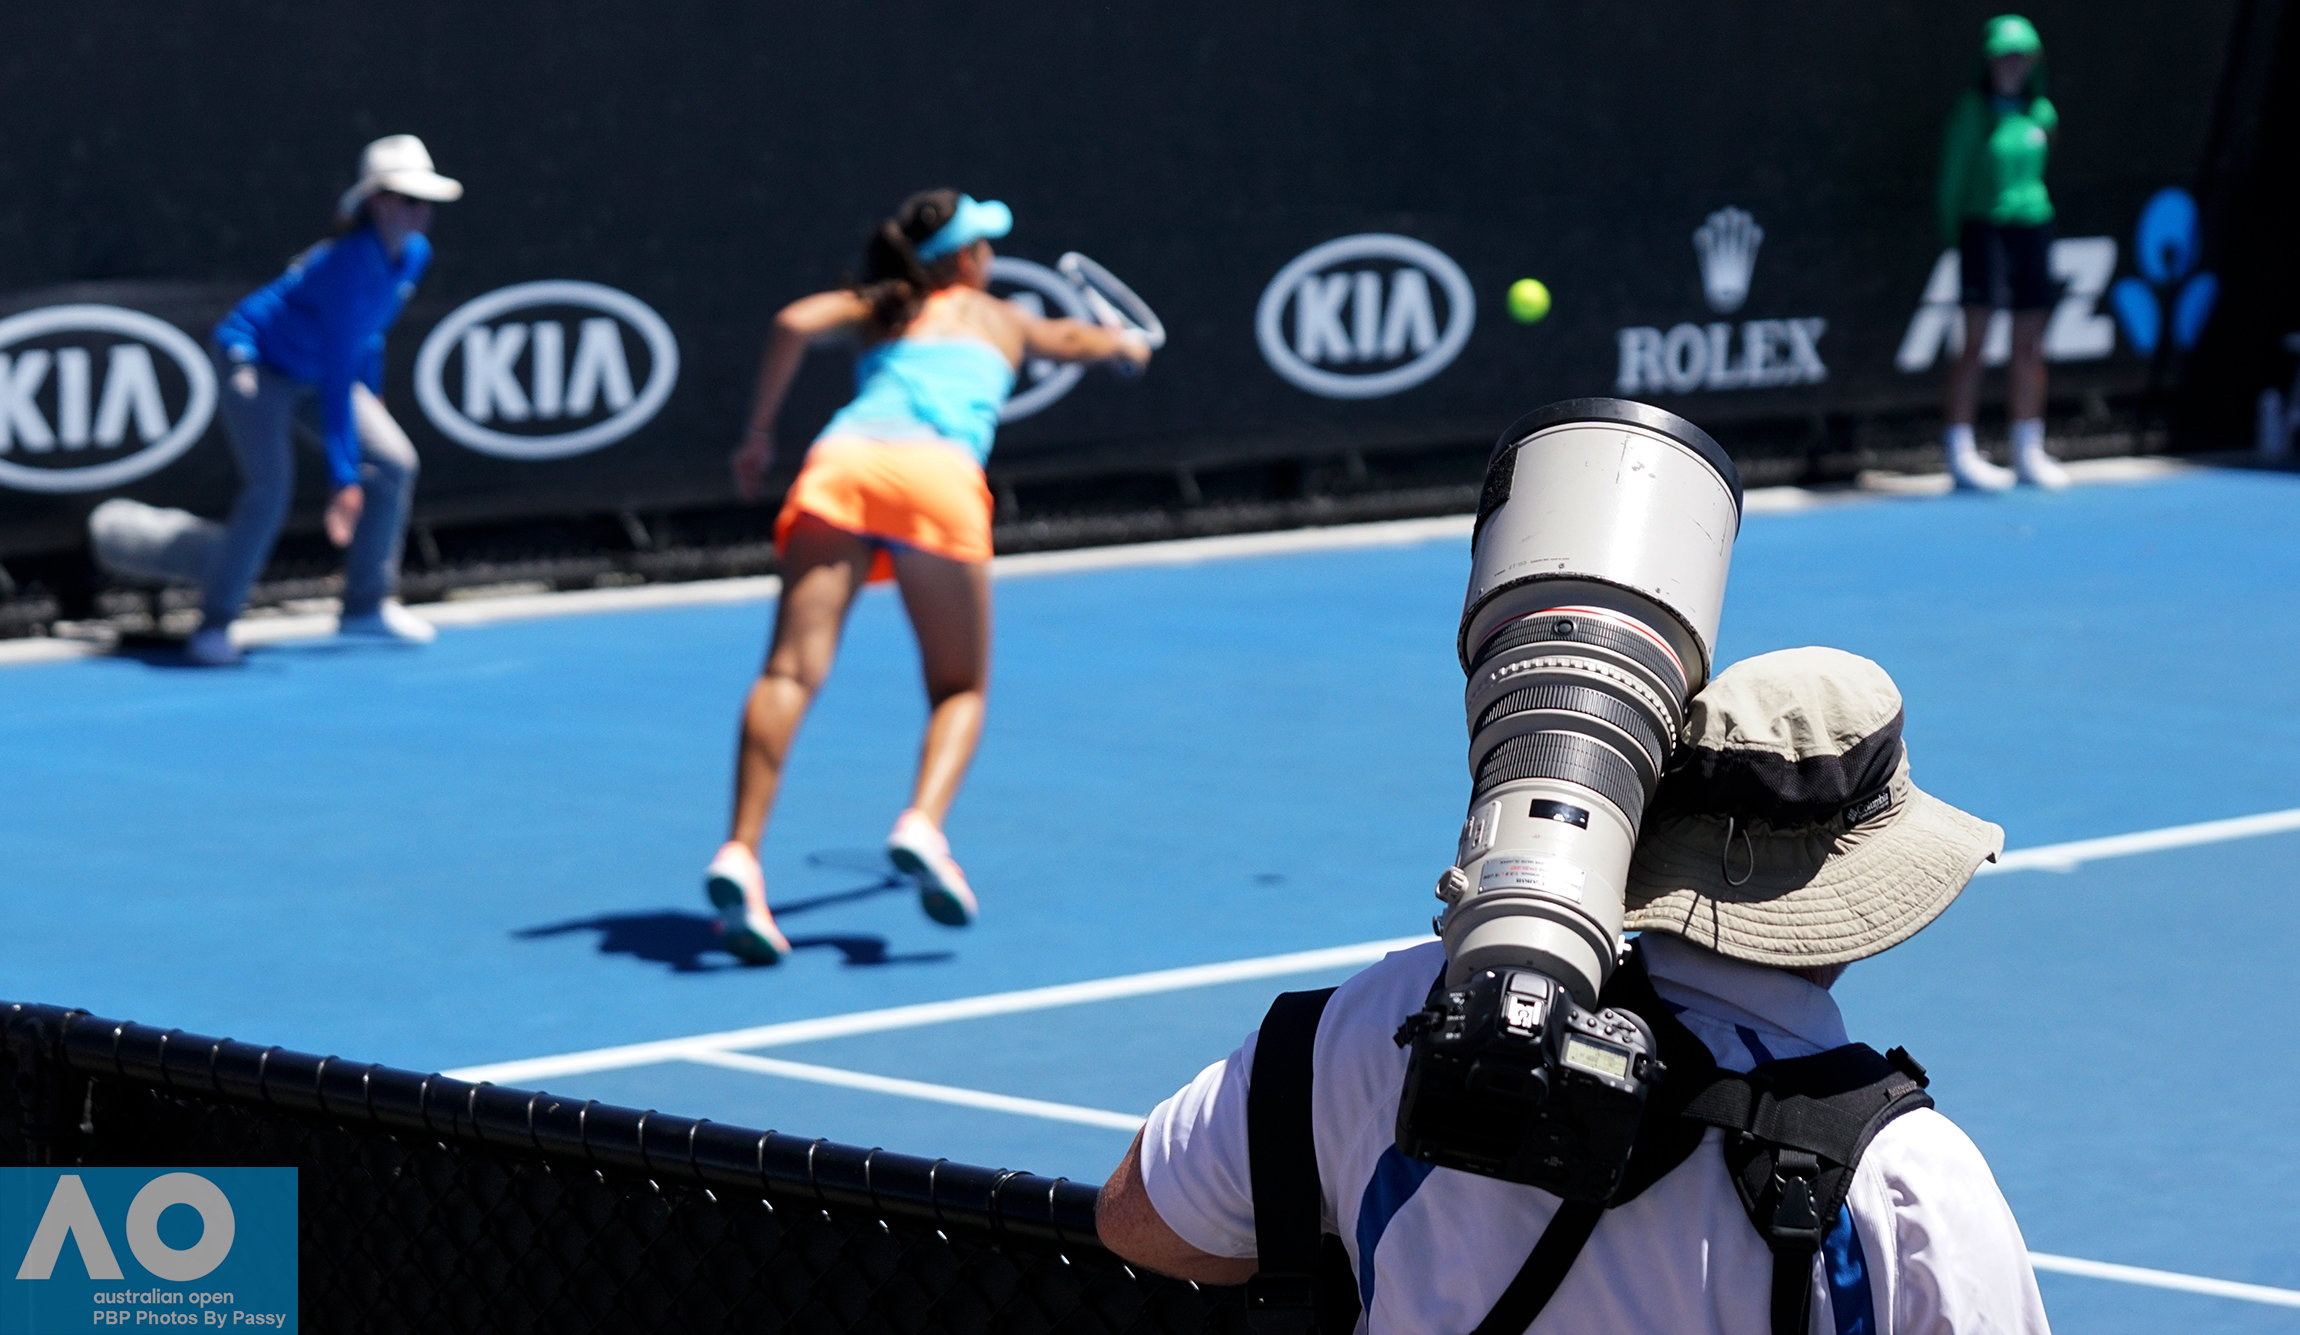
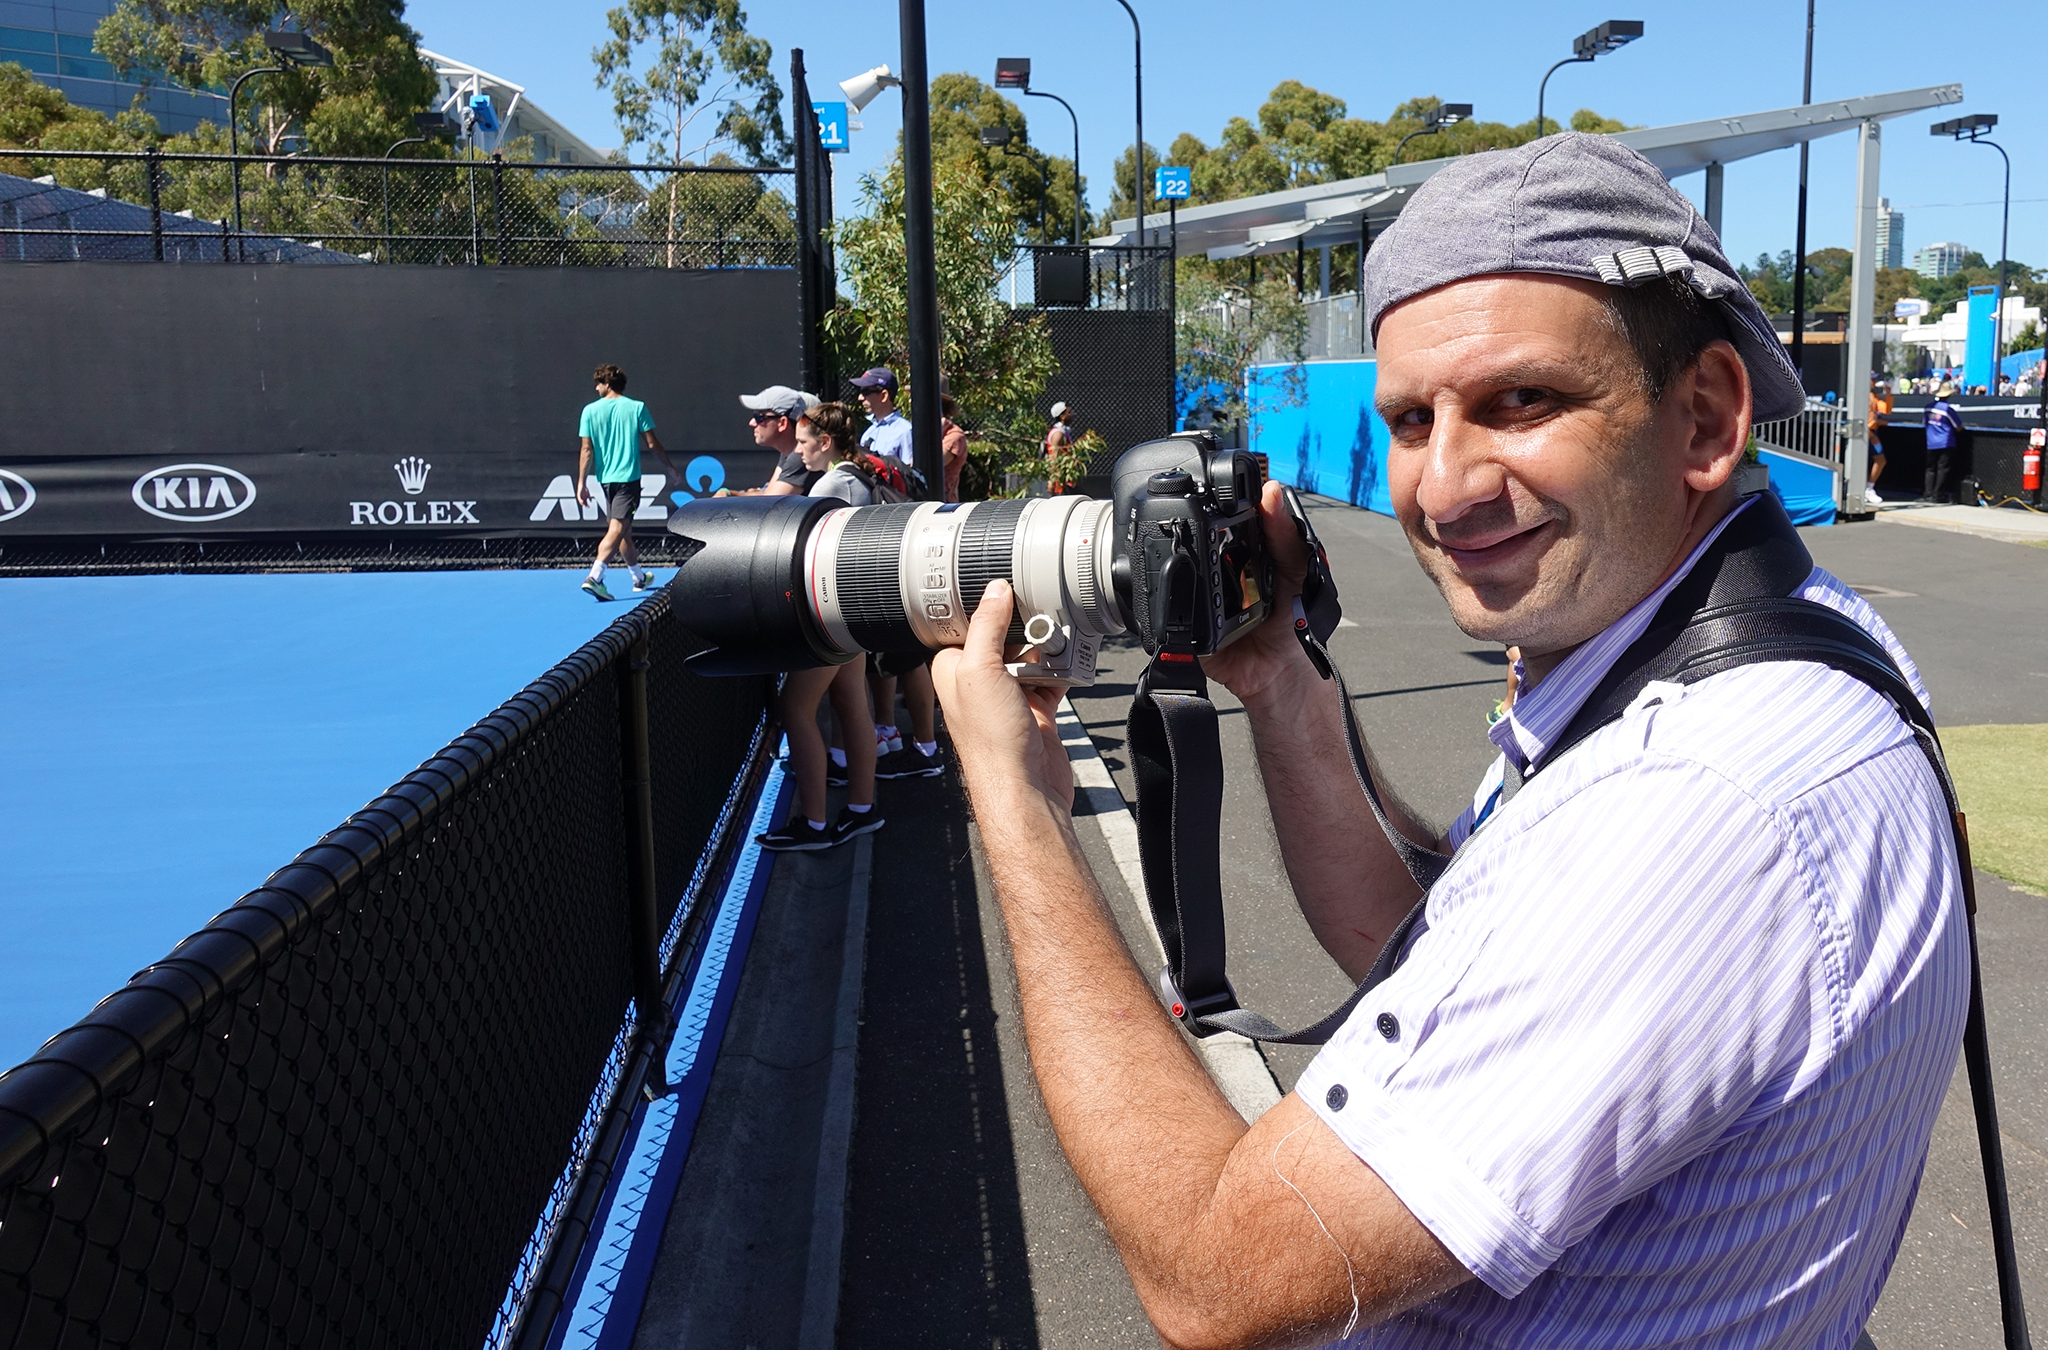
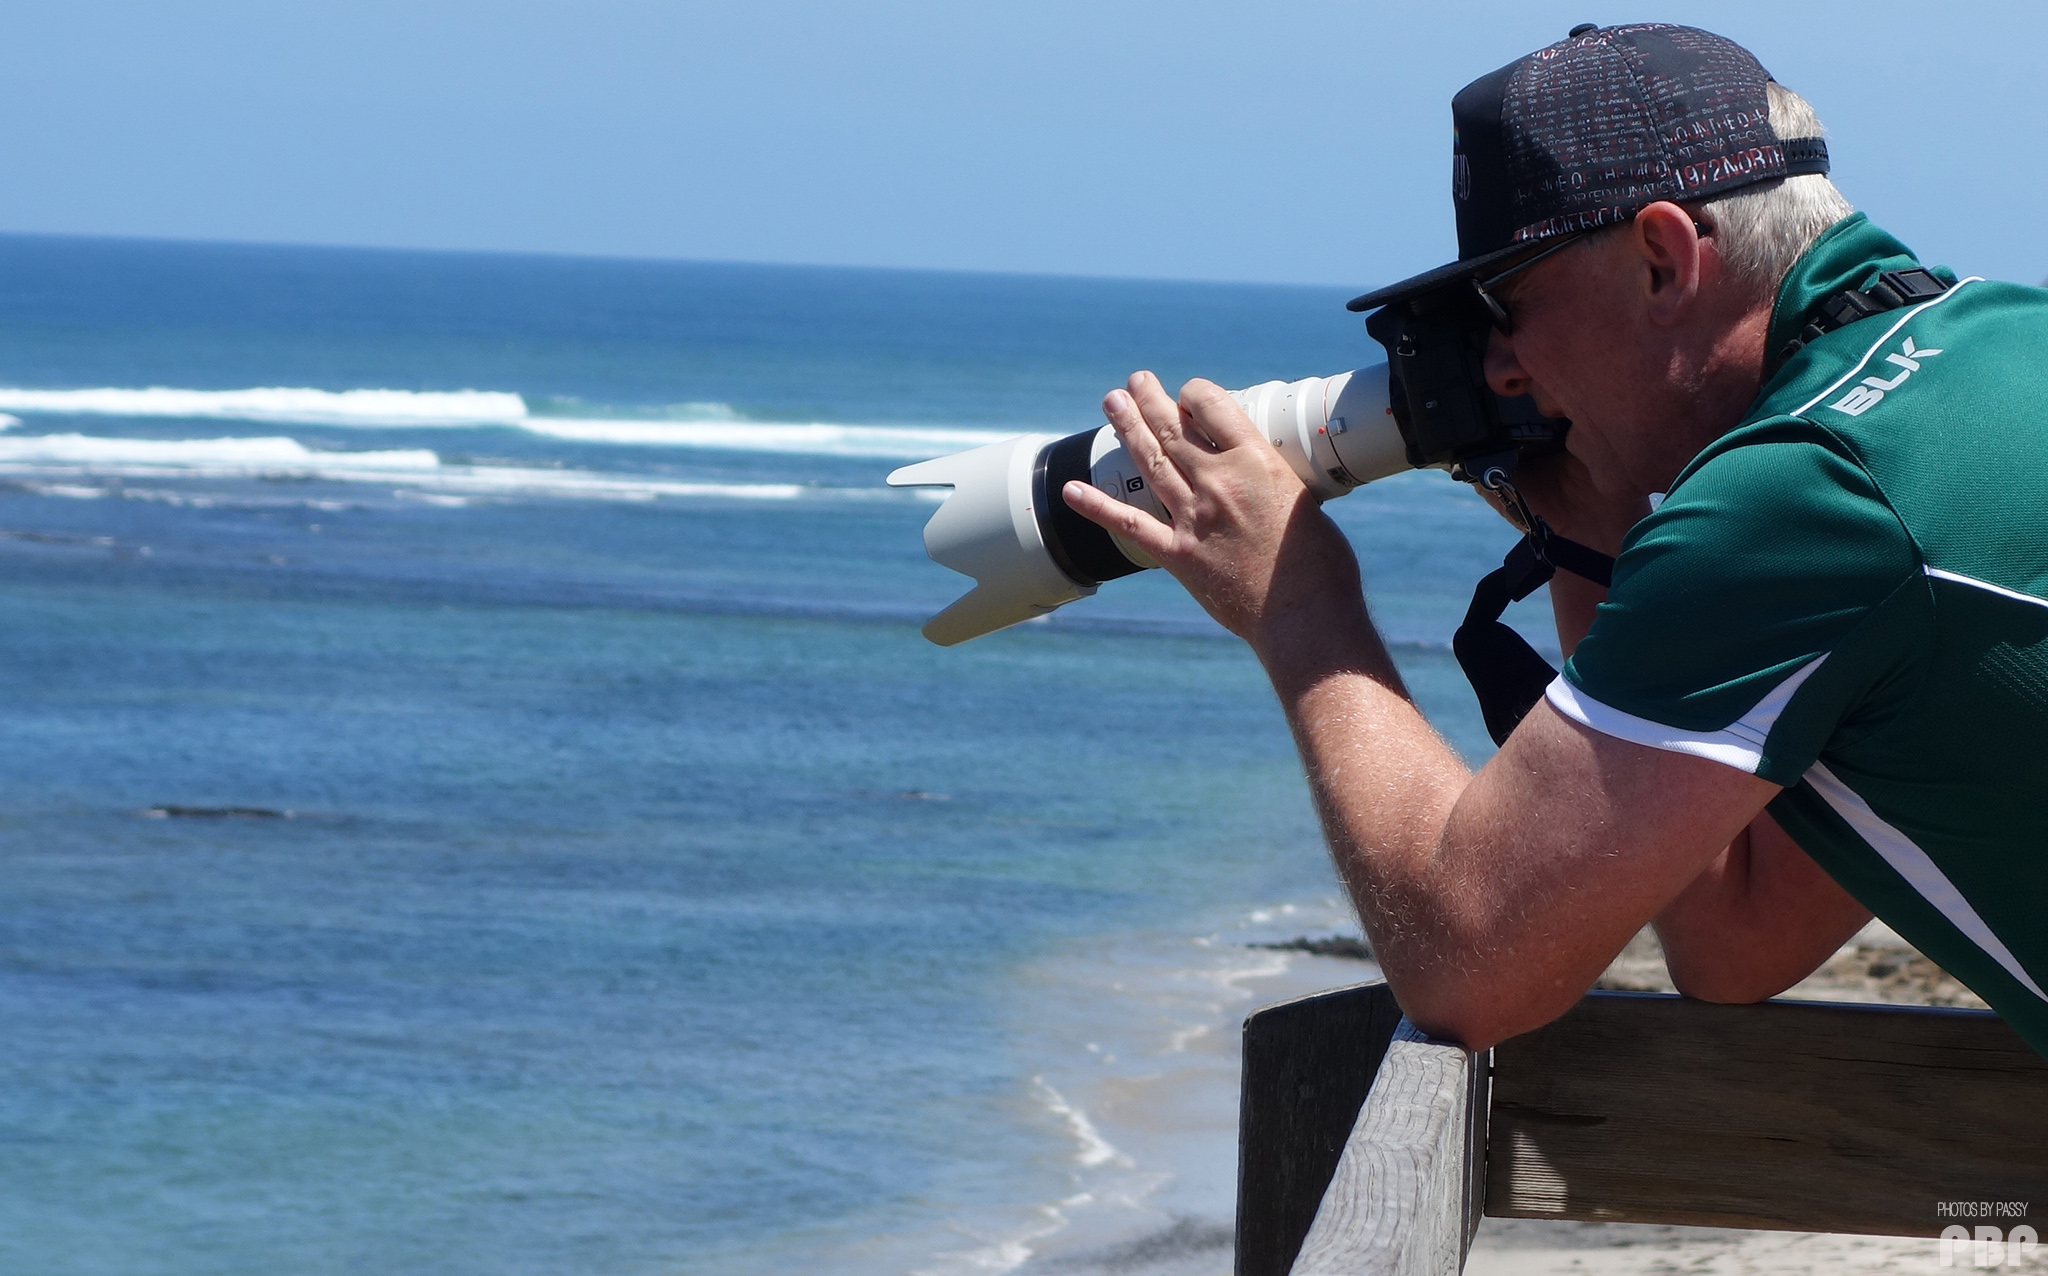
Sometimes the Pros also stand on the outside of the court fence next to the net as shown in the photo of a Professional Photographer below.

(Click Image to View Full Size)
This gets the same kind of angled front on shots, but from a bit higher up. If there are no Pros around, sometimes we can also locate ourselves here for a couple of minutes and quickly take some shots.
However a lot of the time we cannot stand at the fence to take shots and we have to sit in the stands with the other spectators. Here there are lots of obstructions like people’s hats and heads, umbrellas that players sit under, and courtside mounted cameras.
In the stands we need to try and sit in an aisle seat so that we have room to pan our camera with its long lens and follow the action. Sometimes if you are in an aisle or the back row, you may even be able to stand up to take some shots.
Typical Tennis Camera Settings:
Aperture F2.8, F3.5, or F4.0
Shutter 1/2000th, 1/3200th, or even 1/4000th
ISO 250, 320, or 400.
Football Photography
In Football Photography it is very easy to get lots of images where we cannot see the players faces at all. Photos of the backs of people are not good and need to be immediately deleted.
A good Football shot always shows the players faces and emotions like this one.
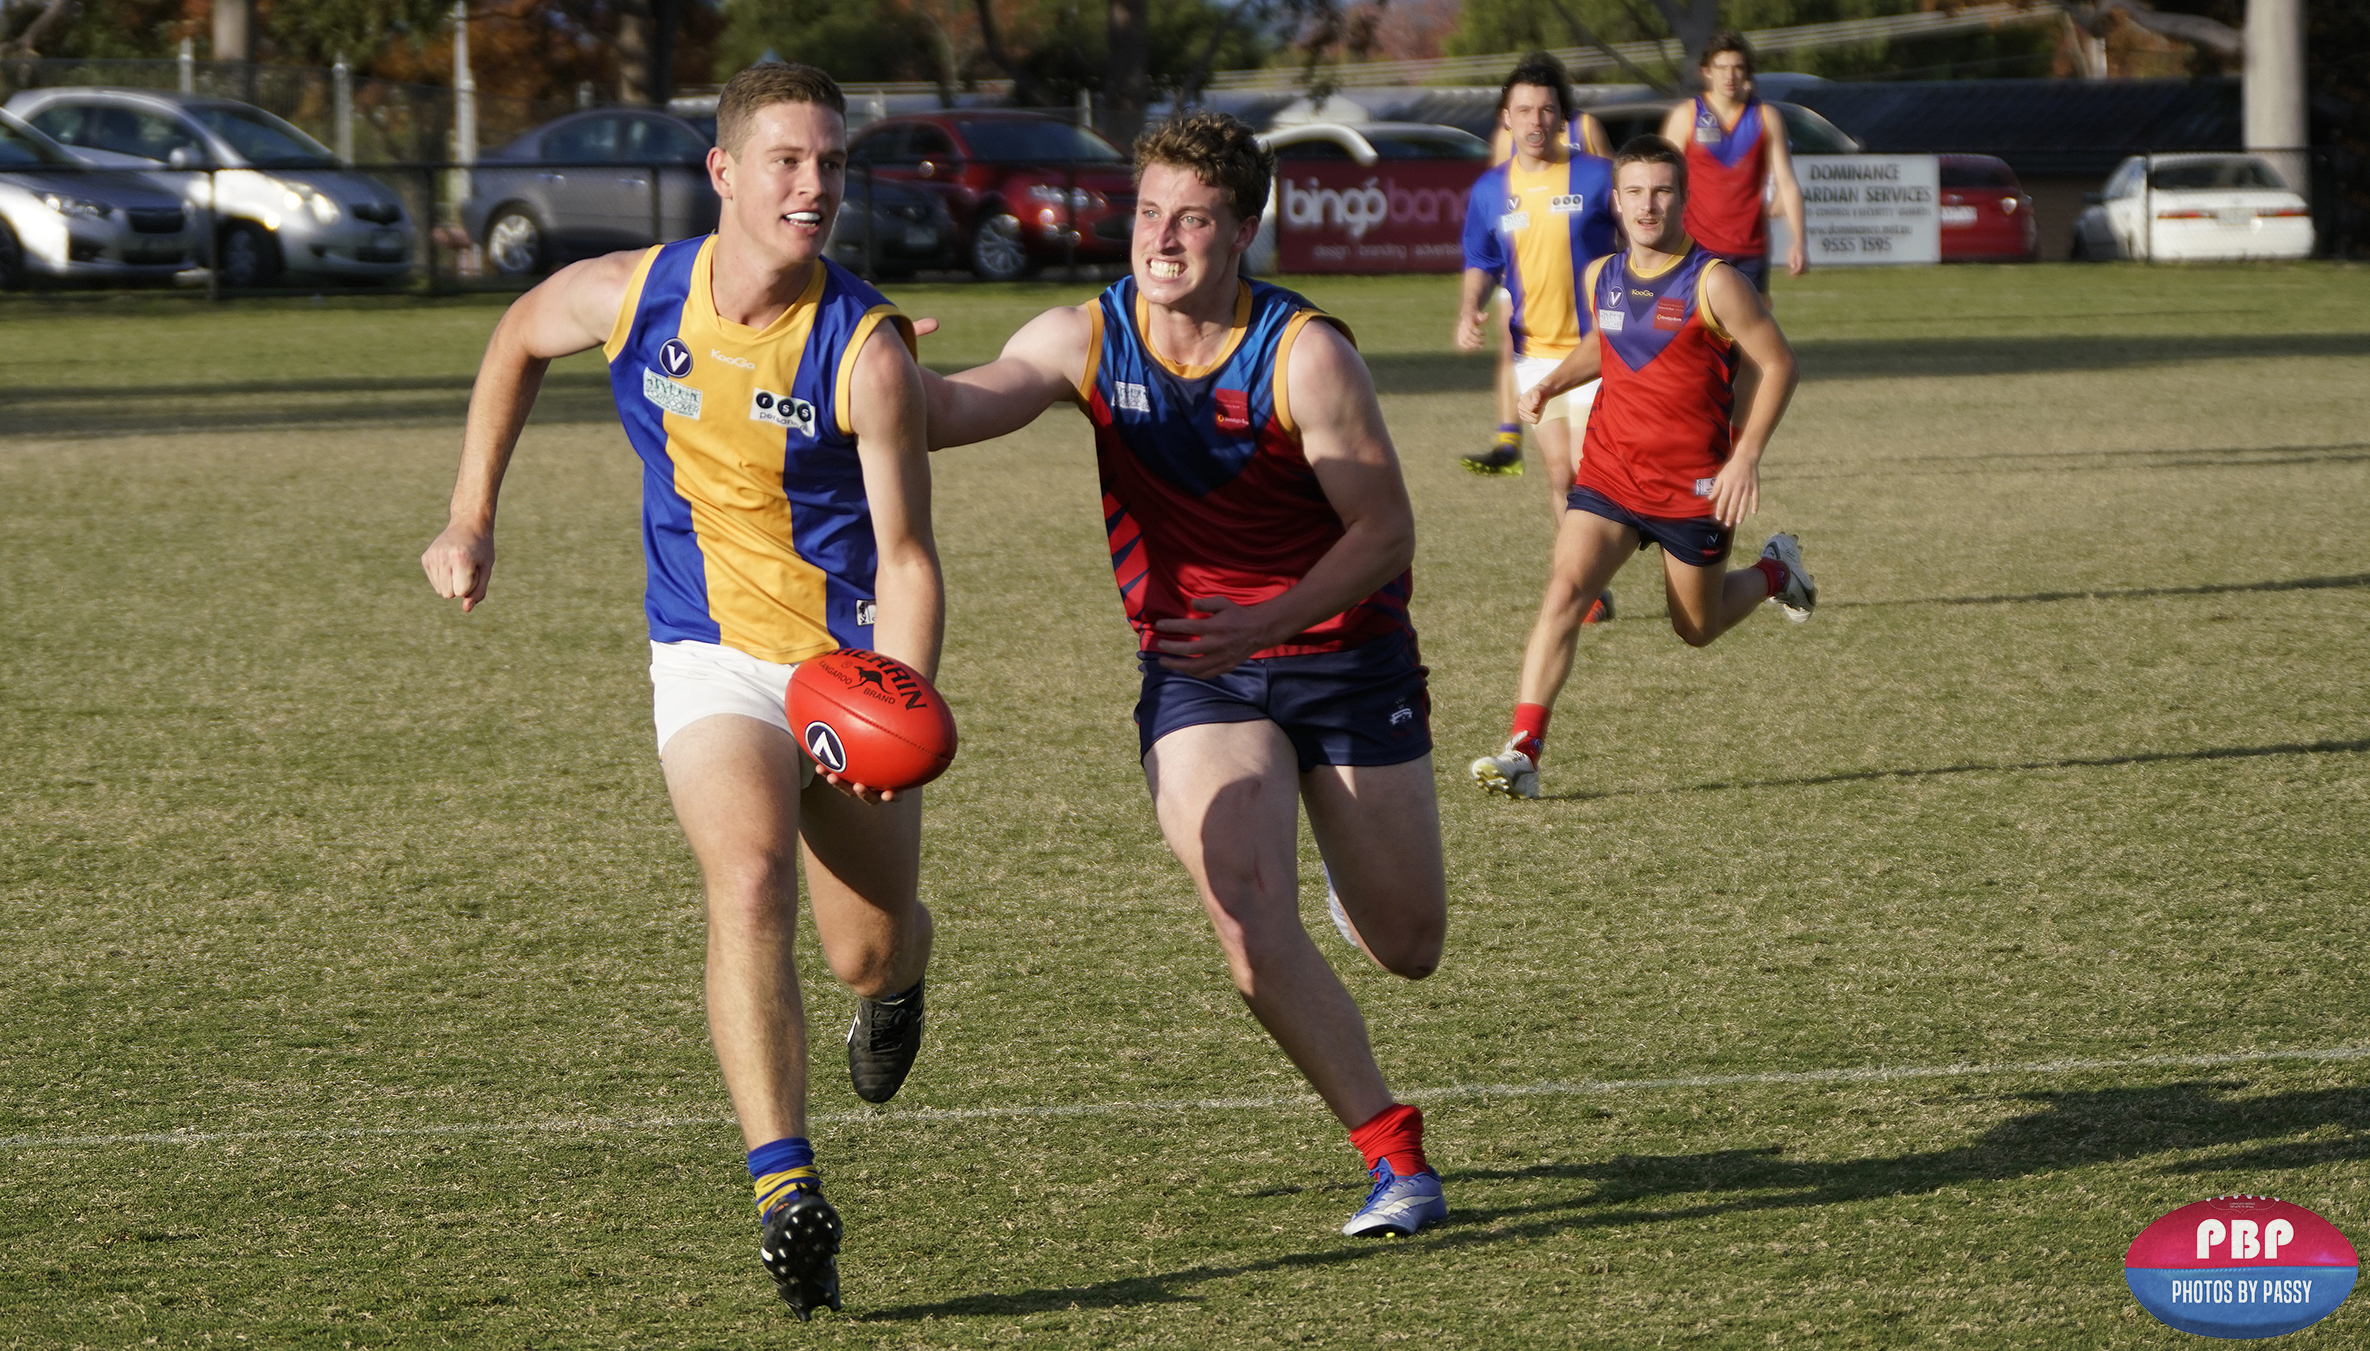
(Click Image to View Full Size)
We tend to wander around the outside of the ground to take photos. First we stand at the wing at get some good rucking photos from the centre bounces. After this we spend most of our time on the half forward or half back flank.
The flanks are best because you get offensive play coming towards you, and then kick outs from the goal line coming toward you as well.
Usually the play tends to go around one side of the ground, and so stay on that side of the ground. Have the team that is dominating play running towards you. Locate yourself on the half forward flank of their goal scoring end.
There is no point standing behind the goals because you will get far too many photos of the backs of people, and could also get hit by the ball.
It is recommended to always have the ball visibe in all football photos. However sometimes a close up shot showing competitive emotional expressions on players faces can also make for a great shot.
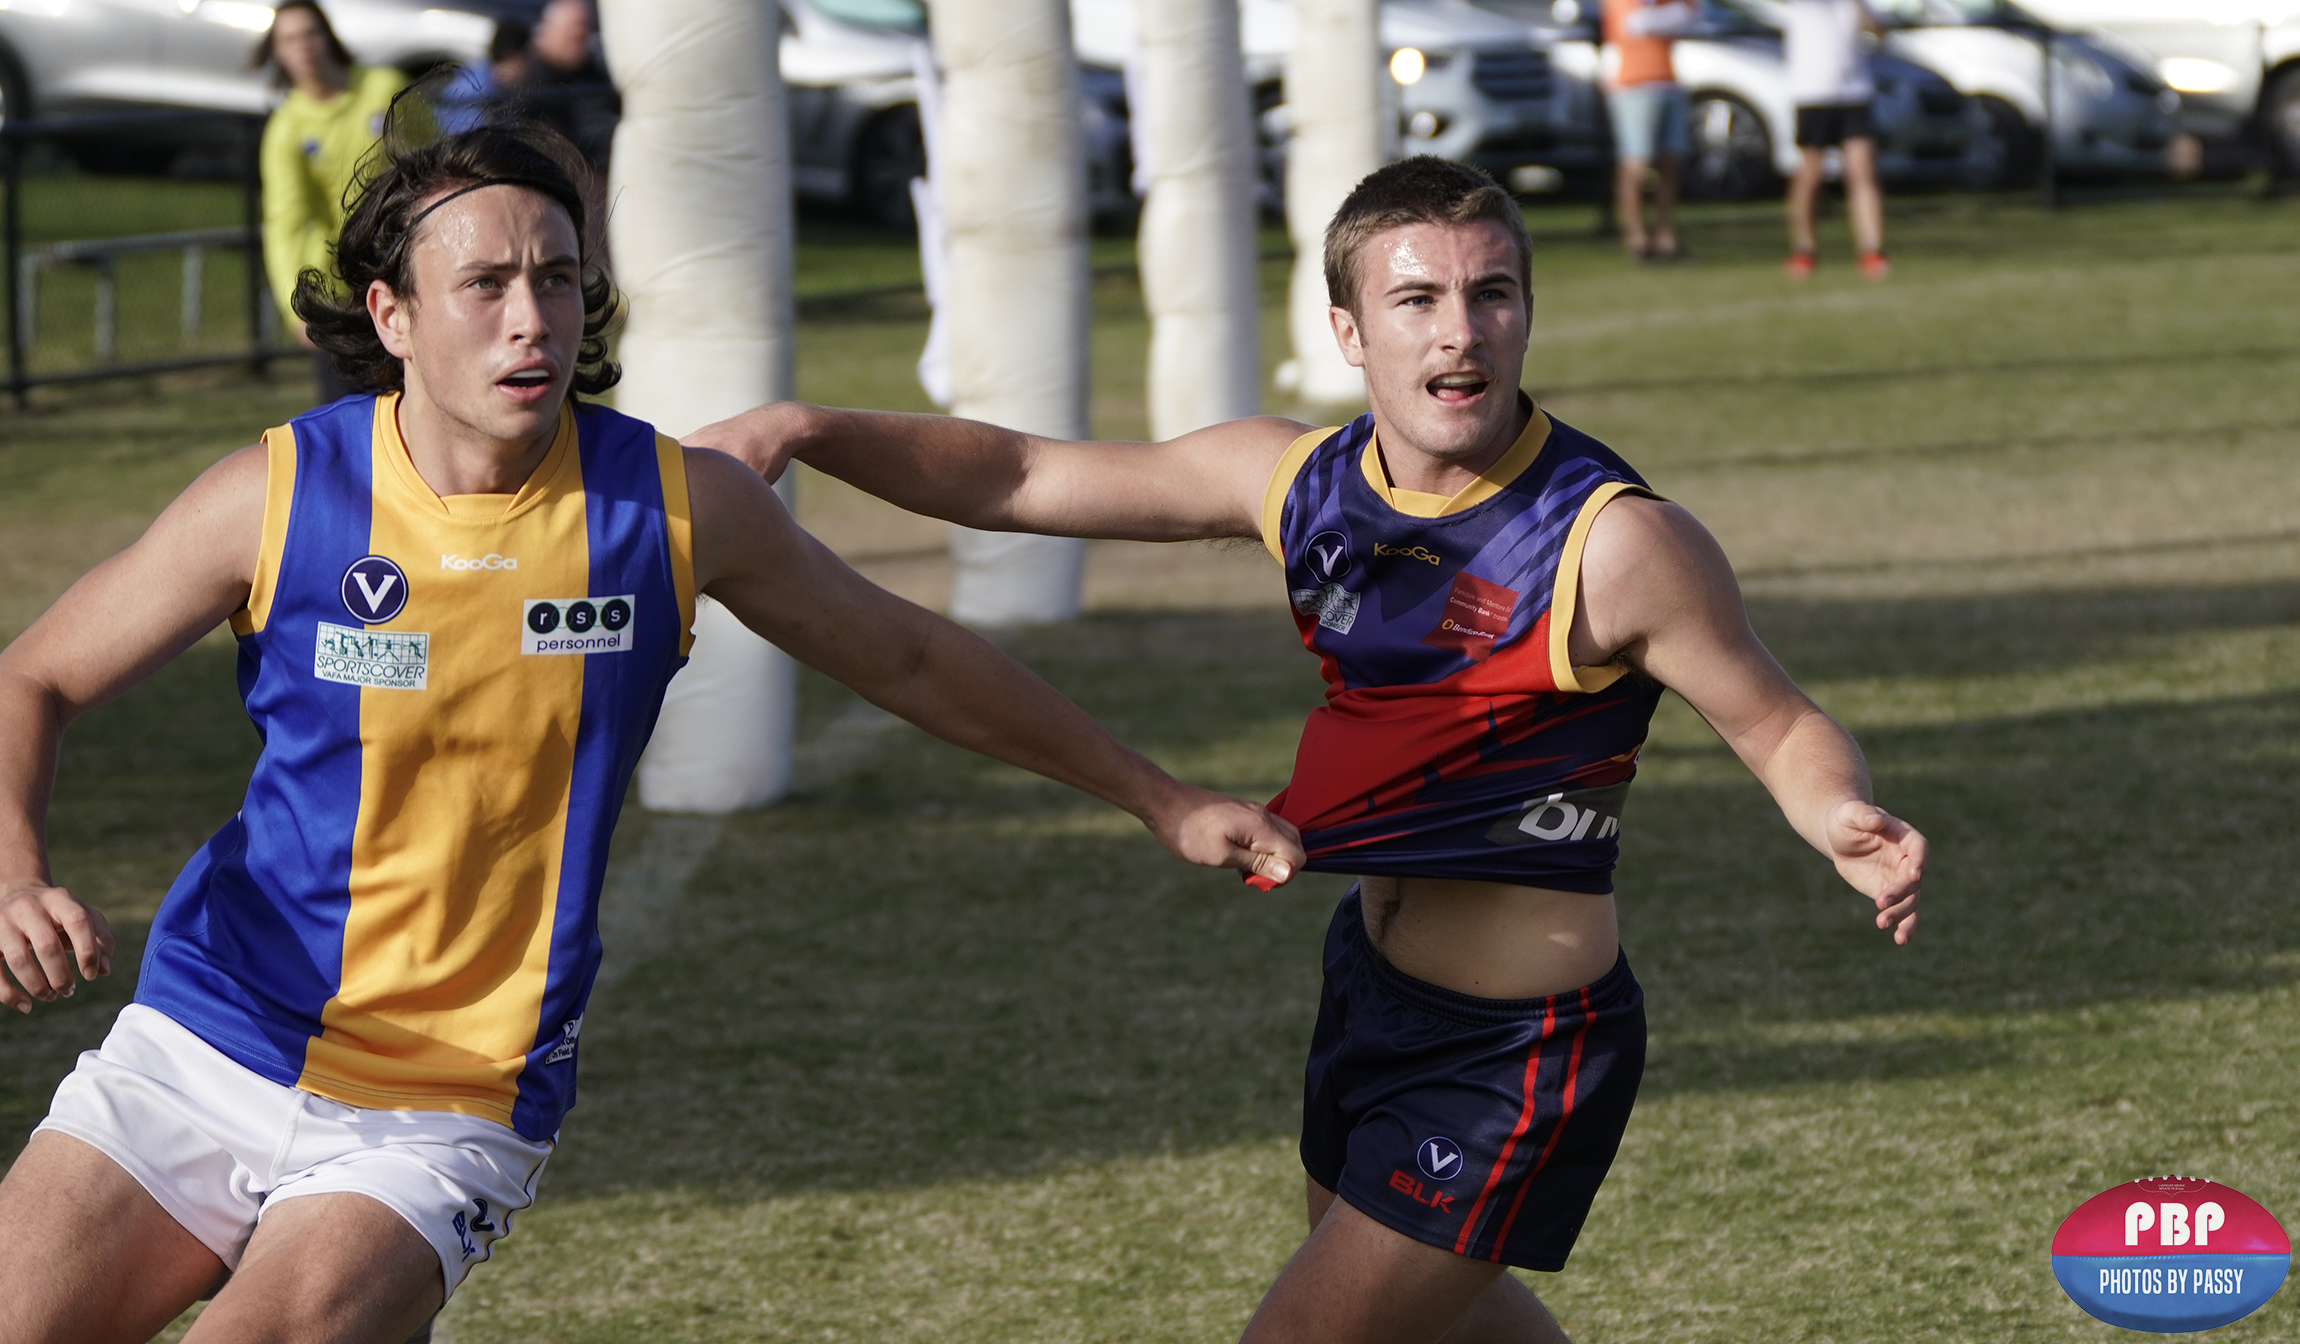
(Click Image to View Full Size)
Typical Football Camera Settings:
Aperture F3.5, F4.0, or F5.6
Shutter 1/1000th, 1/1600th, 1/2000th, 1/3200th
ISO 250, 320, or 400.
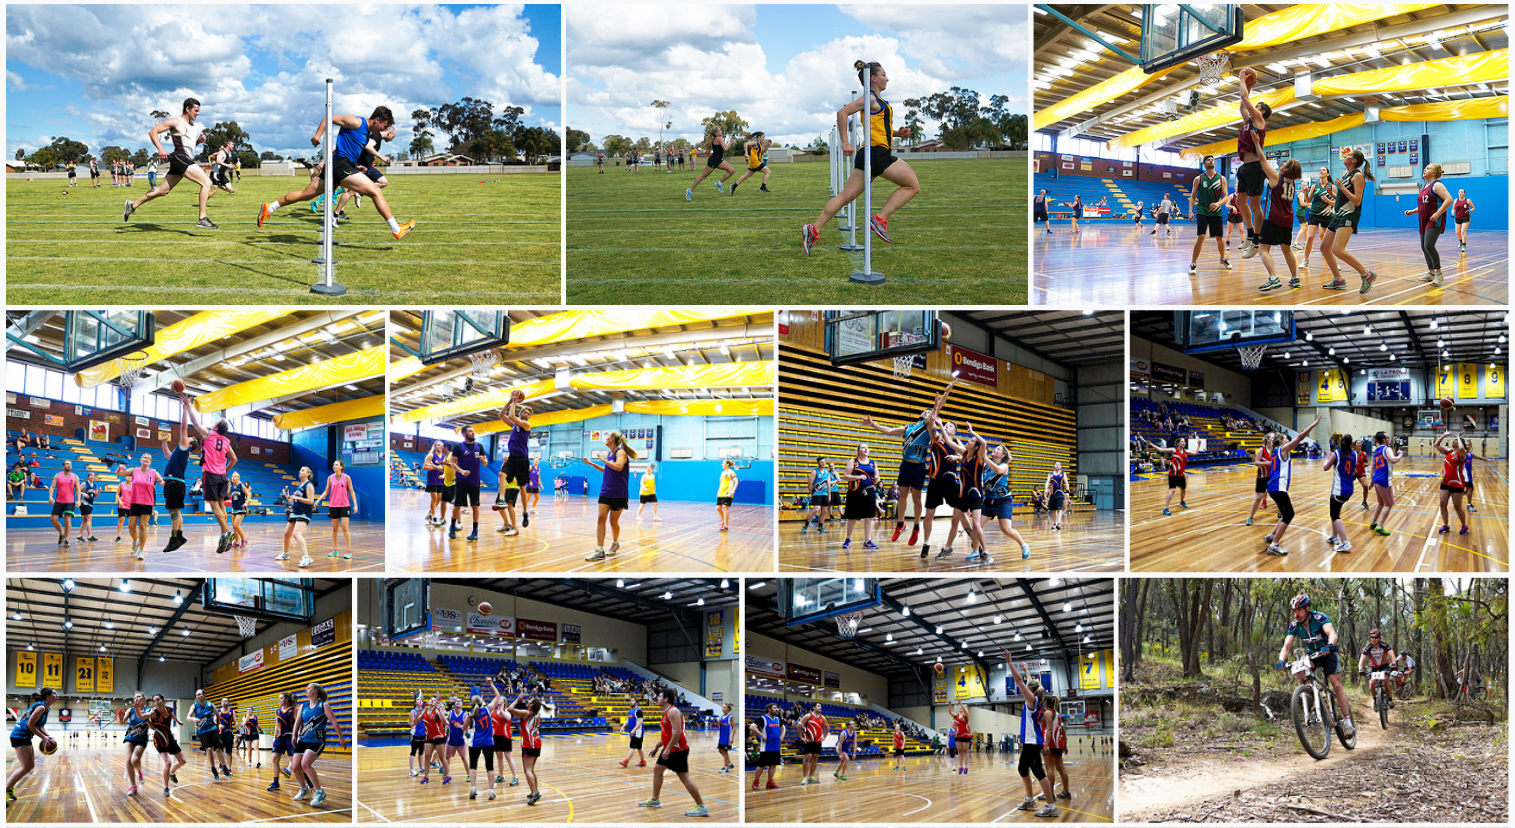
Basketball Photography
For Basketball photos it is important to have the Backboard, the hoop, and the faces of the players all visible.
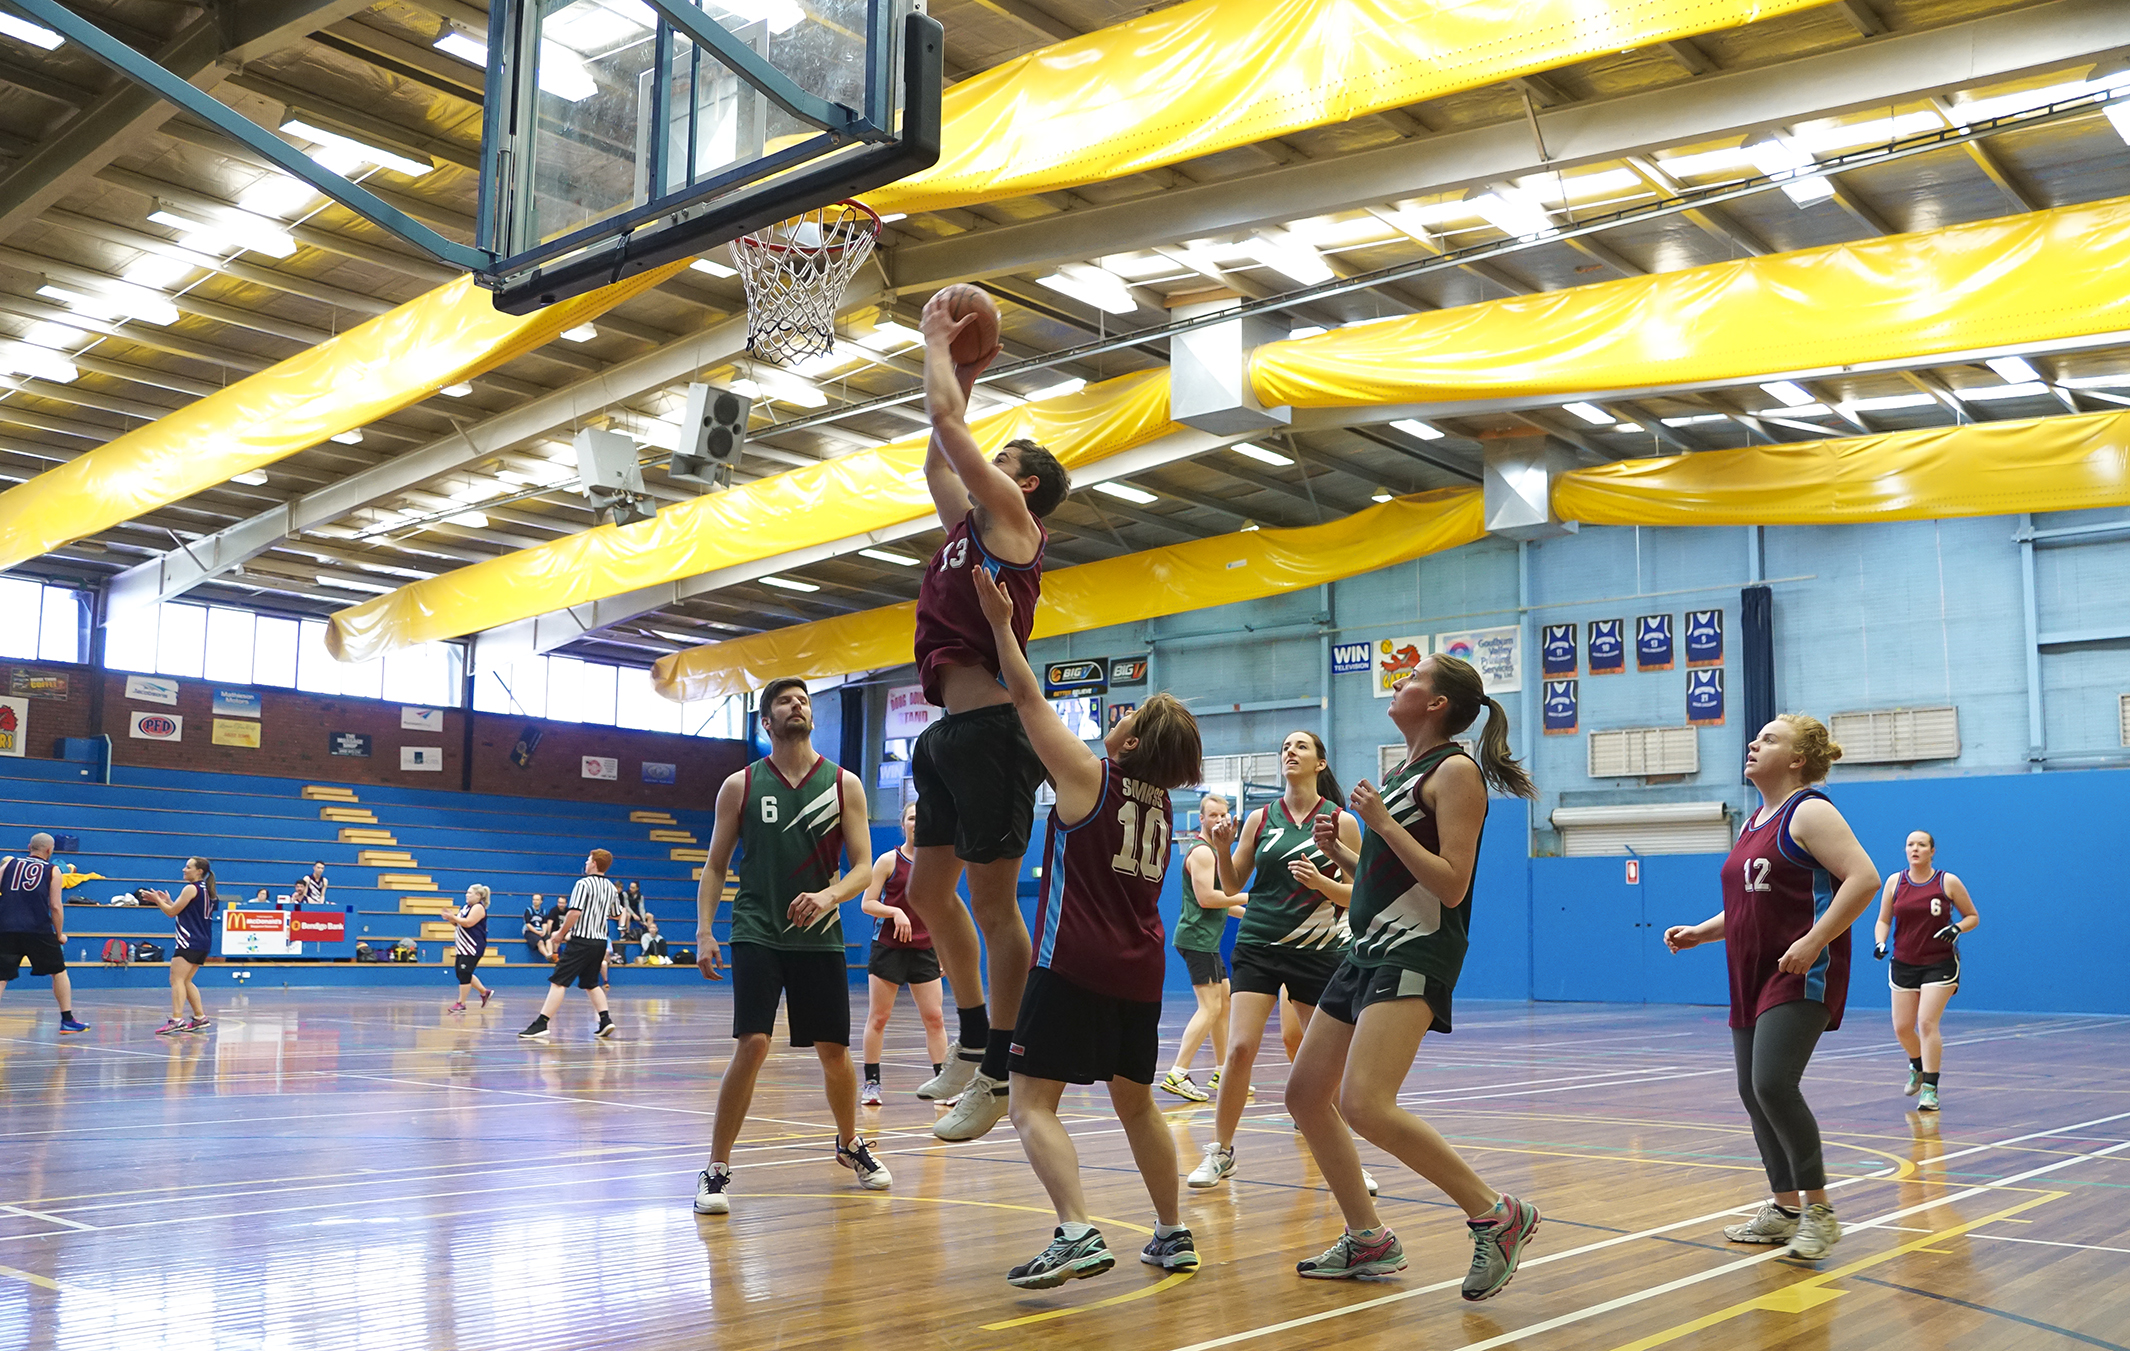
(Click Image to View Full Size)
For Basketball Photos the best place to stand is as close as possible to the back corner of the key. However the referee might keep getting in your way. Just run to the side where they are not… continually.
Make sure you shoot from down low by kneeling down on one knee, (not sitting on the floor), so you can get out of the way quickly if you need to.
If you get relegated to the stands then try and get a medium high vantage point looking towards the end of the court. This way you can get front on shots as the teams charge down the court. Basically use the same positioning approach as in football: be in a position a bit forward towards the centre line but able to see the hoop and backboard.
Typical Basketball Camera Settings Indoors:
Aperture F2.8, F3.5, or F4.0
Shutter 1/500th, or 1/1000th
ISO 400 or 800.
Netball Photography
Shots for Goal are an easy and great Netball Shot to get. There is some focussed action in the shot while the other players tensely await the outcome.
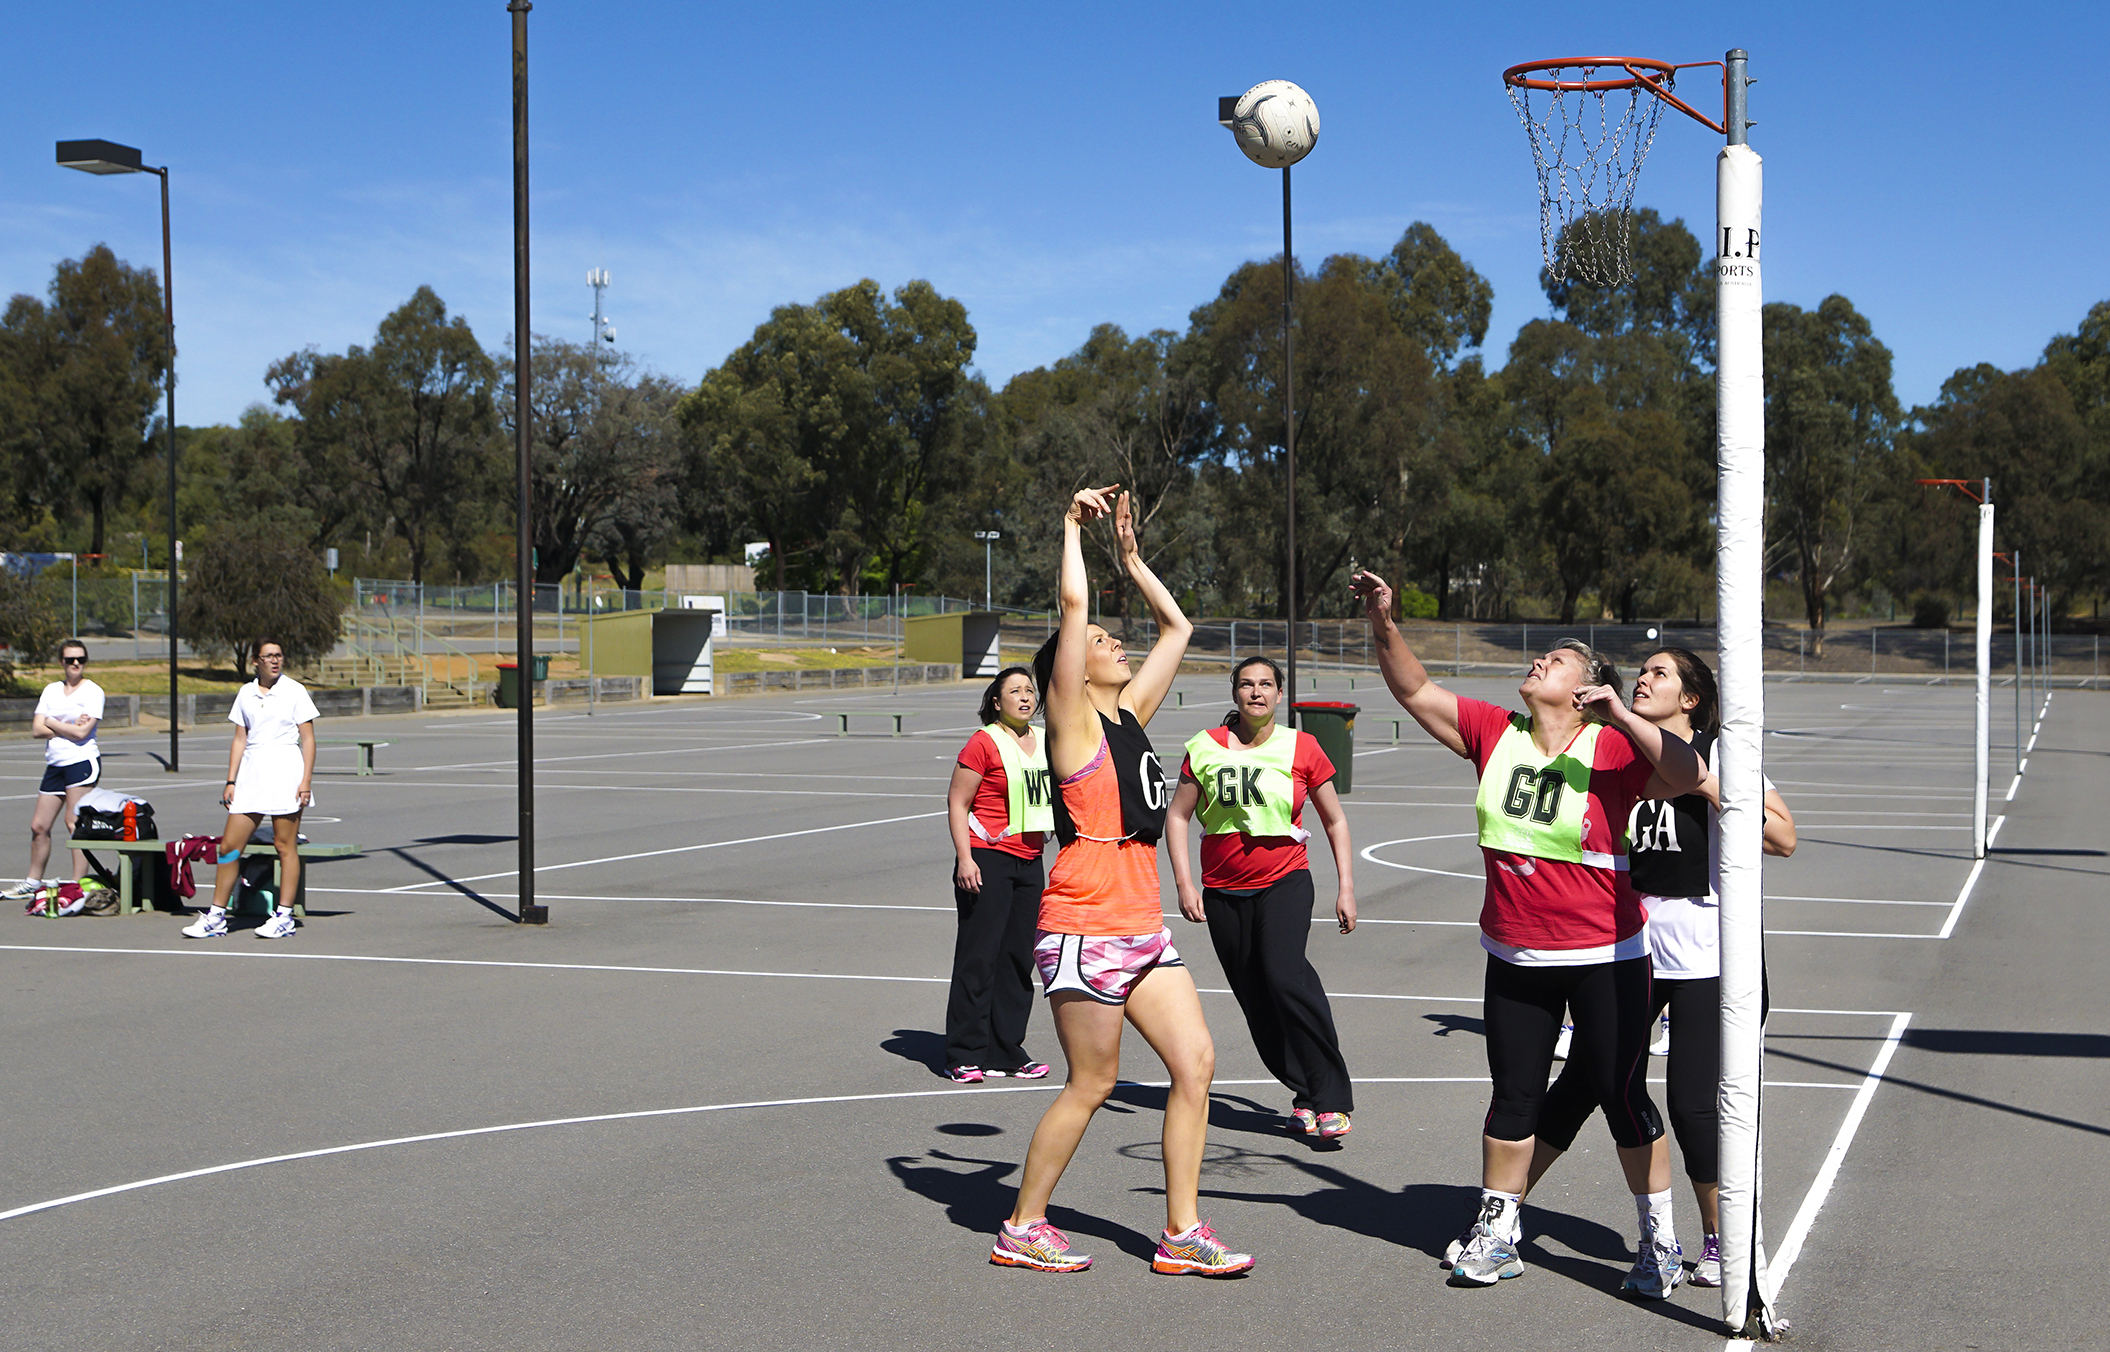
(Click Image to View Full Size)
Netball is a very start stop game of passing shots and low skilled players can look very awkward and not make for good images.
Often there are outdoor courts right next to each other and players from all the teams everywhere, as well as spectators standing or continually walking around on the sidelines. This makes for confusing backgrounds.
Try to get competition for the ball shots like the one below, as well as shots for goal images as discussed previously.
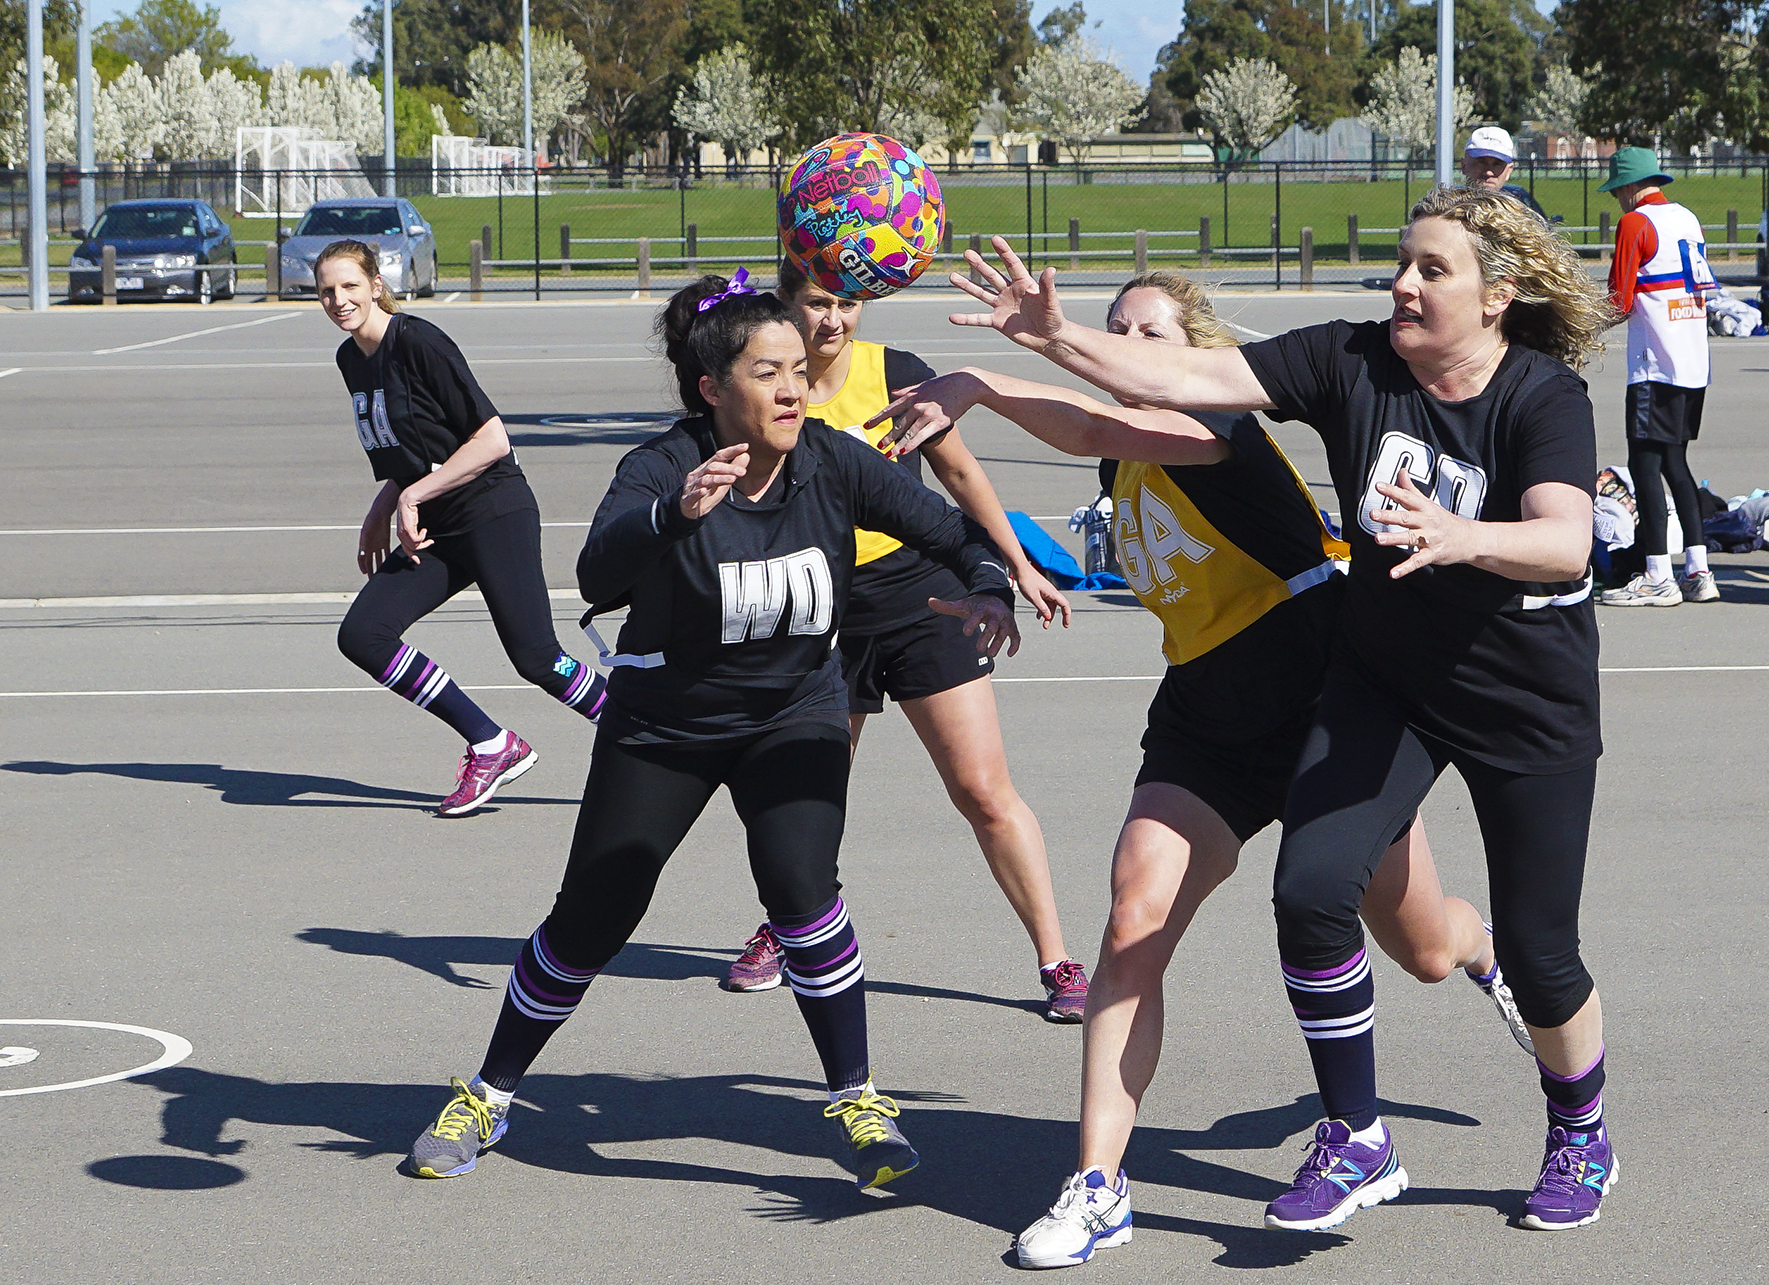
(Click Image to View Full Size)
Typical Netball Camera Settings:
Aperture F3.5, F4.0, or F5.6
Shutter 1/1000th, 1/1600th, or 1/2000th
ISO 250, 320, or 400.
Volleyball
In Volleyball games the ball goes way too high up in the air and moves too fast to get many good images. The best place to be is in a stadium shooting a quality skilled game where you can get photos of the whole court action like the one below that we found on Flickr.
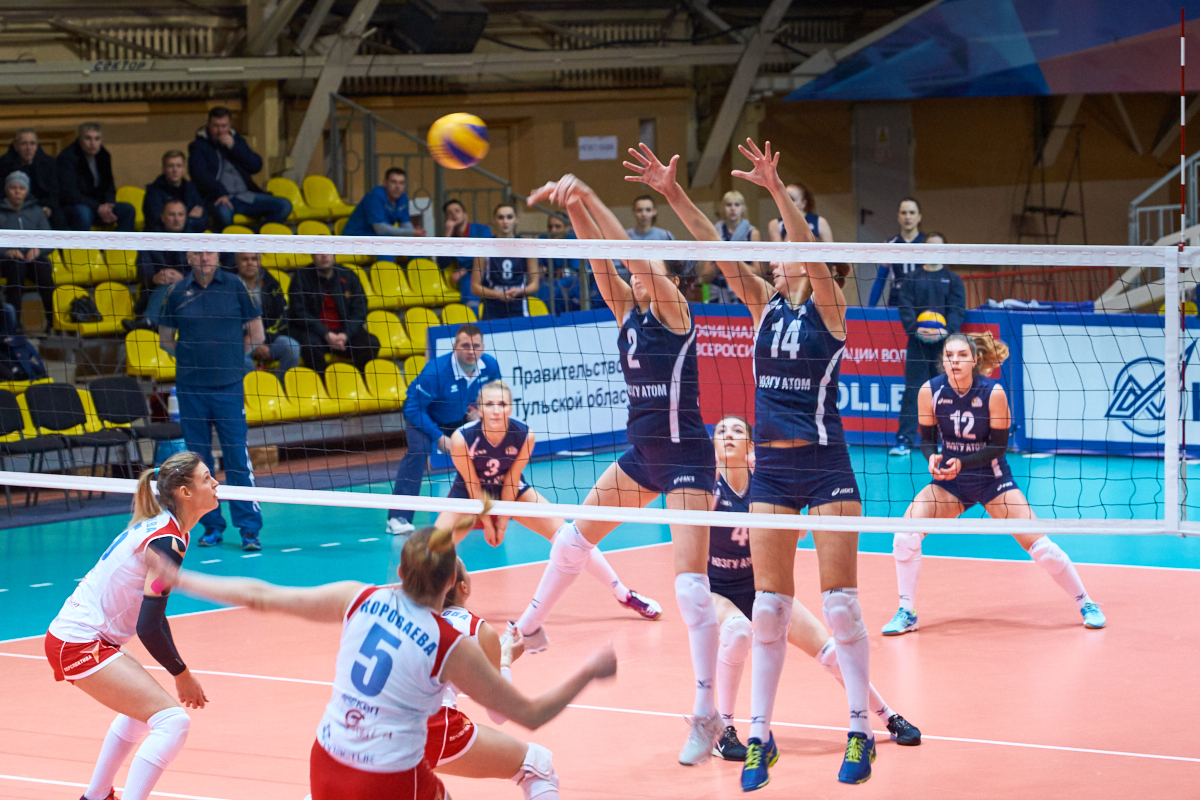
(Click Image to View Full Size: Photo from Flickr)
Photographing Indoor Beach Volleyball puts you in a very confined space, with the ball moving at high speeds and bouncing off the side nets. Stand right at the net, and try not to get hit by stray balls.
It will also be necessary to use a High ISO like 400 or 800, an Aperture of F2.8 or F3.5, and then a slower shutter speed of 1/1000th or even 1/500th to get enough light in for the indoor lighting conditions.
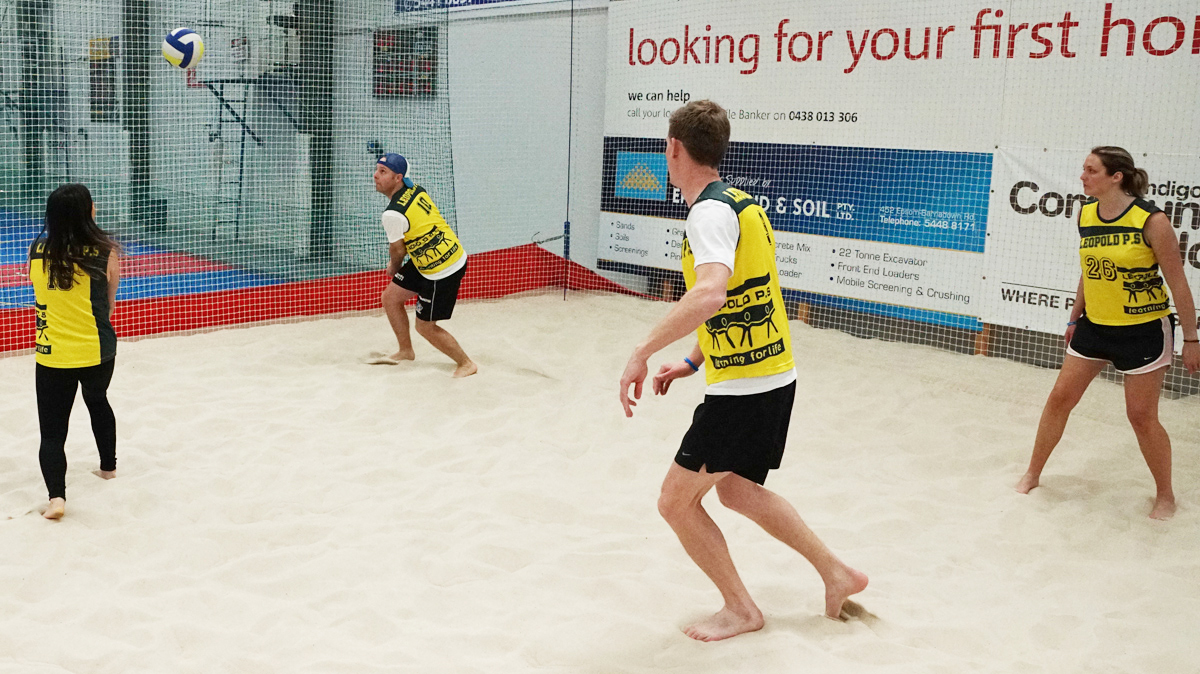
(Click Image to View Full Size)
Indoor Beach Volleyball is extremely fast in a very enclosed area and can be dangerous for the Photographer. Low light means we have to shoot at low shutter speeds producing blurred ball movement.
The Ball within proximity of players is very hard to capture because it moves so fast and can be hit very high into the air.
Typical Volleyball Camera Settings Indoors:
Aperture F2.8, F3.5, or F4.0
Shutter 1/500th, or 1/1000th
ISO 400 or 800.
Athletics
Most of the Athletics shots we have done have been for schools and so we cannot display them publicly.
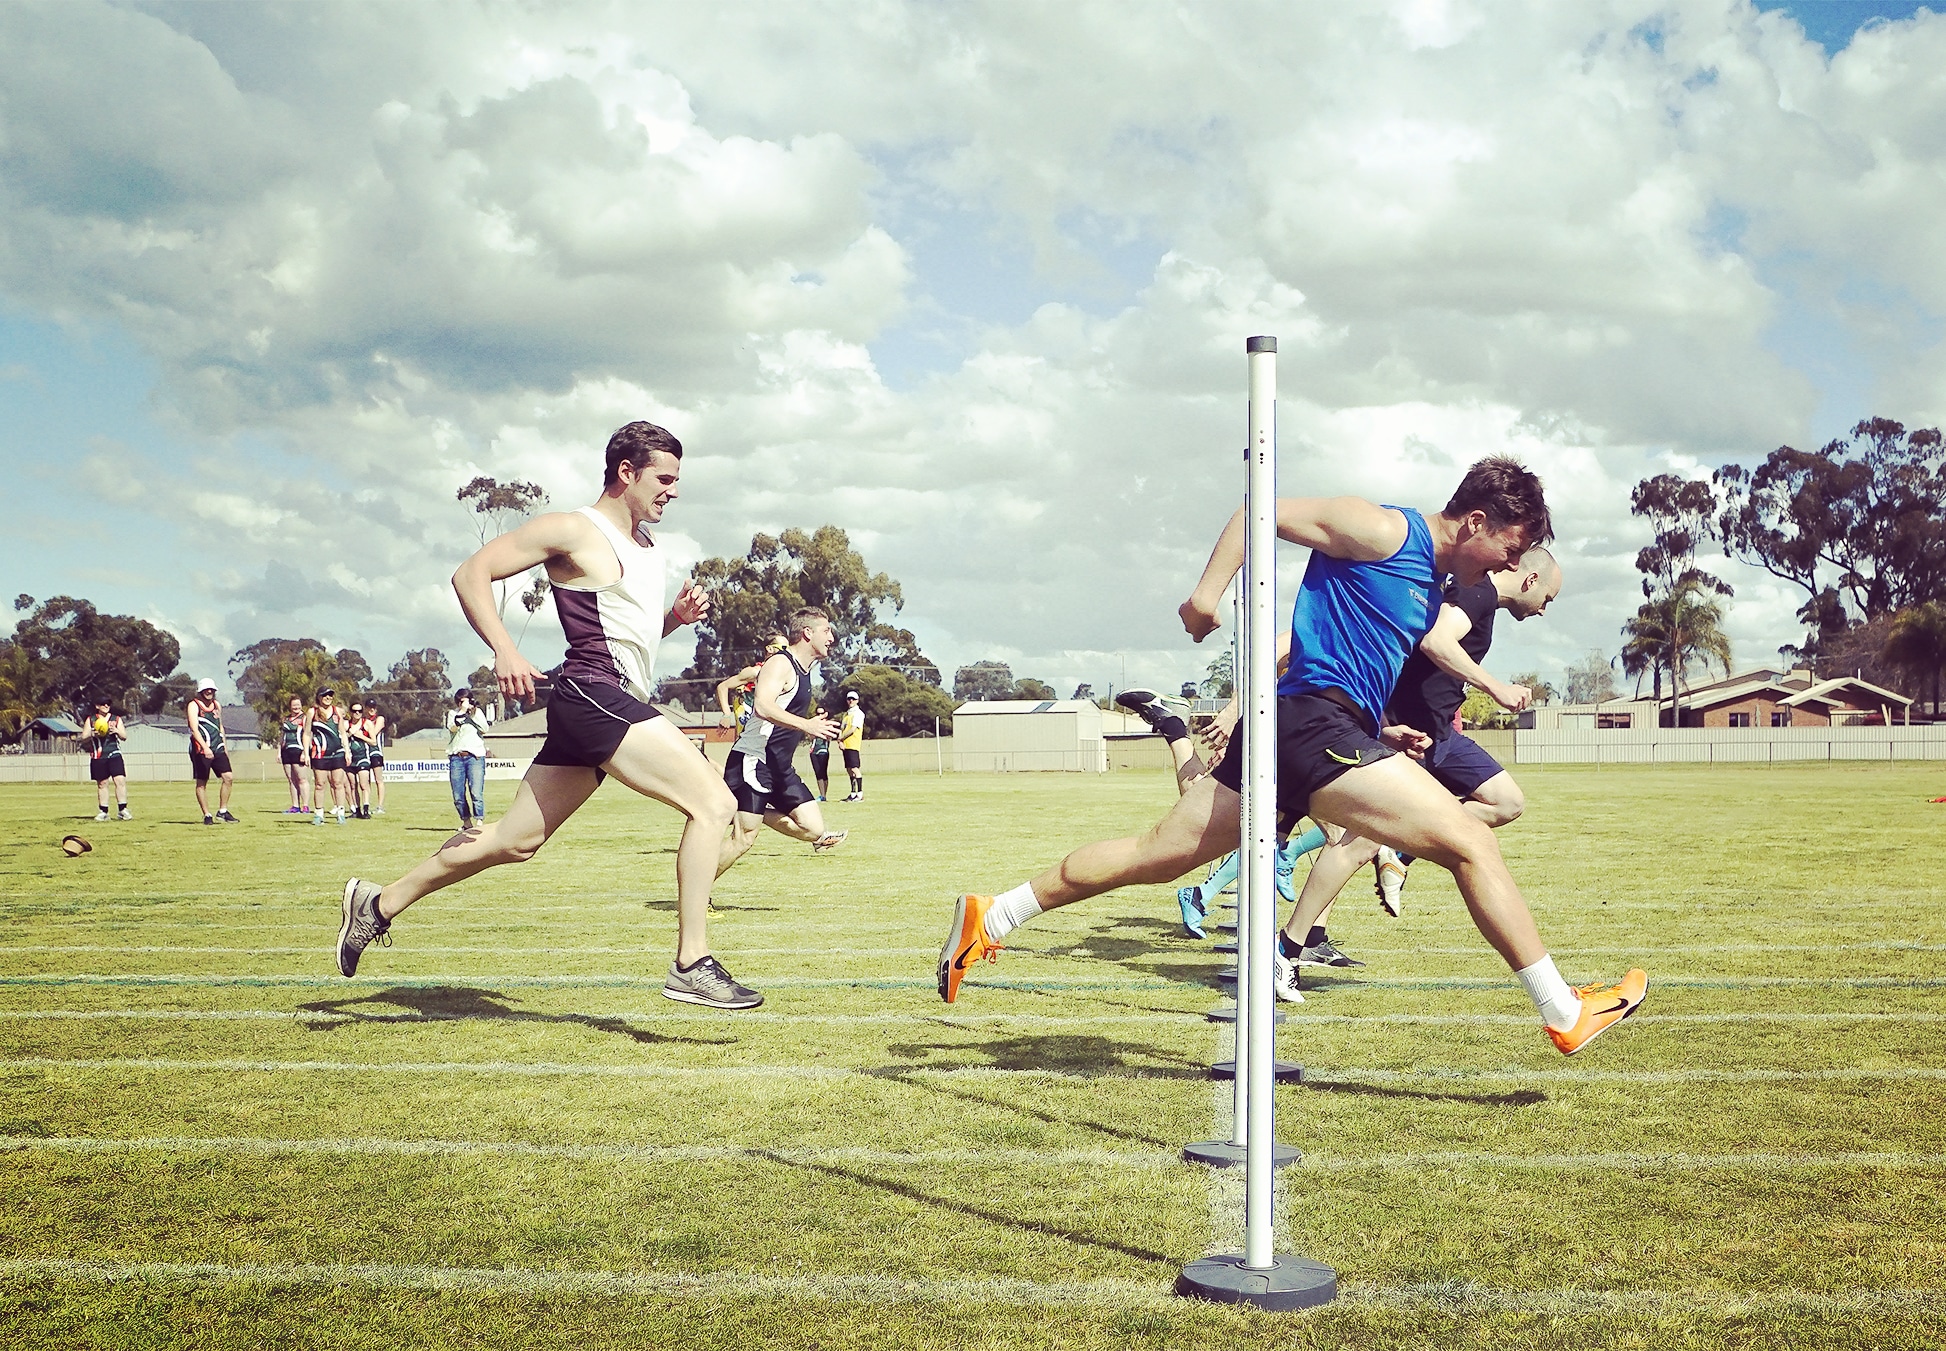
However, here is one shot that has adult aged competitors.
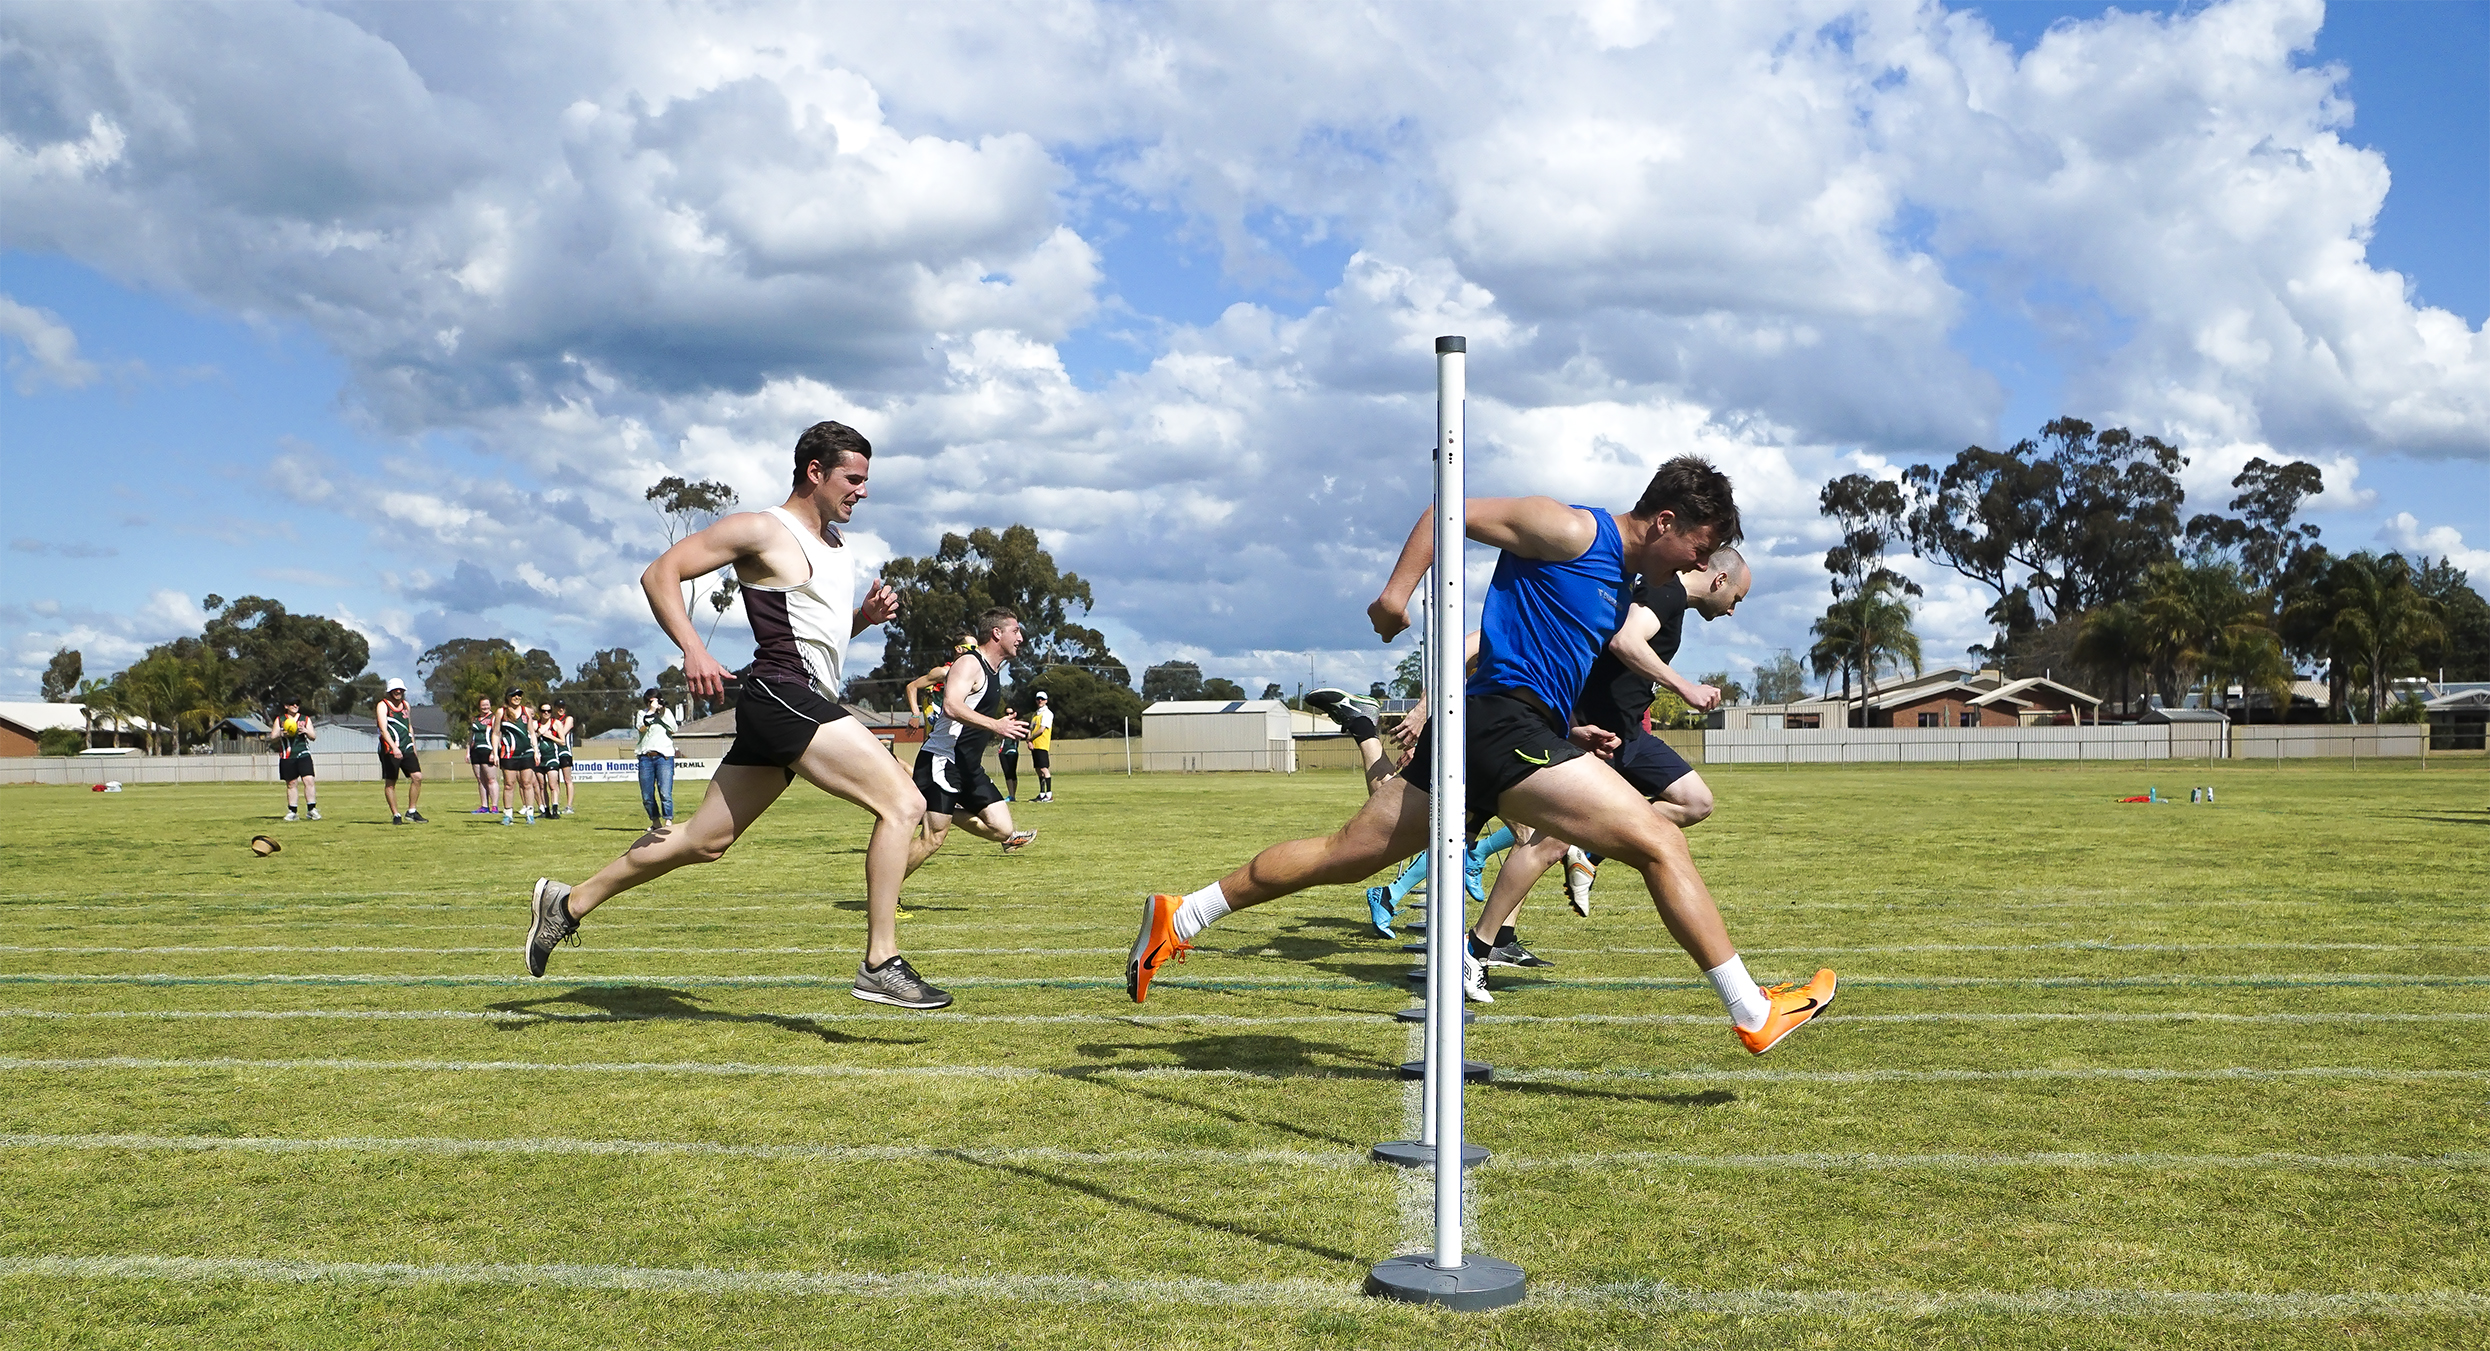
(Click Image to View Full Size)
For photographing running races it is best to be located at the inside edge of the track about 5 meters (15 feet) or so from the starting line. Get down as low as possible and shoot to capture the explosive strides of the runners coming towards you.
Another great position is at the Finish line directly side on to the line to capture the athletes finishing the race and lungeing towards the line.
For long jump and triple jump, get down as low as possible (even lying down on your stomach) at the end of the sand pit. Shoot upwards to make the jumps look even higher than they actually are.
The same approach applies for High Jump. Get down really low behind the landing mat and shoot upwards as the jumper crosses over the bar.
Throwing events like Shot Put and Dicuss are far too dangerous to attempt photographing! However you can get to the side of a javelin throw and capture the launch.
Typical Athletics Camera Settings:
Aperture F2.8, F3.5, or F4.0
Shutter 1/2000th, 1/3200th, or even 1/4000th
ISO 250, 320, or 400.
Mountain Bikes
The main tip for shooting Mountain Bikes is to shoot from very low down, kneeling on one knee, sitting down cross legged, or even lying flat on your stomach. Get close to the edge of the track, and being near corners produces good shots.
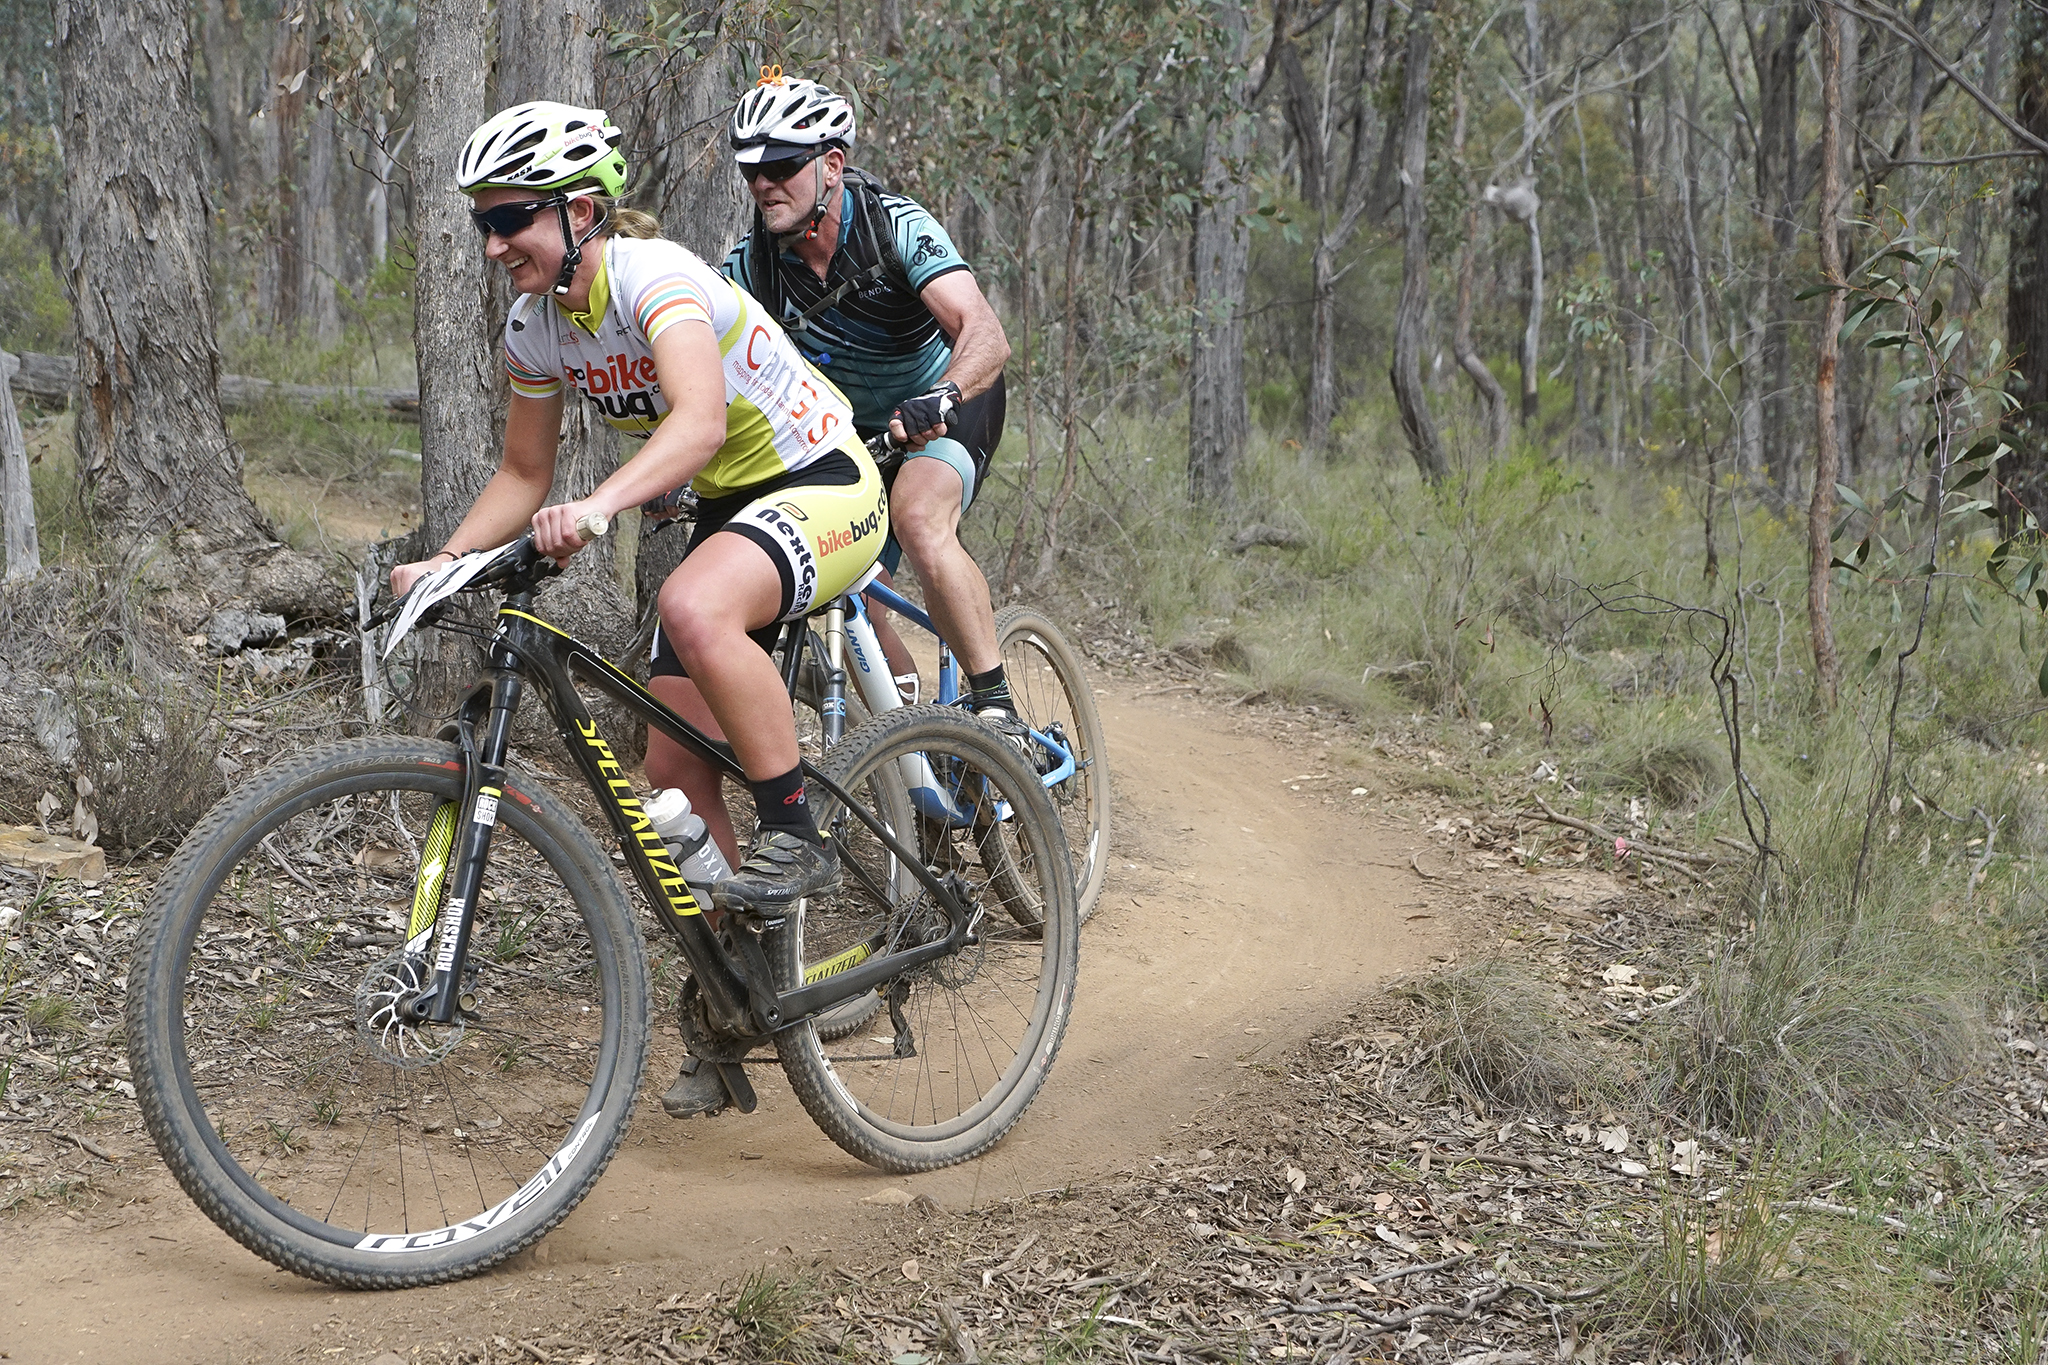
(Click Image to View Full Size)
There will be a lot of dust or mud generated from the bikes and flicked your way so best to have a weatherproof camera and lens, and make sure you have a clear UV filter on the lens to protect it.
Another great tip is to take lots of photos early in the race when the riders are still grouped close together and riding hard as they jostle for position.
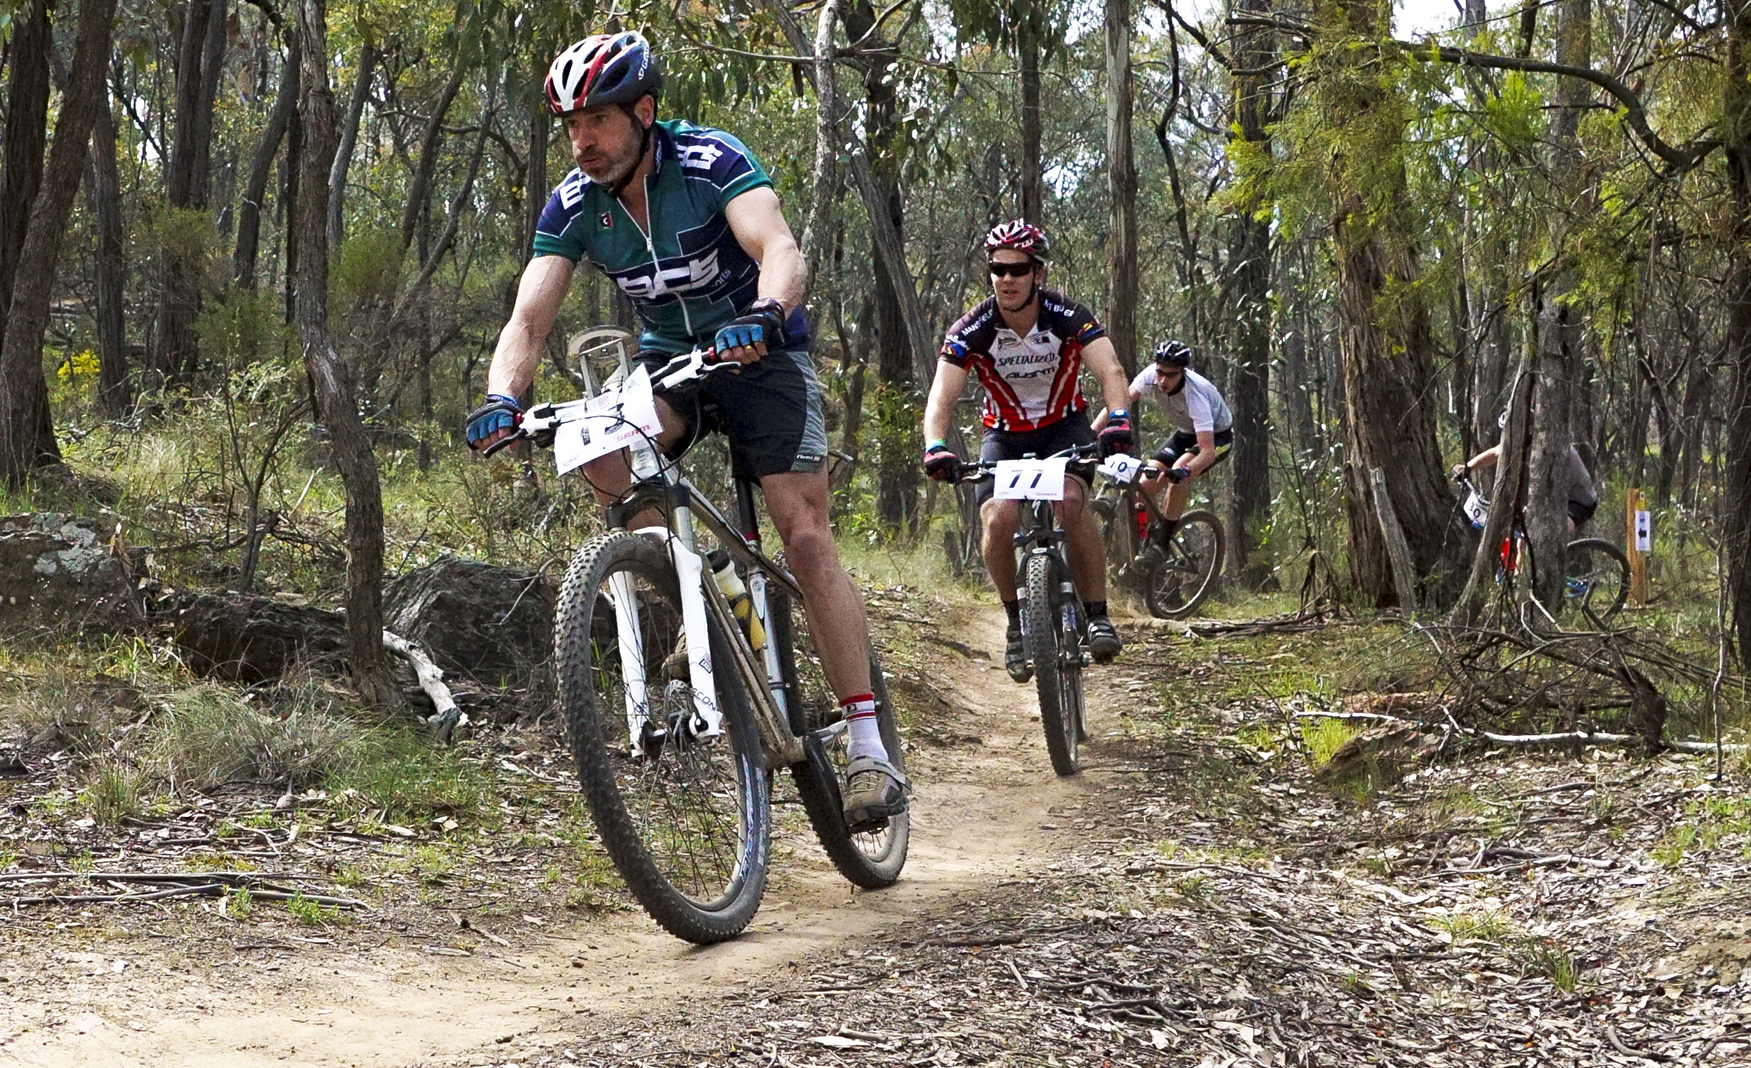
(Click Image to View Full Size)
If there are any decent jumps on the course, then get down at the side of the track lying on your stomach and shoot upwards to make the height of the bike in air look really big.
Typical Mountain Bikes Camera Settings:
Aperture F2.8, F3.5, or F4.0
Shutter 1/1000th, 1/1600th, or 1/2000th
ISO 250, 320, or 400.
Kite Boarding
Kite Boarding is a great high speed water sport with aerial “tricks” performed by riders.
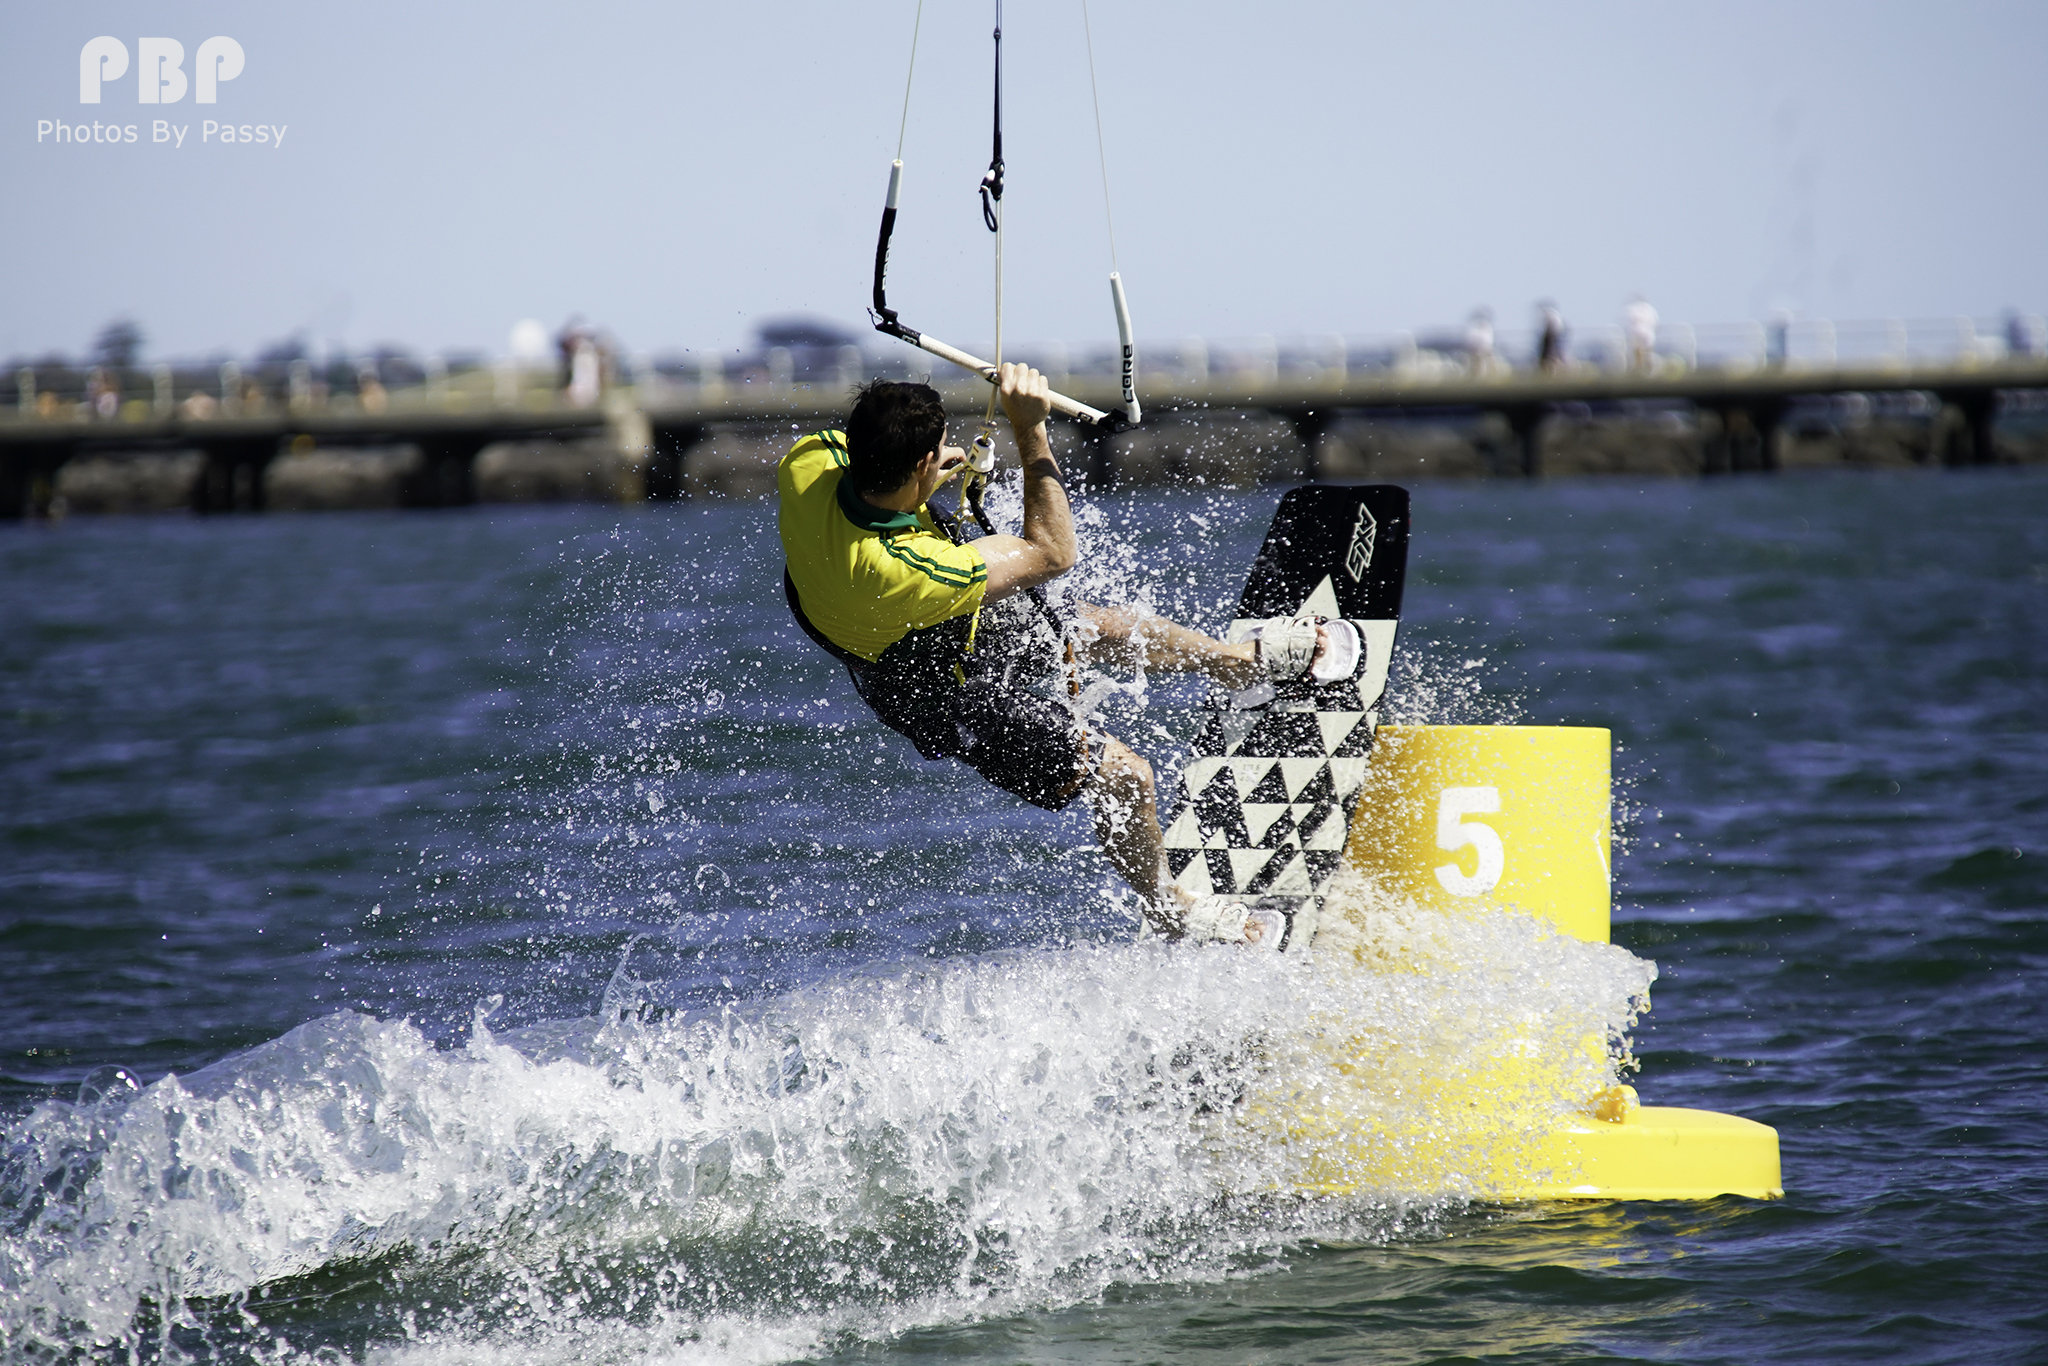
(Click Image to View Full Size)
If the wind is blowing in the right direction and you are lucky, there will be kite boarders doing long runs in close and parallel to the shoreline.
If this is not the case, then the boarders will quickly move too far offshore to get good pictures. This means the time to take your photos is when they are first launching close to the shoreline.
Make sure you also get some sky pictures of all of the colourful kites and people setting up on the shoreline as well.
Use “Burst” Mode at the fastest speed possible with focus tracking to capture multiframes of “trick manouvres”.
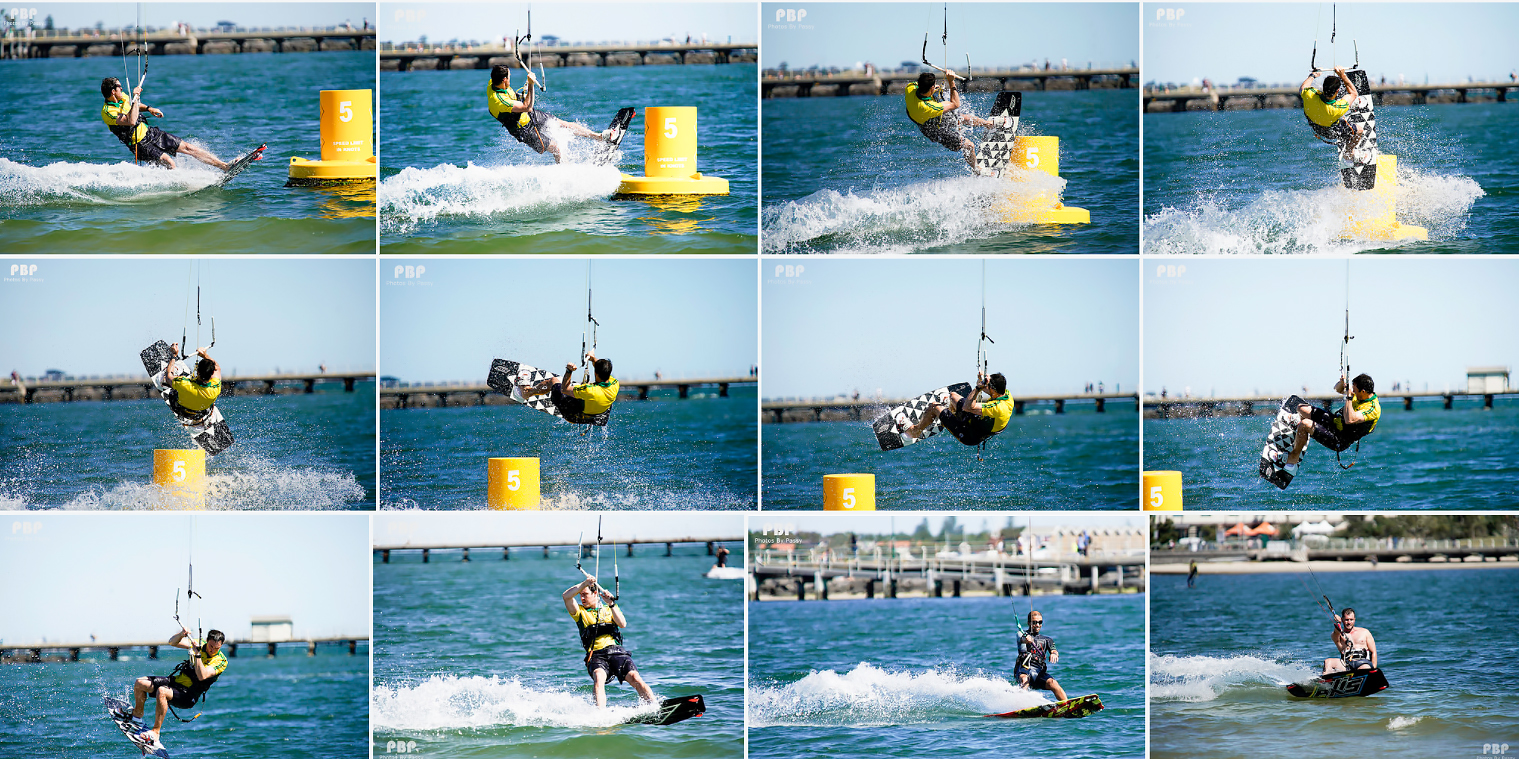
(Click Image to View Full Size)
There will be lots of shots to “chimp through” and this may take a lot of time, but it will be worth it to get the best tricks captured.
Typical Kite Boarding Camera Settings:
Aperture F3.5, F4.0, F5.6
Shutter 1/2000th, or 1/3200th
ISO 320, 400 or 500
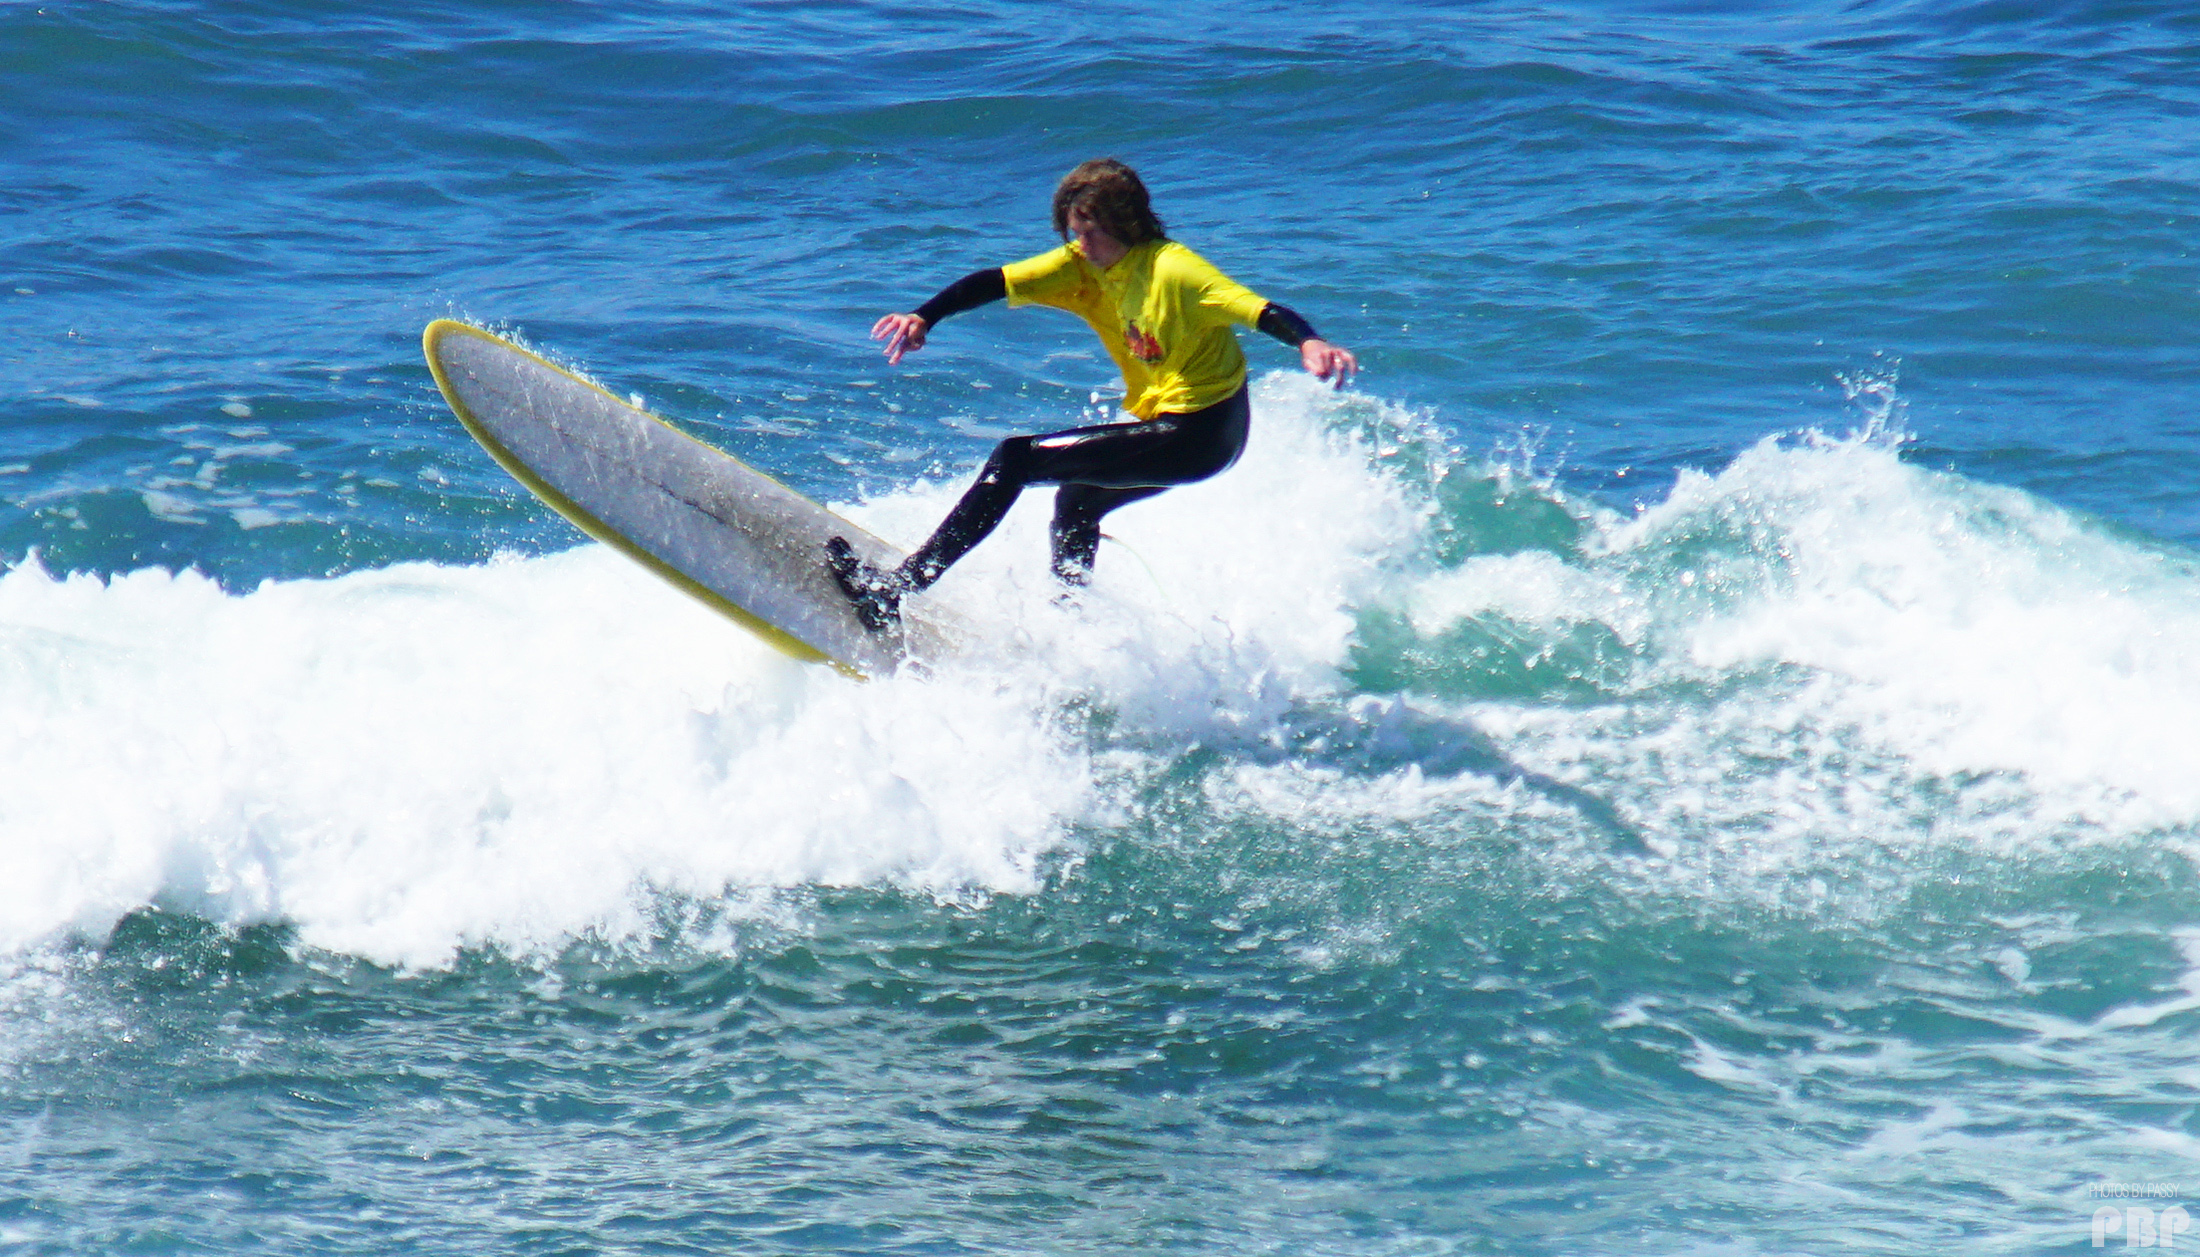
Surfing
Surfing is difficult without specialised big lenses, as often the action is so far offshore from where we can stand on a beach or a cliff top.
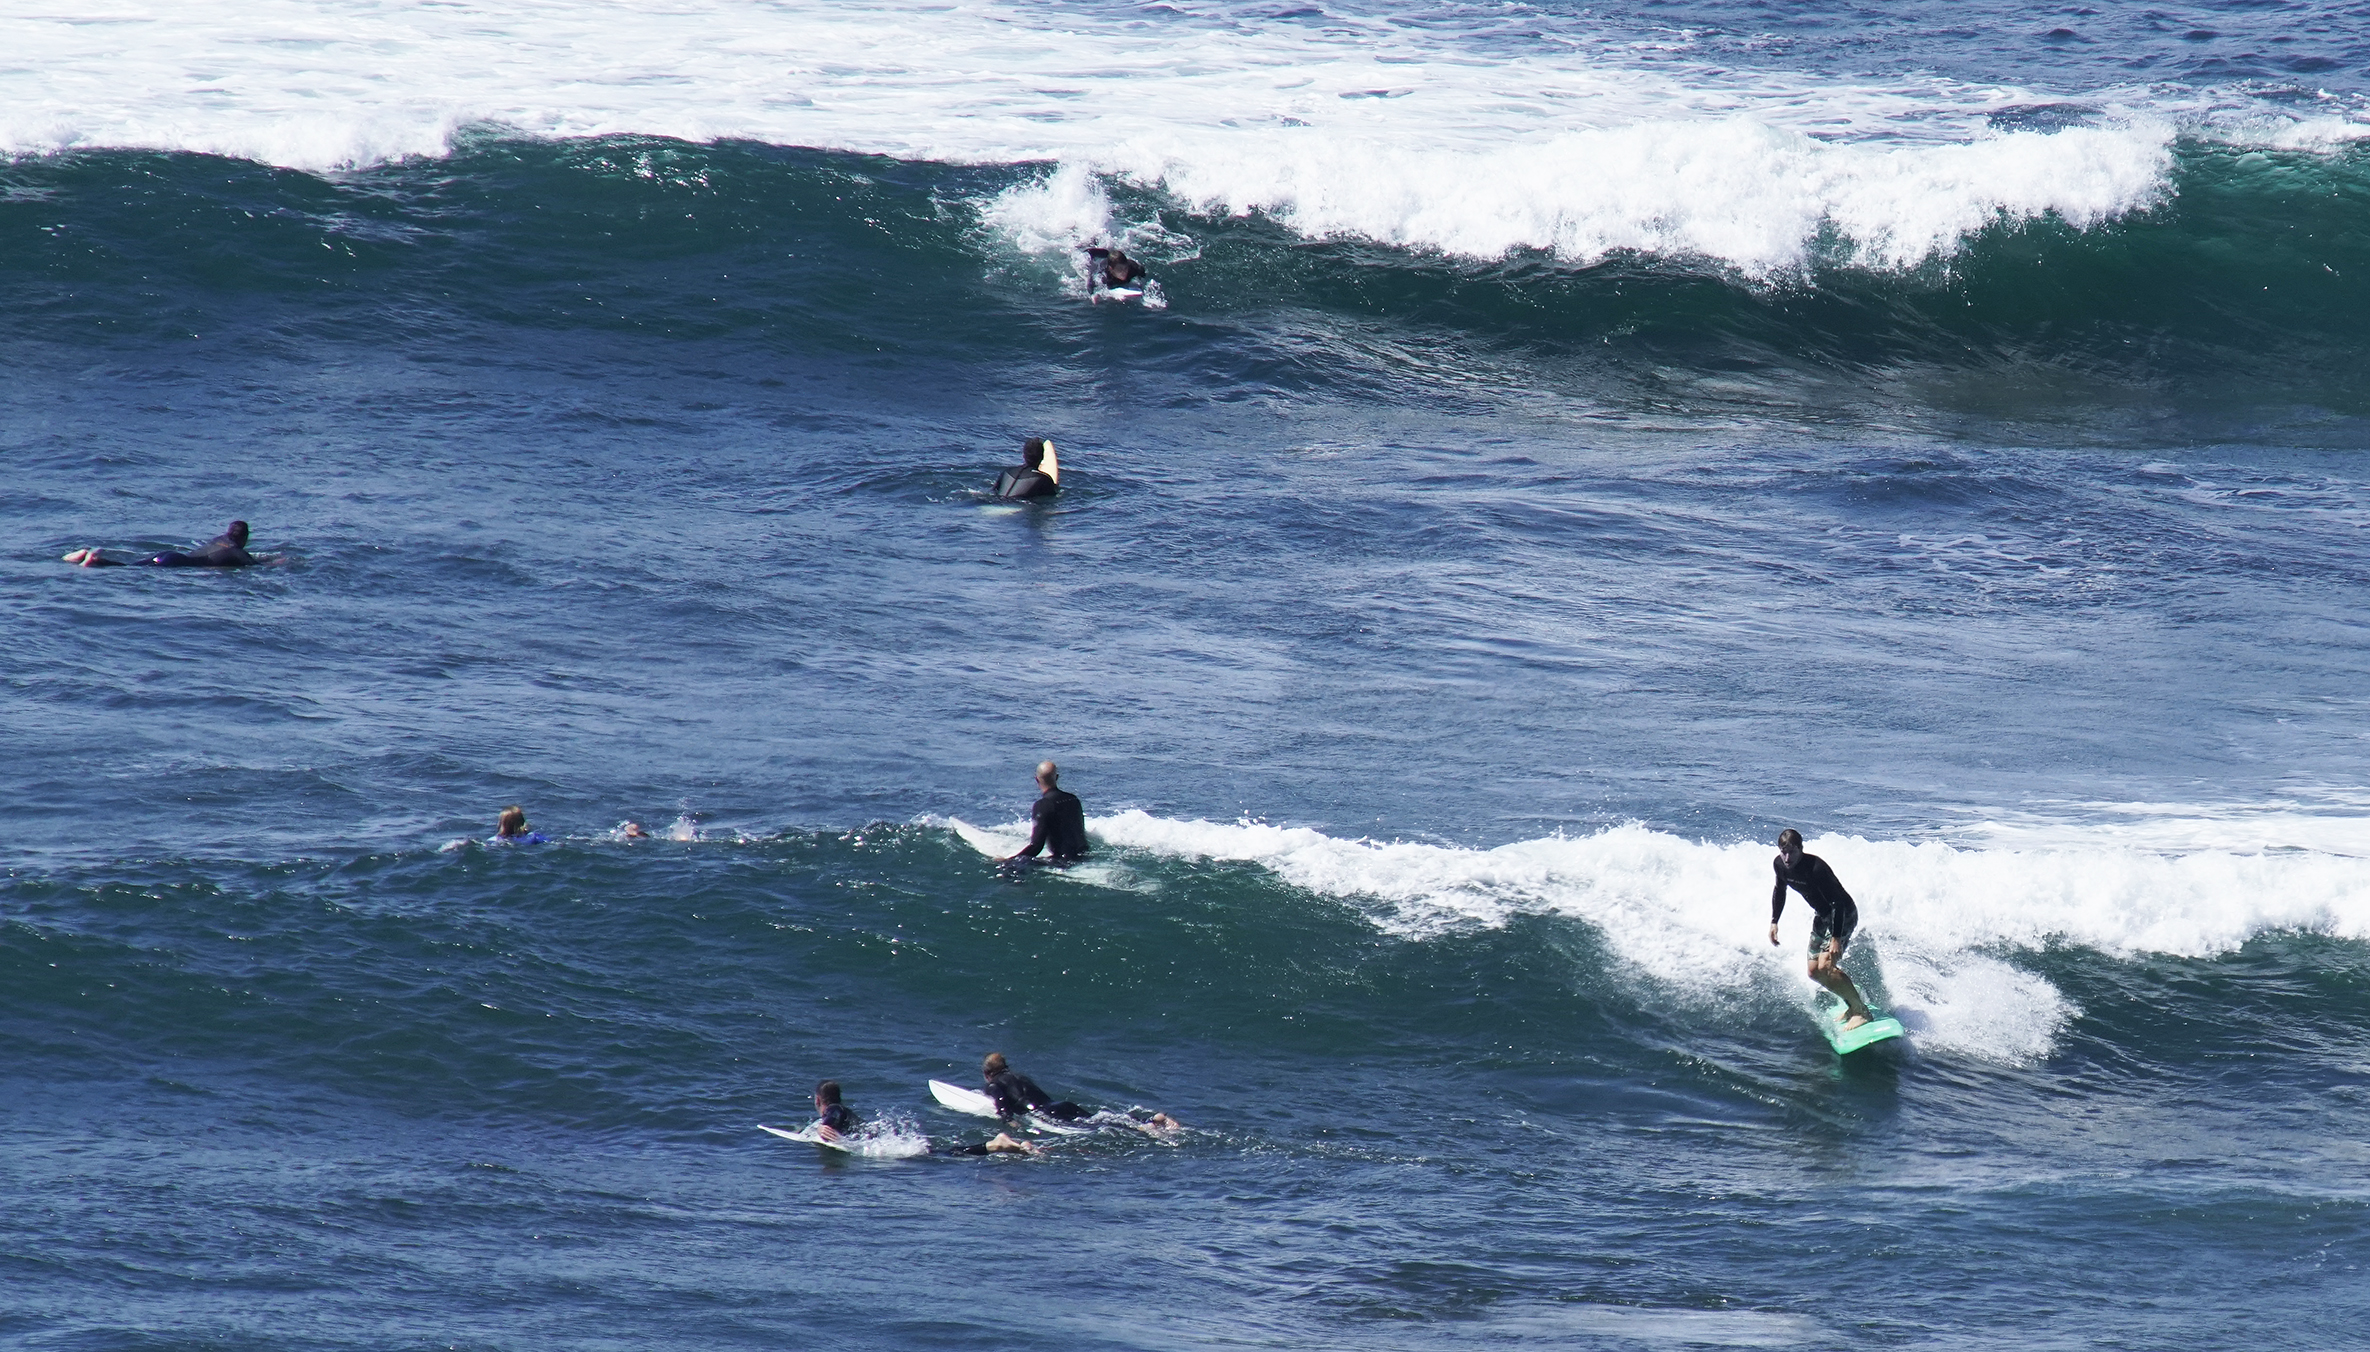
(Click Image to View Full Size)
At the moment we are using our 70-200 F2.8 lens with a 2X Teleconverter that turns it into an F5.6 lens capable of shooting at 400mm on the A99II Full frame Camera.
If we put this setup onto the cropped sensor A77II camera then we get a maximum zoom of 1.5 x 400 = 600mm.
This enables us to get reasonable surf shots like the following:
(Click Image to View Full Size)
We would love to get some much sharper and detailed images, but cannot justify spending huge amounts of money (thousands) on giant Telephoto or Zoom lenses.
Our current plan is to save up over the next 12 months and purchase a Tamron 150-600mm F5.6 / 6.0 lens which will give as a little more reach on the Sony A99II and up to 1.5 x 600 = 900mm on the Sony A77II.
The Tamron lens is around $2000 Australian to buy, and seems to have fairly good reviews on the Internet. It will be a luxury if we buy it, but we may be able to use it for Football photos as well.
Typical Surfing Camera Settings:
Aperture F4.0, F5.6, F8.0
Shutter 1/1000th, or 1/2000th.
ISO 400 500 or 800
Note that because the action is so far away and difficult to focus on we often use 1/2000th, ISO 800, and F8.0 to help with the distant focussing.
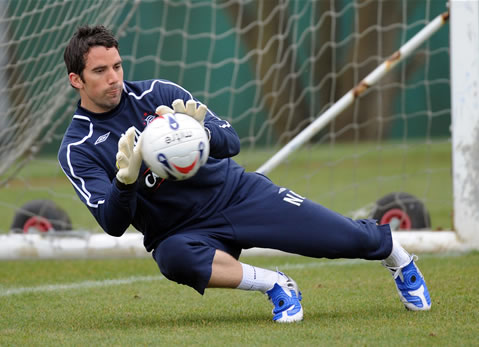
Soccer
We have not shot any outdoor soccer matches, but if we did we would probably use the same approach as for Australian Football.
In addition we would try and get some shots of diving goalie saves. These are not very easy to get as a search of Google Images did not find that many images, except for the following one which is a great shot.
We have tried photographing Indoor Soccer. It was way too fast paced, and too dangerous for getting hit by the ball or colliding with players. The indoor lighting was also very poor. The photos were barely usable and very grainy and blurred.
Cricket Baseball Softball
These are all long and tedious games with only occasional intermittent action.
There is also a real risk of getting hurt if a stray ball hits you.
We avoid shooting these sports.
If we did have to shoot them, our approach might be to shoot 4K video and then try and pull some stills off the video.
Table Tennis and Badminton
These sports are played indoors in cramped conditions and the ping pong ball and shuttle cock move at incredibly high speeds.
Because we have to shoot at low shutter speeds to compensate for the poor lighting, it is very difficult to get any usable shots.
We have attempted to shoot both of these sports with very poor results due to the slow shutter speed in low light, as well as tables and courts all being too crowded and close to each other.
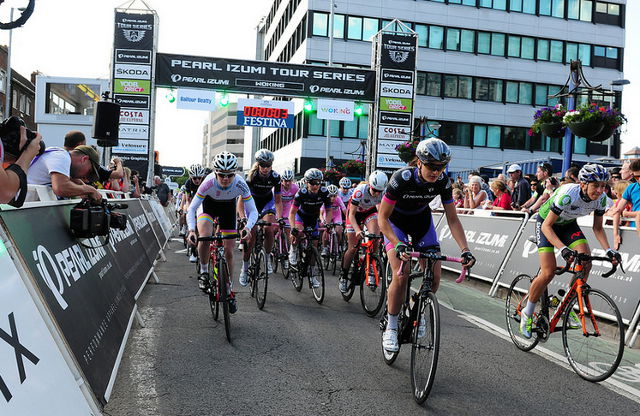
Cycling
We have not done any photos of cycling. If we did shoot a race we would make sure that we definitely covered the front facing aspect of the start of the race, like the photo shown below from Google Images.
For the rest of the race we would shoot down low on corners like we do for Mountain Bikes.
A Panorama shot of the pellaton group coming around a corner would be tricky to create, but looks great from some of the images we have seen on Google.
There might also be opportunities for Blurring and Panning of side on views of riders, like is done in motorpsorts.
The other shot to get would be of the winner with hands in the air crossing the finish line.
Motor Sports
We have not shot any cars or motorcycles racing.
However if we did we would try using a slower shutter speed of perhaps 1/500th and pan our shot to try and get background blurring to emphasize speed.
Other Sports
There are many other sports we have not covered here such as Equestrian, Rodeo Events, Swimming, Water Polo, Hockey and so many others.
If we had to shoot any of these we would first look at Google Images as well as websites for the particular sport to see what the “Good” and “Popular” shots look like.
The next step would be to work out what location and position the shots were taken from, and then go to the event and try and get these same types of shots.
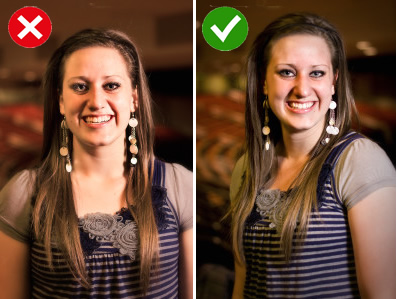
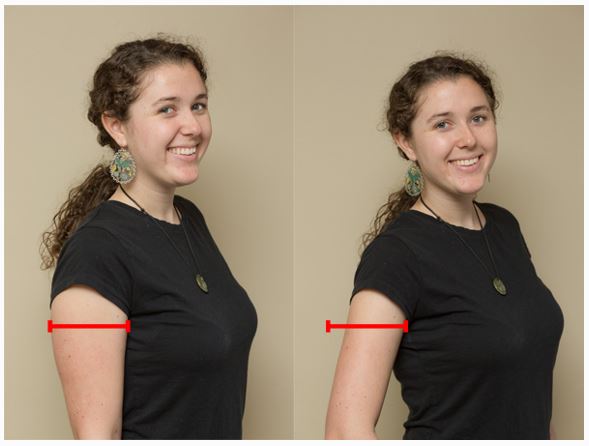
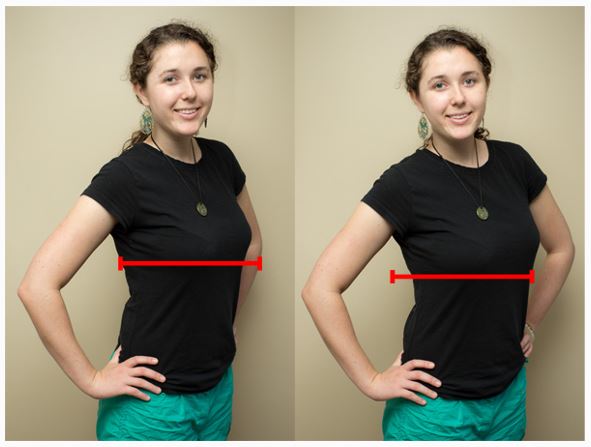
Taking Group Shots of Teams
When doing Group Team shots at a Sports Event try mixing it up and “racking and stacking” the groups in different arrangements.
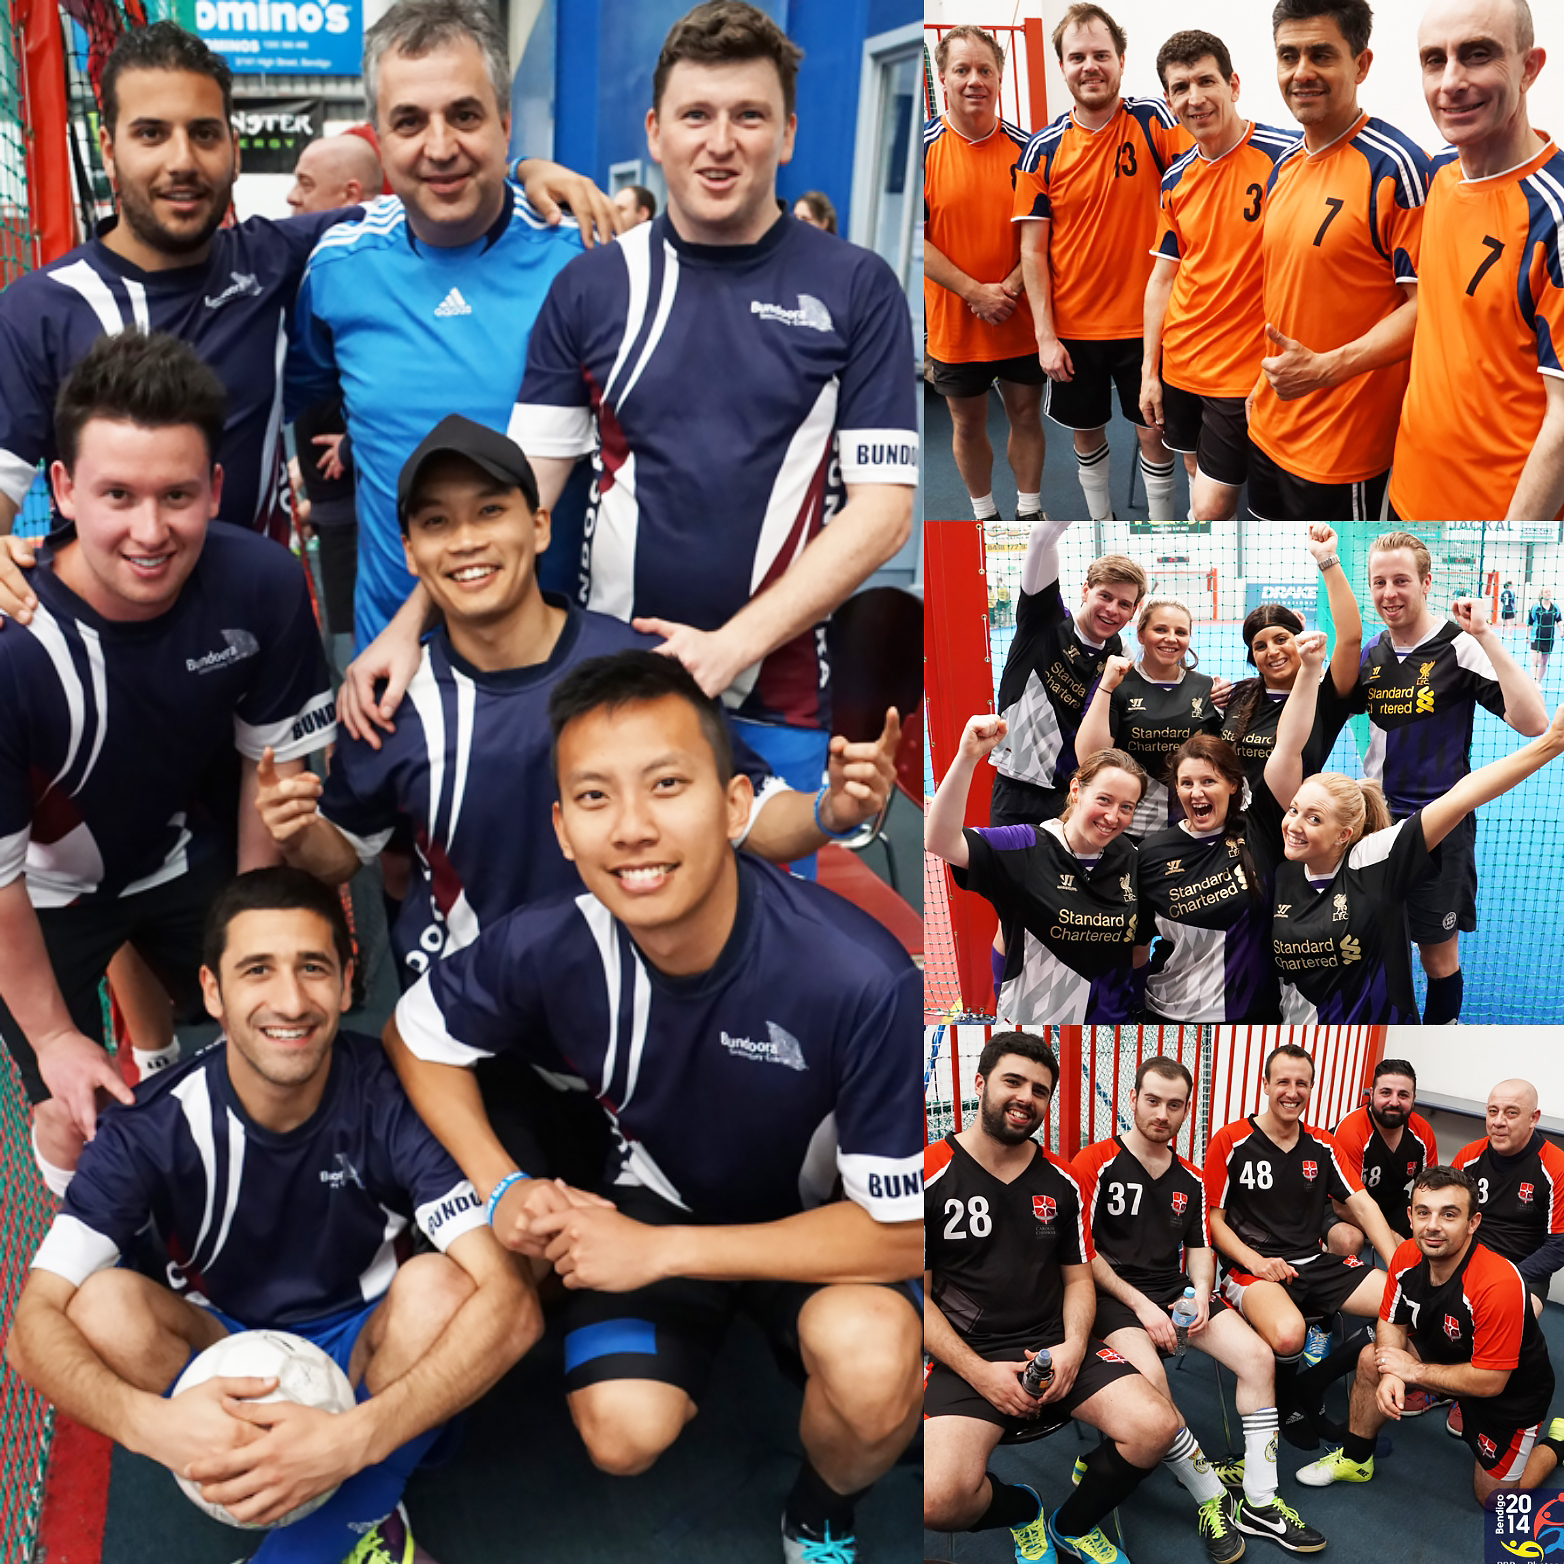
(Click Image to View Full Size)
These pictures are much more interesting in a Photo Album than having every group in the same standard arrangement in every team photo.
Final Summary
We find Sports Photograhy fun because it is such a challenge to get that elusive shot where a great moment is captured with emotion and clarity for a particular sporting match or event.
However due to the time and effort of travelling and shooting events, as well as the long hours spent sorting through and processing burst rate photos, we seriously doubt that we would like to do it full time.
Sports Photography is not for everyone, and only a special breed of photographer becomes a full time professional Sports Photographer.
Having Hundreds or even Thousands of Burst Rate photos to go through to meet very tight deadlines can make Sports Photography a painful grind. That’s why it is so important to pick an event or sport which excites you and where you know about how the game is played and what makes for a good image.
High Speed F2.8 Zoom lenses for Sports Photography and high frame rate DSLR Cameras are also incredibly expensive to buy. So start off simple, and really make sure you like doing Sports Photos before spending big dollars upgrading to sophisticated equipment.
Most importantly, take your time learning, and make sure you are having fun. If Sports Photograhy is not bringing you great joy, then move onto something else.
Enjoy,
Passy
Follow us on Instagram @photosbypassy
Like and Follow our Facebook at
“PBP Photos By Passy”